Items Selection
Many applications require the ability to select items shown over the map. The VisualizationLayer object has built-in functionality which supports items selection, both point-type and map shapes. This article explains the usage of the items selection feature in the following main scenarios:
Items selection.
Map shape selection.
Using the selection API from the code.
By default items selection feature is disabled in favor of the panning by mouse click and zooming using rectangle selection operations. To enable it you should set values of the MouseClickMode and MouseSelectionMode properties of the RadMap control:
Example 1
    <telerik:RadMap.Provider>
        <telerikMap:OpenStreetMapProvider APIKey="Your API Key" StandardModeUserAgent="Your User Agent"/>
    </telerik:RadMap.Provider>
        <telerikMap:VisualizationLayer x:Name="visualizationLayer"
                                       ItemTemplate="{StaticResource PinPointTemplate}"
                                       SelectionChanged="visualizationLayer_SelectionChanged" />
</telerik:RadMap>
Items selection
In this section we demonstrate how the items selection can be implemented for the point-type objects (i.e. objects which represent single location on the map). In order to provide the needed data to the visualization layer, you have to create a collection of business MapItem objects. For example:
Example 2
using Microsoft.UI;
using Microsoft.UI.Xaml.Media;
using Telerik.UI.Xaml.Controls.DataVisualization.Map;
#if WINDOWS_DESKTOP
using System.ComponentModel;
#else
using Microsoft.UI.Xaml.Data;
#endif

public class MapItem : INotifyPropertyChanged
{
    private static SolidColorBrush RegularBrush = new SolidColorBrush(Colors.Green);
    private static SolidColorBrush SelectedBrush = new SolidColorBrush(Colors.Red);

    private string caption = string.Empty;
    private Location location = Location.Empty;
    private bool isSelected = false;
    private SolidColorBrush background = RegularBrush;

    public MapItem(
        string caption,
        Location location)
    {
        this.Caption = caption;
        this.Location = location;
    }

    public event PropertyChangedEventHandler PropertyChanged;

    public SolidColorBrush Background
    {
        get
        {
            return this.background;
        }

        set
        {
            this.background = value;
            this.OnPropertyChanged("Background");
        }
    }

    public string Caption
    {
        get
        {
            return this.caption;
        }

        set
        {
            this.caption = value;
            this.OnPropertyChanged("Caption");
        }
    }

    public bool IsSelected
    {
        get
        {
            return this.isSelected;
        }

        set
        {
            this.isSelected = value;
            this.Background = this.isSelected ? SelectedBrush : RegularBrush;
            this.OnPropertyChanged("IsSelected");
        }
    }

    public Location Location
    {
        get
        {
            return this.location;
        }

        set
        {
            this.location = value;
            this.OnPropertyChanged("Location");
        }
    }

    private void OnPropertyChanged(string propertyName)
    {
        if (this.PropertyChanged != null)
        {
            this.PropertyChanged(
                this,
                new PropertyChangedEventArgs(propertyName));
        }
    }
}
Example 3
<Grid>
    <Grid.Resources>
        <DataTemplate x:Key="PinPointTemplate">
            <telerikMap:MapPinPoint Background="{Binding Background}"
                         BorderBrush="Black"
                         BorderThickness="1"
                         Text="{Binding Path=Caption}"
                         telerikMap:MapLayer.Location="{Binding Path=Location}">
                <ToolTipService.ToolTip>
                    <ToolTip Content="{Binding Path=Caption}" />
                </ToolTipService.ToolTip>
            </telerikMap:MapPinPoint>
        </DataTemplate>
    </Grid.Resources>
    <telerik:RadMap x:Name="RadMap1"  Margin="10"
                            Center="40,-95"
                            MouseClickMode="SelectItem"
                            MouseSelectionMode="RaiseEvent"
                            Zoom="4">

        <telerik:RadMap.Provider>
            <telerikMap:OpenStreetMapProvider APIKey="Your API Key" StandardModeUserAgent="Your User Agent"/>
        </telerik:RadMap.Provider>
        <telerikMap:VisualizationLayer x:Name="visualizationLayer"
                                       ItemTemplate="{StaticResource PinPointTemplate}"
                                       SelectionChanged="visualizationLayer_SelectionChanged" />
    </telerik:RadMap>
</Grid>
Example 4
public partial class SelectLocations : UserControl
{
    private Random rnd = new Random();

    public SelectLocations()
    {
        InitializeComponent();

        LocationRect usa = new LocationRect(
            new Location(50, -120),
            new Location(30, -70));
        this.visualizationLayer.ItemsSource = this.GeneratePoiCollection(50, usa);
    }

    private void GenerateMapItem(
        ObservableCollection<MapItem> data,
        Location location,
        int index)
    {
        MapItem poi = new MapItem(
            string.Format("Item {0}", index),
            location);

        data.Add(poi);
    }

    private ObservableCollection<MapItem> GeneratePoiCollection(int count, LocationRect region)
    {
        ObservableCollection<MapItem> data = new ObservableCollection<MapItem>();

        for (int i = 0; i < count; i++)
        {
            Location baseLocation = new Location(
                    region.North - rnd.NextDouble() * region.GeoSize.Height,
                    region.West + rnd.NextDouble() * region.GeoSize.Width);
            this.GenerateMapItem(data, baseLocation, i);
        }

        return data;
    }

    private void LayerSelectionChanged(object sender, SelectionChangedEventArgs e)
    {
        if (e.RemovedItems != null)
        {
            foreach (MapItem item in e.RemovedItems)
            {
                item.IsSelected = false;
            }
        }

        if (e.AddedItems != null)
        {
            foreach (MapItem item in e.AddedItems)
            {
                item.IsSelected = true;
            }
        }
    }
}
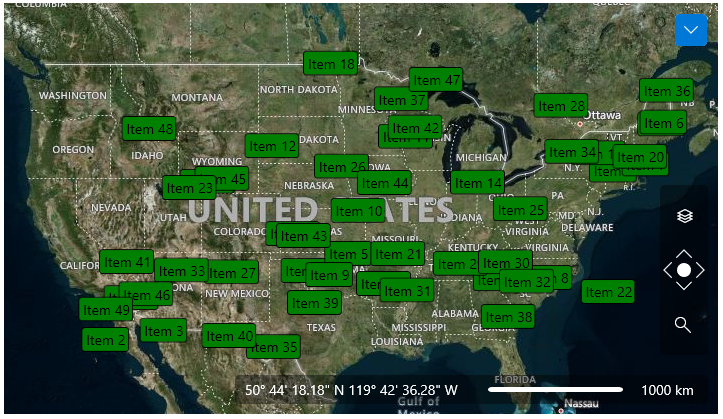
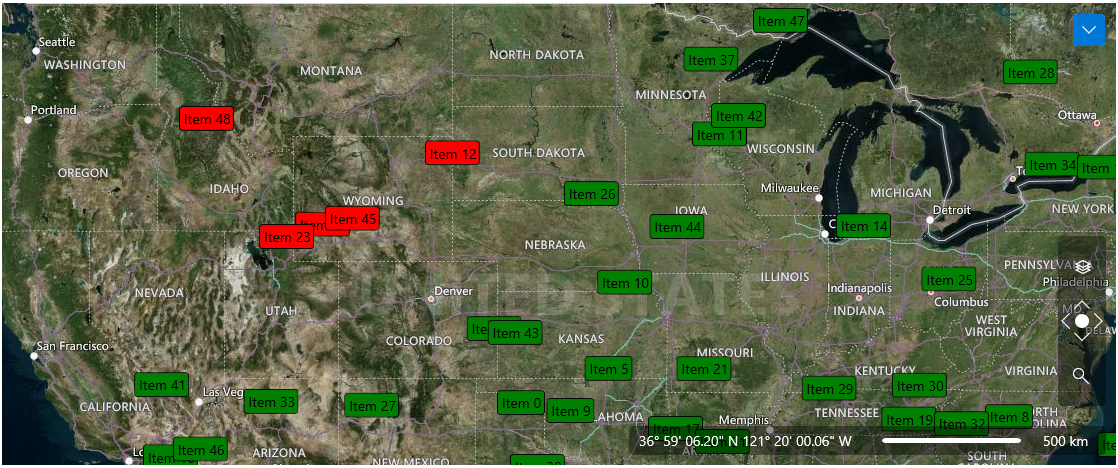
There are two ways to select items:
By clicking any individual item.
Using rectangle selection.
When you click individual item it changes its state and background:
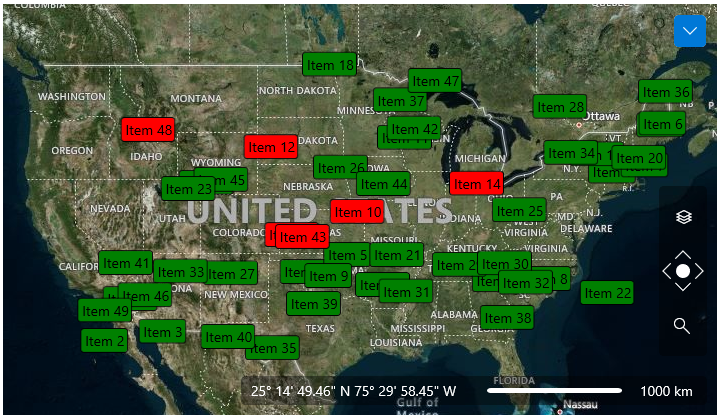
Here are the steps that you need to take in order to select items using rectangle selection:
Press and hold the left Shift key.
Press and hold left mouse button to start group selection.
Move mouse to the desired location.
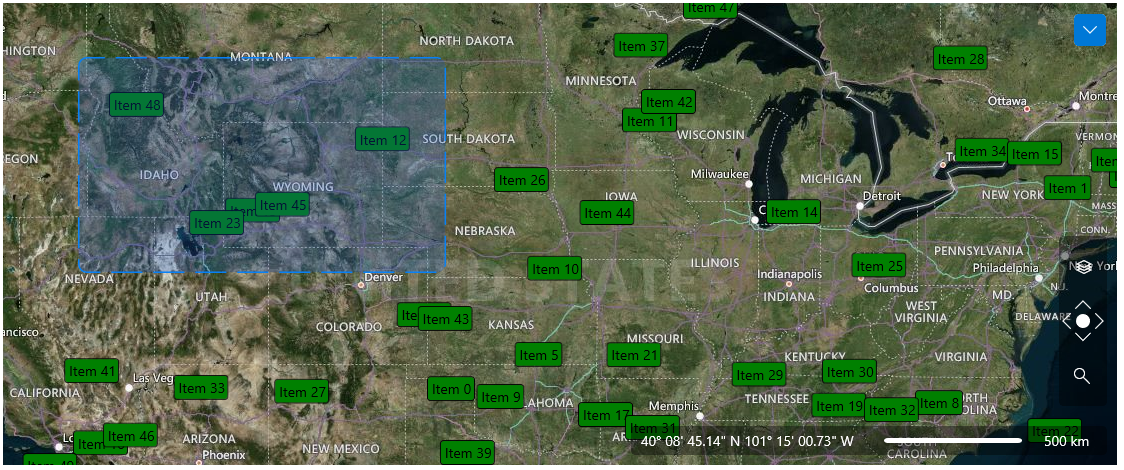
- Release mouse button and Shift key. The items inside the rectangle will be selected.
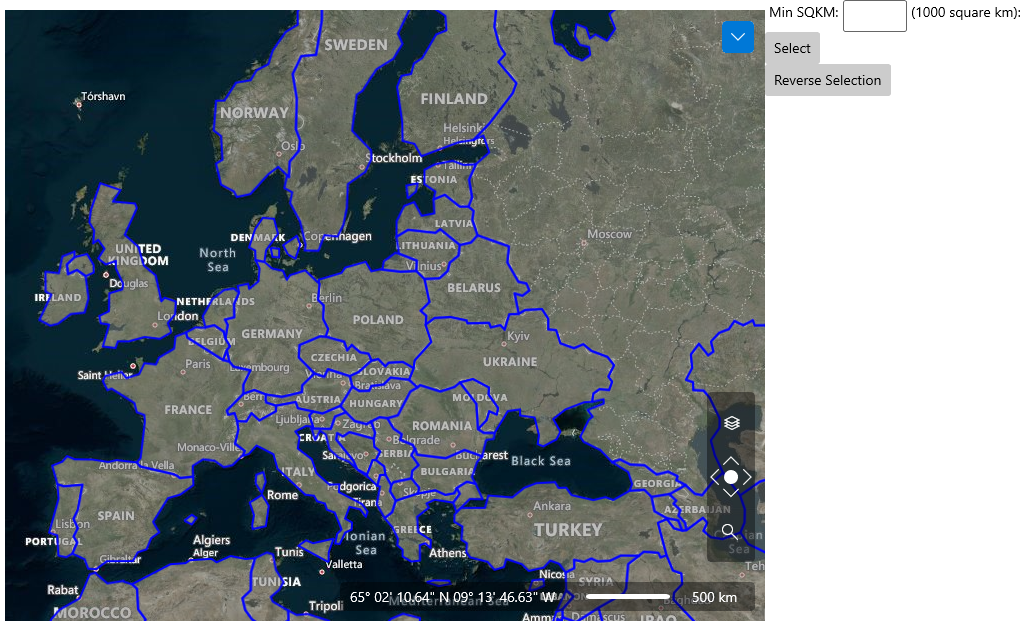
Map shape selection
In this section we demonstrate how the items selection feature can be implemented for the map shape objects. The VisualizationLayer handles selection state of the map shape objects automatically so we do not need to do anything specific. You just have to set filling for the different states of the shape objects: ShapeFill, HighlightFill and SelectedFill:
Example 5
<dataVisualization:RadMap x:Name="radMap"
        Center="52, 20" Margin="10 10 0 10"
        MouseClickMode="SelectItem"
        MouseSelectionMode="RaiseEvent"
        Zoom="4">
    <dataVisualization:RadMap.Provider>
        <telerikMap:OpenStreetMapProvider APIKey="Your API Key" StandardModeUserAgent="Your User Agent"/>
    </dataVisualization:RadMap.Provider>
    <telerikMap:VisualizationLayer x:Name="visualizationLayer">
        <telerikMap:VisualizationLayer.ShapeFill>
            <telerikMap:MapShapeFill Fill="#80808080"
                    Stroke="Blue"
                    StrokeThickness="2" />
        </telerikMap:VisualizationLayer.ShapeFill>
        <telerikMap:VisualizationLayer.HighlightFill>
            <telerikMap:MapShapeFill Fill="#80FFA500"
                    Stroke="Coral"
                    StrokeThickness="2" />
        </telerikMap:VisualizationLayer.HighlightFill>
        <telerikMap:VisualizationLayer.SelectedFill>
            <telerikMap:MapShapeFill Fill="#80208020"
                    Stroke="SlateBlue"
                    StrokeThickness="2" />
        </telerikMap:VisualizationLayer.SelectedFill>
        <telerikMap:VisualizationLayer.Reader>
            <telerikMap:AsyncShapeFileReader DataSource="ms-appx:///Examples/Map/Shapes/world.dbf"
                                        Source="ms-appx:///Examples/Map/Shapes/world.shp" />
        </telerikMap:VisualizationLayer.Reader>
    </telerikMap:VisualizationLayer>
</dataVisualization:RadMap>
There are two ways you can use to select shapes:
By clicking the individual shape.
Using rectangle selection.
When you click individual map shape it changes its state and appearance:
Here are the steps that you need to take in order to select items using rectangle selection:
Press and hold the left Shift key.
Press and hold left mouse button to start group selection.
Move mouse to the desired location.
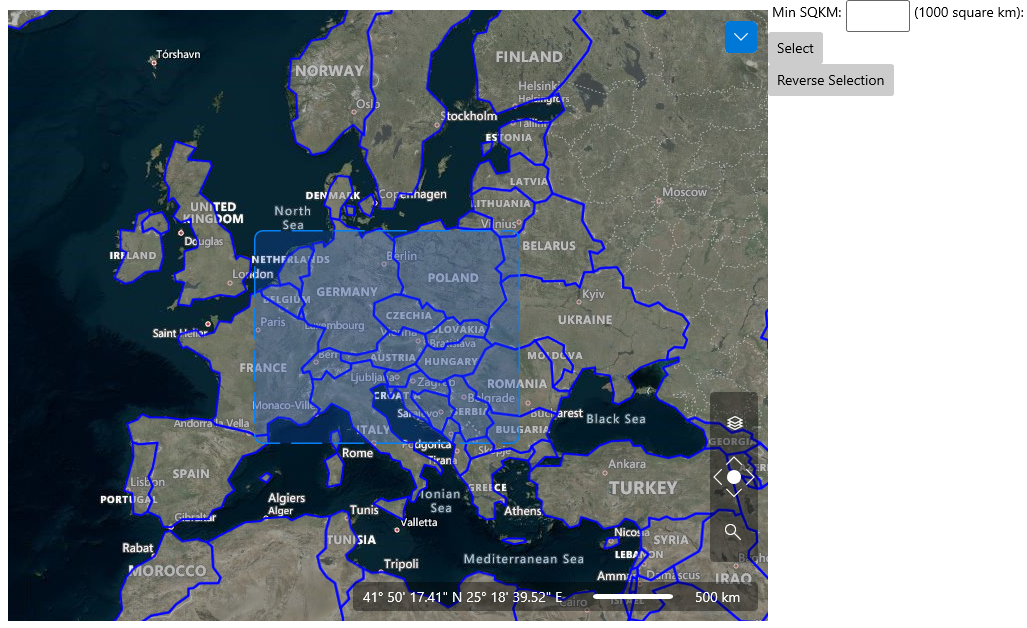
- Release mouse button and Shift key. The items inside the rectangle will be selected
Only shapes which are completely inside the selection rectangle are selected.
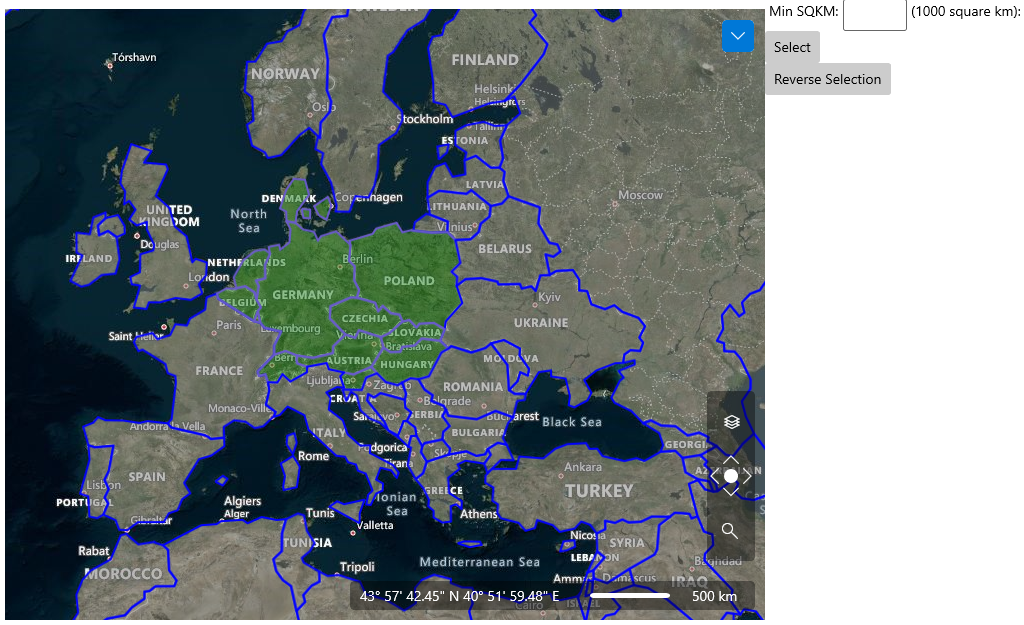
Using the selection API from the code
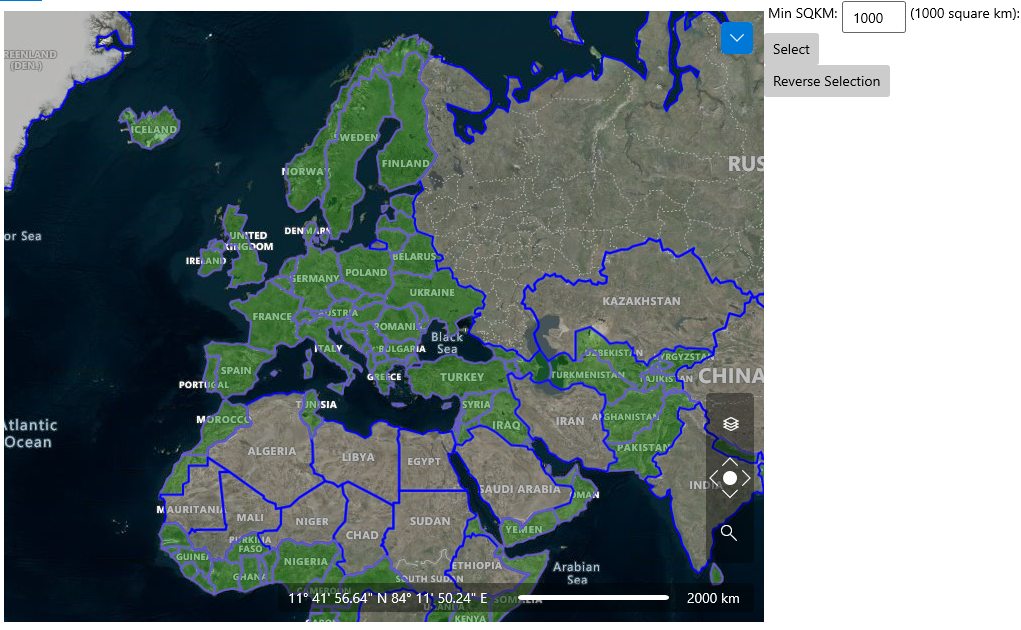
The VisualizationLayer class provides several methods which can be used to select or unselect items programmatically. In this section we demonstrate how the items selection can be used to select map shapes using extended data. For demonstration purposes the world.shp and world.dbf files are used. Both files are available in our QSF demo application. The world.shp file contains shapes which represents countries around the world. The world.dbf file contains extended data for these shapes. The extended property with SQKM name represents area of the country in the square kilometers. We will use this property to select countries with area which is greater than a given value.
Example 6
<Grid>
    <Grid.ColumnDefinitions>
        <ColumnDefinition Width="*" />
        <ColumnDefinition Width="Auto" />
    </Grid.ColumnDefinitions>
    <dataVisualization:RadMap x:Name="radMap"
            Center="52, 20" Margin="10 10 0 10"
            MouseClickMode="SelectItem"
            MouseSelectionMode="RaiseEvent"
            Zoom="4">
        <dataVisualization:RadMap.Provider>
            <telerikMap:OpenStreetMapProvider APIKey="Your API Key" StandardModeUserAgent="Your User Agent"/>
        </dataVisualization:RadMap.Provider>
        <telerikMap:VisualizationLayer x:Name="visualizationLayer">
            <telerikMap:VisualizationLayer.ShapeFill>
                <telerikMap:MapShapeFill Fill="#80808080"
                                Stroke="Blue"
                                StrokeThickness="2" />
            </telerikMap:VisualizationLayer.ShapeFill>
            <telerikMap:VisualizationLayer.HighlightFill>
                <telerikMap:MapShapeFill Fill="#80FFA500"
                                Stroke="Coral"
                                StrokeThickness="2" />
            </telerikMap:VisualizationLayer.HighlightFill>
            <telerikMap:VisualizationLayer.SelectedFill>
                <telerikMap:MapShapeFill Fill="#80208020"
                                Stroke="SlateBlue"
                                StrokeThickness="2" />
            </telerikMap:VisualizationLayer.SelectedFill>
            <telerikMap:VisualizationLayer.Reader>
                <telerikMap:AsyncShapeFileReader DataSource="ms-appx:///Examples/Map/Shapes/world.dbf"
                                                    Source="ms-appx:///Examples/Map/Shapes/world.shp" />
            </telerikMap:VisualizationLayer.Reader>
        </telerikMap:VisualizationLayer>
    </dataVisualization:RadMap>
    <StackPanel Grid.Column="1" Orientation="Vertical">
        <StackPanel Orientation="Horizontal">
            <TextBlock Margin="4,2,4,2" Text="Min SQKM:" />
            <TextBox Name="filter" Width="60" />
            <TextBlock Margin="4,2,4,2" Text="(1000 square km):" />
        </StackPanel>
        <Button Click="ShowSelectedItems">
            <TextBlock Text="Select" />
        </Button>
        <Button Click="ReverseSelection">
            <TextBlock Text="Reverse Selection" />
        </Button>
    </StackPanel>
</Grid>
Example 7
using System;
using System.Collections.Generic;
using System.Linq;
using Telerik.UI.Xaml.Controls.DataVisualization.Map;
private void ShowSelectedItems(object sender, Microsoft.UI.Xaml.RoutedEventArgs e)
{
string condition = this.filter.Text.Trim();
double minSqkm;
if (double.TryParse(condition, out minSqkm))
{
IEnumerable<object> itemsToSelect = from MapShapeData item in this.visualizationLayer.Items
where ((double)item.ExtendedData.GetValue("SQKM")) > minSqkm * 1000d
select item;
this.visualizationLayer.Select(itemsToSelect, true);
}
}
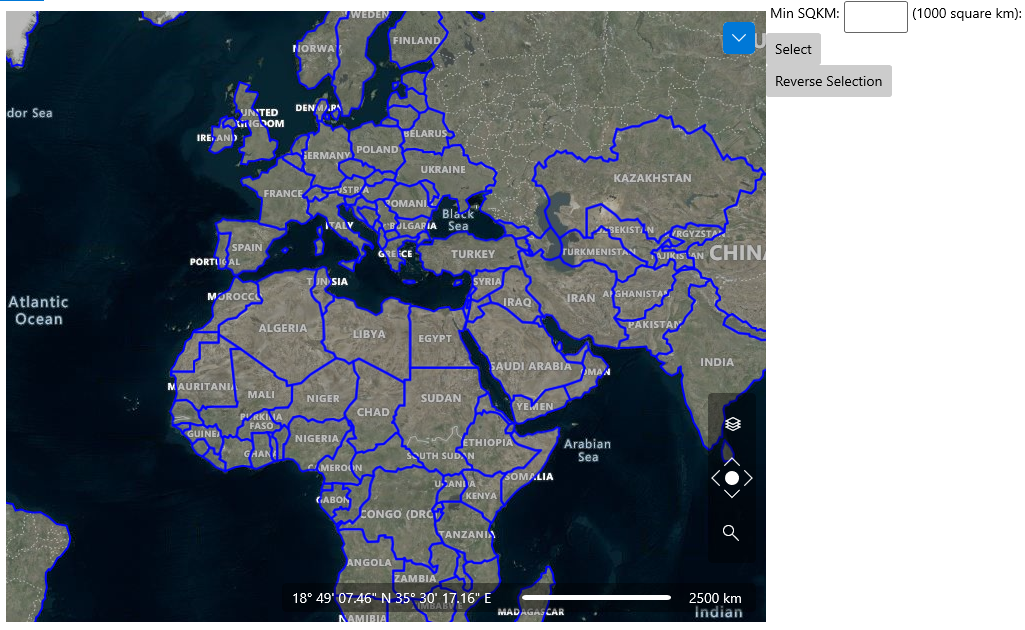
private void ReverseSelection(object sender, Microsoft.UI.Xaml.RoutedEventArgs e)
{
this.visualizationLayer.ReverseSelection(this.visualizationLayer.Items);
}
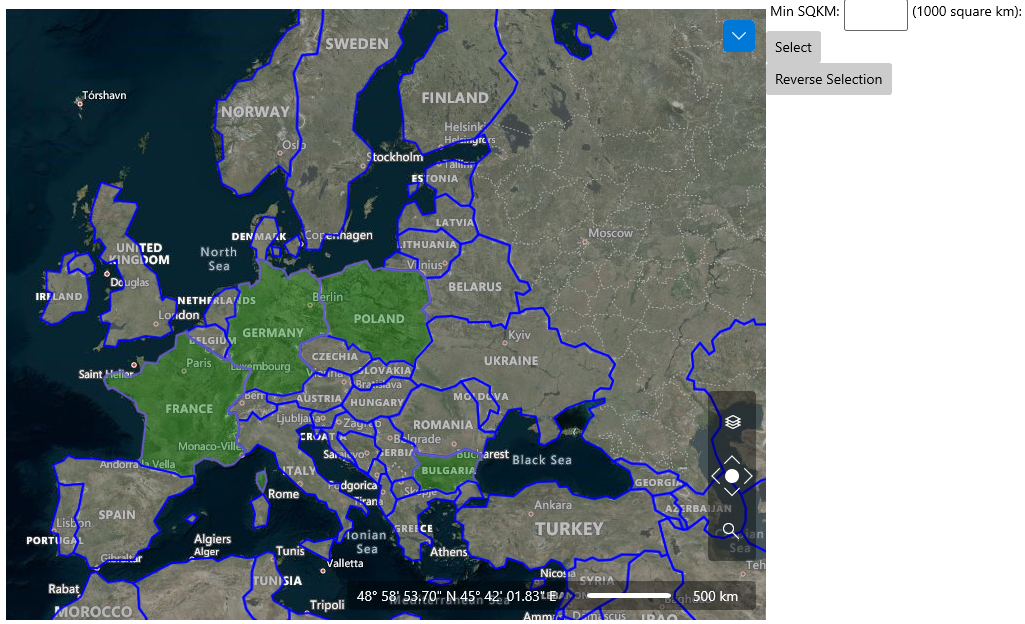
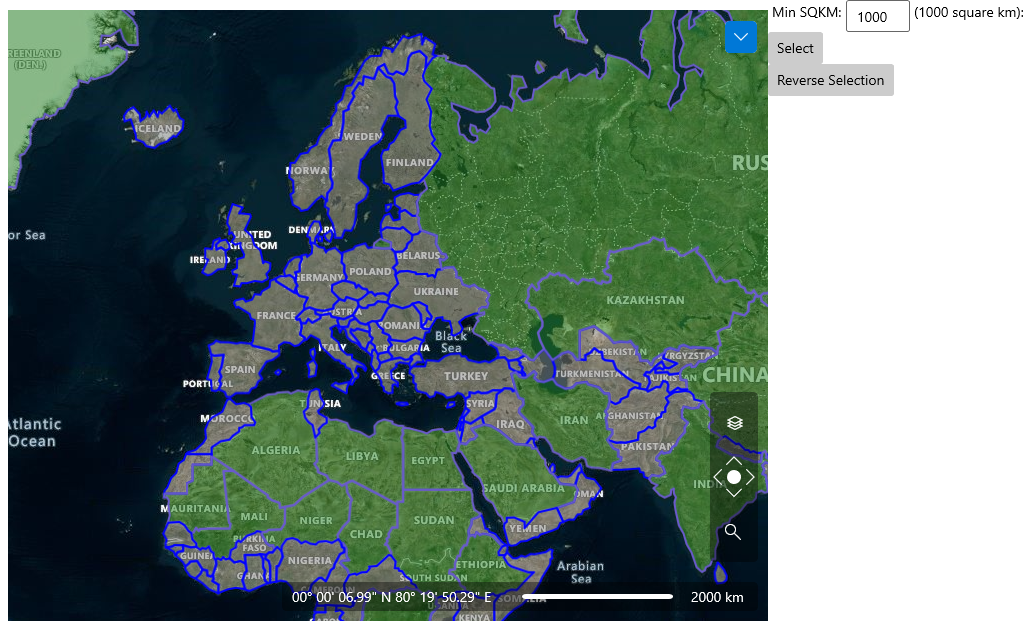
Enter desired value in the text box. For example, 1000, which means you’d like to select countries with area larger than 1 billion (1000 * 1000) square miles. Click select button. The shapes which meet the condition will be selected:
Click “Reverse Selection” button. The selection will be reversed (i.e. selected items will be unselected and vice versa):