Mini Map
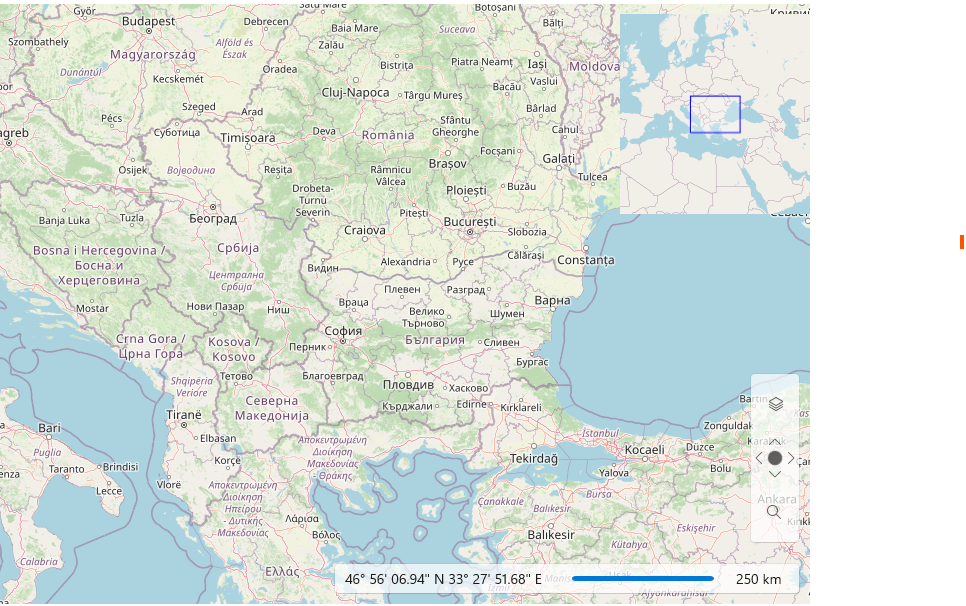
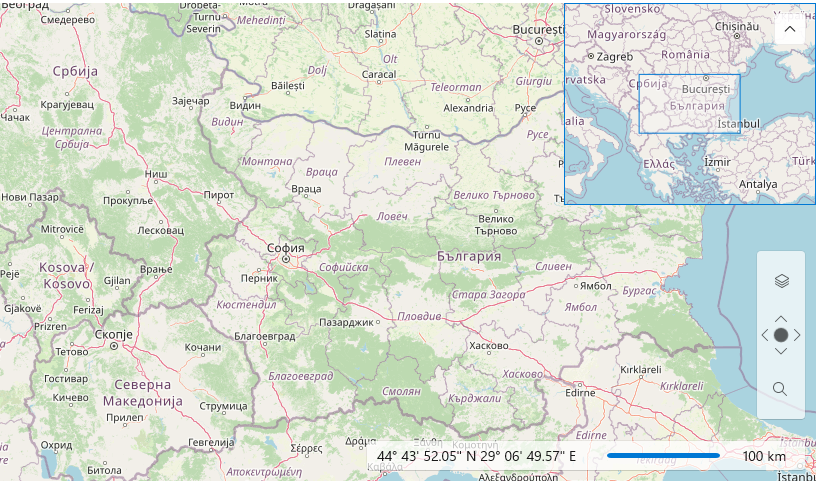
The RadMap control provides a Mini Map functionality. The Mini Map control is enabled by default. To see it just click on the expander button at the top right corner of the Map:
You can control the visibility of Mini Map together with its expander button via the MiniMapExpanderVisibility property.To collapse / expand the Mini Map you can use IsMiniMapExpanded.
The MiniMapWidth and MiniMapHeight are used to control the Mini Map width and height respectively.
The Mini Map viewport is rectangle which indicates what portion the map image is currently shown. You can use the following properties to customize it:
IsViewportAreaVisible: Indicates whether the rectangle area which represents viewport of map in minimap is visible.
ViewportAreaZoomReduction: Specifies a reduction for zoom level of minimap. When it is 1 then the rectangle should be smaller than best view by 1 zoom level.
ViewPortAreaFill: As its name implies gets or sets the Fill for the viewport.
ViewportAreaStroke: Should be used together with ViewPortAreaStrokeThickness property, to provide stroke for the viewport area.
The Mini Map control can also be used as a separate control like other map controls such as map navigation, scale and mouse location control. In fact the Mini Map inherits the RadMap. So, you can use the features of RadMap control. For more information - please check all supported features in the Features section of the content tree on your right. Please have in mind that you should not bind the same collection of providers to the Mini Map. You should bind separate collection of providers with separate instances (not the same objects which are presented in the collection of RadMap providers).
The Mini Map can use the first provider in provider list of parent RadMap control only. Also if you use a custom provider, then you should implement the IClonable interface for using it with Mini Map.
Below you'll find a sample that demonstrates how to use the MiniMap as a standalone control and place it above the RadMap.
Example 1
<Grid Width="800" Height="480">
    <dataVisualization:RadMap x:Name="radMap1" MiniMapExpanderVisibility="Collapsed" Margin="0 5 0 0">
        <dataVisualization:RadMap.Providers>
                <telerikMap:OpenStreetMapProvider APIKey="Your API Key" StandardModeUserAgent="Your User Agent"/>
        </dataVisualization:RadMap.Providers>
            <telerikMap:MiniMap x:Name="MiniMap1" HorizontalAlignment="Right" Margin="0 10 0 0"
            UseParentMapProvider="False" VerticalAlignment="Top"
            MapControl="{Binding ElementName=radMap1}"
            UseSpringAnimations="True"
            IsViewportAreaVisible="True" ViewportAreaStroke ="Blue"
            ViewportAreaZoomReduction="1"
            Width="190" Height="200">
                <dataVisualization:RadMap.Provider>
                    <telerikMap:OpenStreetMapProvider APIKey="Your API Key" StandardModeUserAgent="Your User Agent"/>
                </dataVisualization:RadMap.Provider>
        </telerikMap:MiniMap>
    </dataVisualization:RadMap>
</Grid>