Start with Your First Project
Once you have successfully installed and activated Test Studio, and calibrated the browsers for test automation, you are ready to create your first project and get familiar with the Test Studio layout. In this article you will find details about the following topics.
Test Studio is a UI test automation platform that helps QA and Engineering teams build stable and easily maintainable automated tests. Sign up for a free 30-day trial!
![]()
New to Telerik Test Studio?
Tip
Check out the Test Studio Getting started video playlist on YouTube.
Starting Welcome Screen
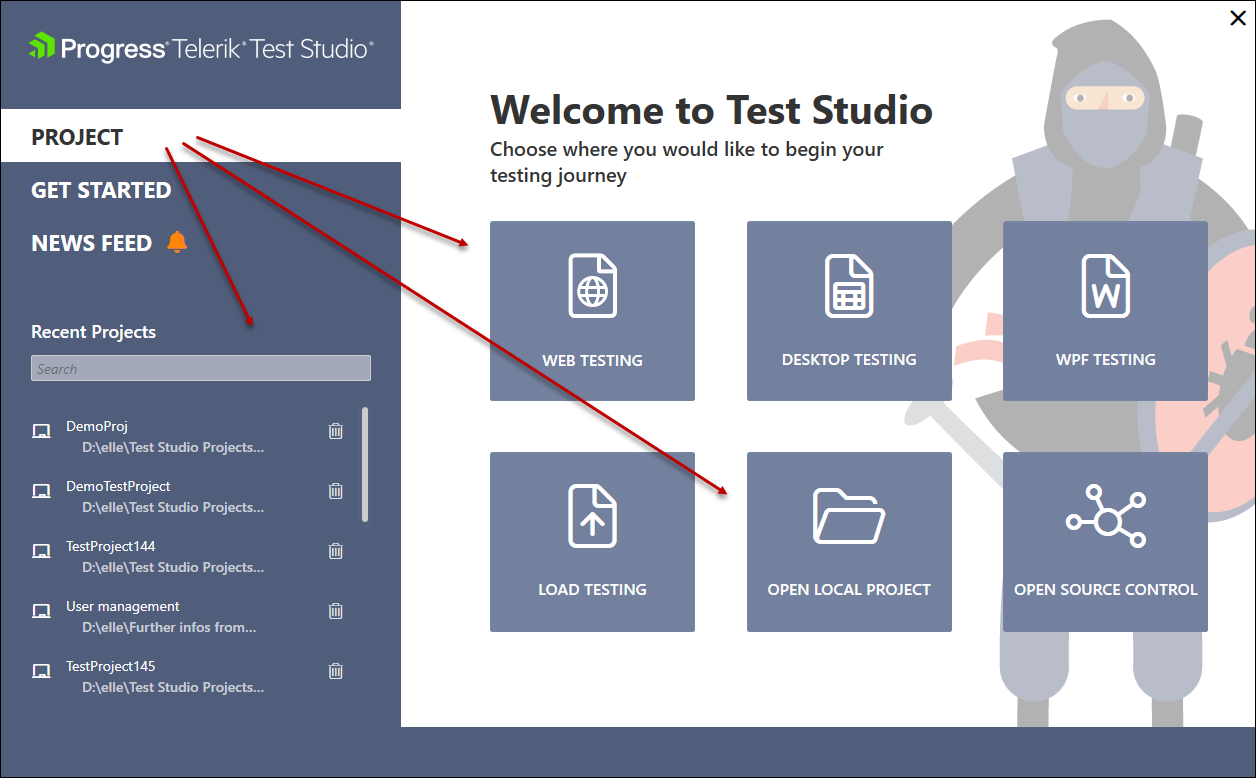
Launching Test Studio gets you to the Welcome Screen. In this view you can choose between a few options to continue:
- Create new project in the Project tab,
- Choose existing project to open from Recent Projects list,
- Explore getting started demo resources in the Get Started tab,
- See notifications about software updates and news related to the product in the News Feed tab.

Create Your First Project
In the Project section you can choose whether to create a new project, open an existing local one, choose to start one of the recently used projects or open a remote project from a source control repository (Git or TFS).
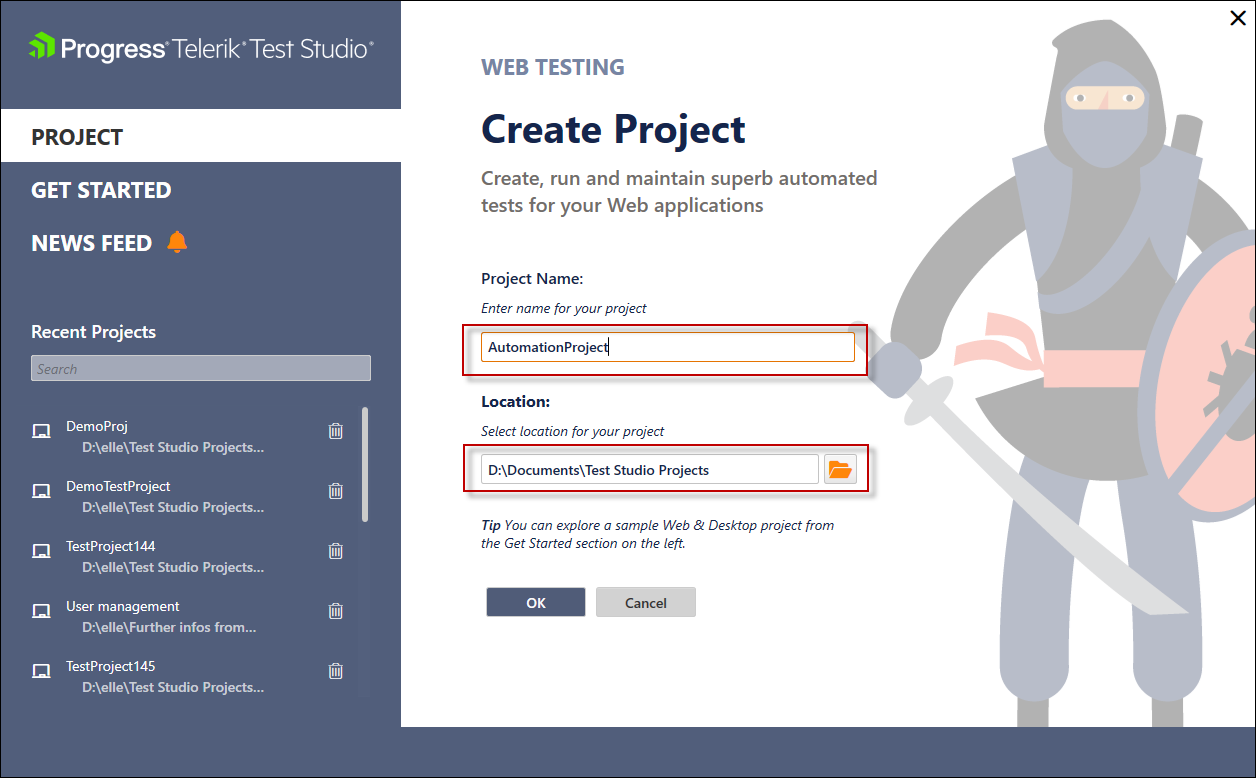
Let's create a new project for the current demonstration - depending on the type of application and testing you perform, you can choose between Web Testing, Desktop Testing, WPF Testing or Load Testing projects (Load testing is only available in Test Studio Ultimate). Let's start by hitting the Web Testing button. On the next screen specify the project name and its location and click the OK button.
Note
The user needs to have read/write permissions for the folder in which the project is created.
The Cancel button returns you in the initial screen with the different types of projects listed.
Demo Web & Desktop Project
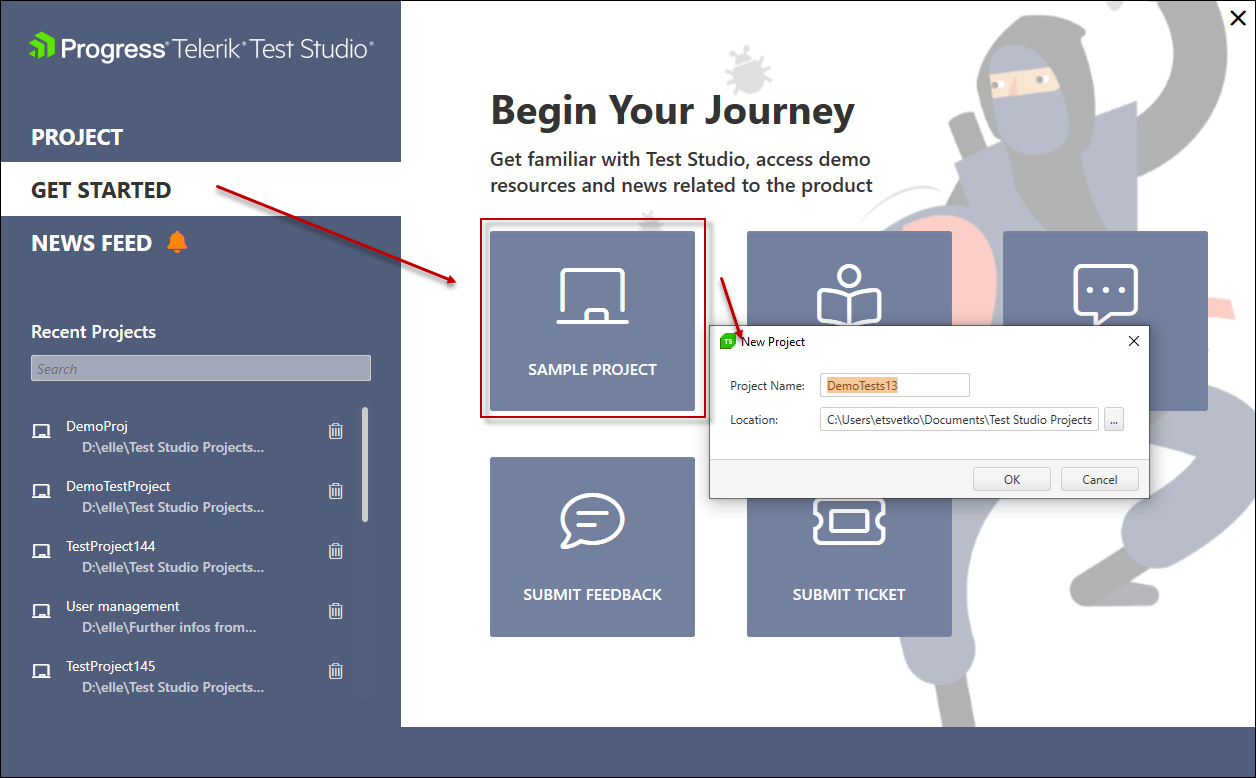
The Get Started section let's you create the demo Web & Desktop project - with this you can speed up your journey in getting familiar with Test Studio.
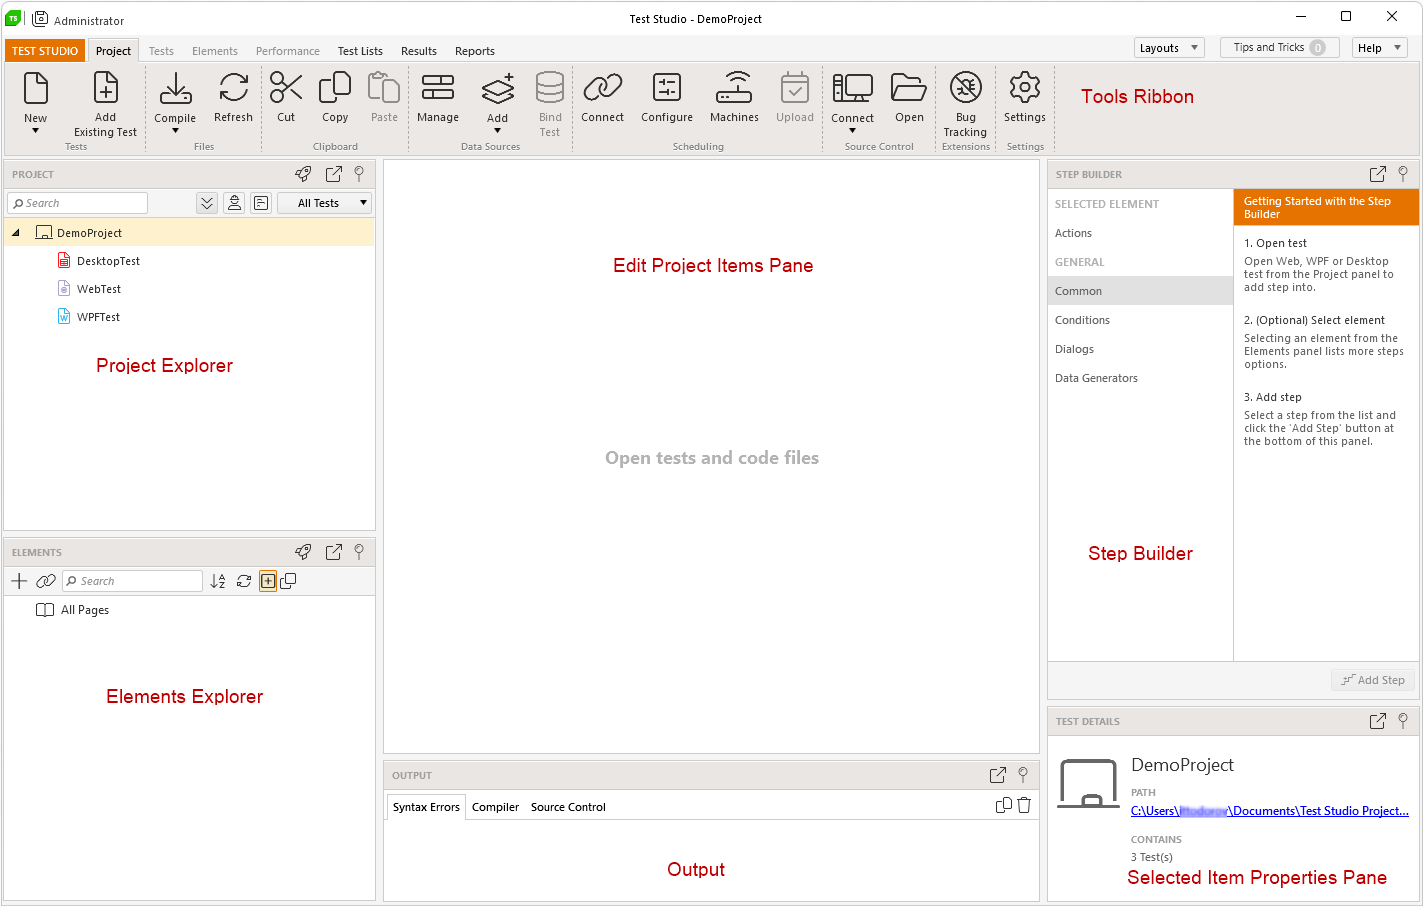
Test Studio Project Layout
Creating your first Test Studio project launches the default Compact layout. This consists of useful panels providing a bunch of useful components. To speed up your flawless work with Test Studio, you can refer the below notes for each of these.
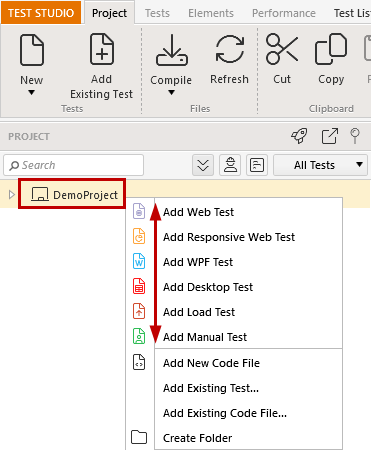
- Project Explorer - this is the pane, which displays the structure of the project with all tests, coded files, folders in the project root folder. Provides access to the items properties, allows you to copy, cut and paste these, add new items, etc.
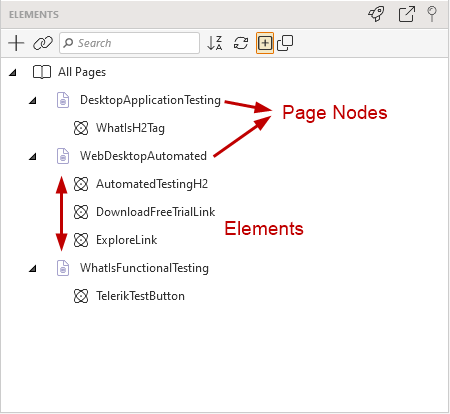
- Elements Explorer - this is the pane, which shows all elements referred from the test steps in the project, structured in a tree view, which includes page node, frame, element. Provides access to the elements' find expressions and properties, allows you to edit these.
- Edit Project Items Pane - this is the pane, which shows the selected component (test, element, coded file) and allows you to edit it.
- Output Pane - this is the pane, which displays different messages related to your work in the project - syntax or compilation errors when adding code snippets, or messages in regards the Source Control related actions.
- Step Builder - this is the pane, which allows you to add different steps in the tests even if no recording session is currently active.
- Properties Pane - this is the pane to list the properties of the currently selected item (test, step, element, page node, frame) and allows you to edit these.
- Tools Ribbon - the Tools Ribbon provides access to various settings in regards the active tab in the project.
Tip
The layout in Test Studio project can be fully customized. You can choose between the predefined layouts or tailor up the panels as per your preference - find out more here.
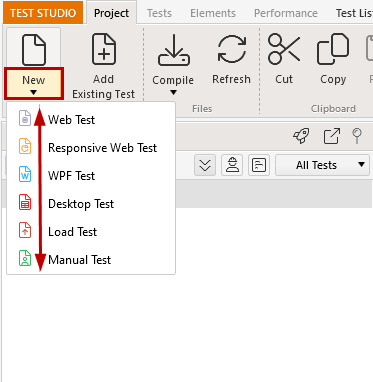
Types of Tests in Test Studio Project
One Test Studio project allows you to include different types of tests:
- Web Test - a test in which you can record actions against a web page started in any of the supported browsers (Chrome, Firefox, Edge, IE).
- Web Responsive Test - a test in which you can record actions against a web page rendered in an emulated device mode (Chrome and Edge).
- Desktop Test - a test in which you can record actions agaisnt a desktop application (not limited to a specific technology).
- WPF Test - a test in which you can record actions against a WPF application.
- Load Test - a test in which you can add different scenarios with web requests to load a web application server.
- Manual Test - a test in which you can add steps to manually execute against any application. This can be converted to a web test if automating a web page.
- Performance Test - a Performance test is always related to a valid web test and is being executed on top of this.
 |
 |