Recording Tests in Test Studio
The Compact Recording Toolbar in Test Studio is the key element in recording tests. Once attached to an application it detects how you act upon the app and represent your actions as automated steps in the test. It also gives access to a variety of useful features enabling you for an entirely codeless testing experience.
Test Studio is a test automation platform for web, WPF, and responsive web applications, supporting UI, functional, load, and RESTful API testing. Sign up for a free 30-day trial!
![]()
New to Telerik Test Studio?
This article guides you trough the recording workflow for web and WPF tests and how you can get the most out of it.
Tip
Check this video tutorial for recording an end-to-end web test scenario.
- How to Start a Recording Session
- Example of a Web Test Recording
- Example of a WPF Test Recording
- Example of a Desktop Test Recording
- How to Add Steps in the Test
- Stop the Recording Session
- Attach the Recorder to a Running Application
- What is the Compact Recorder
Start a Recording Session
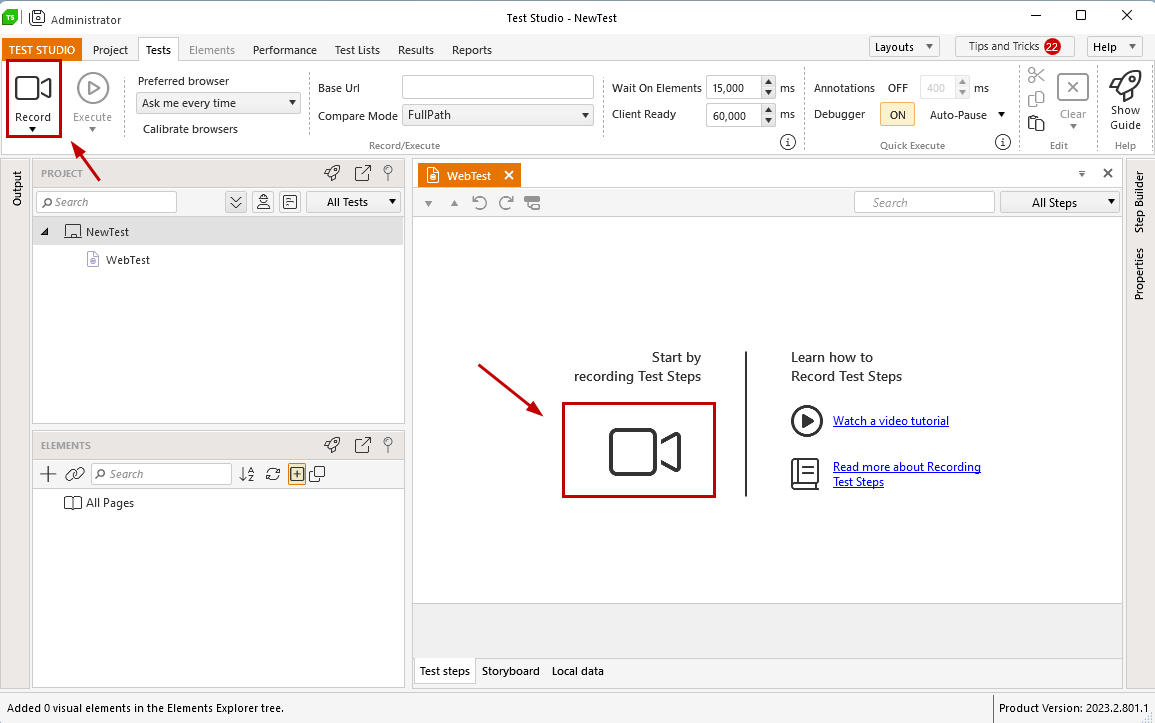
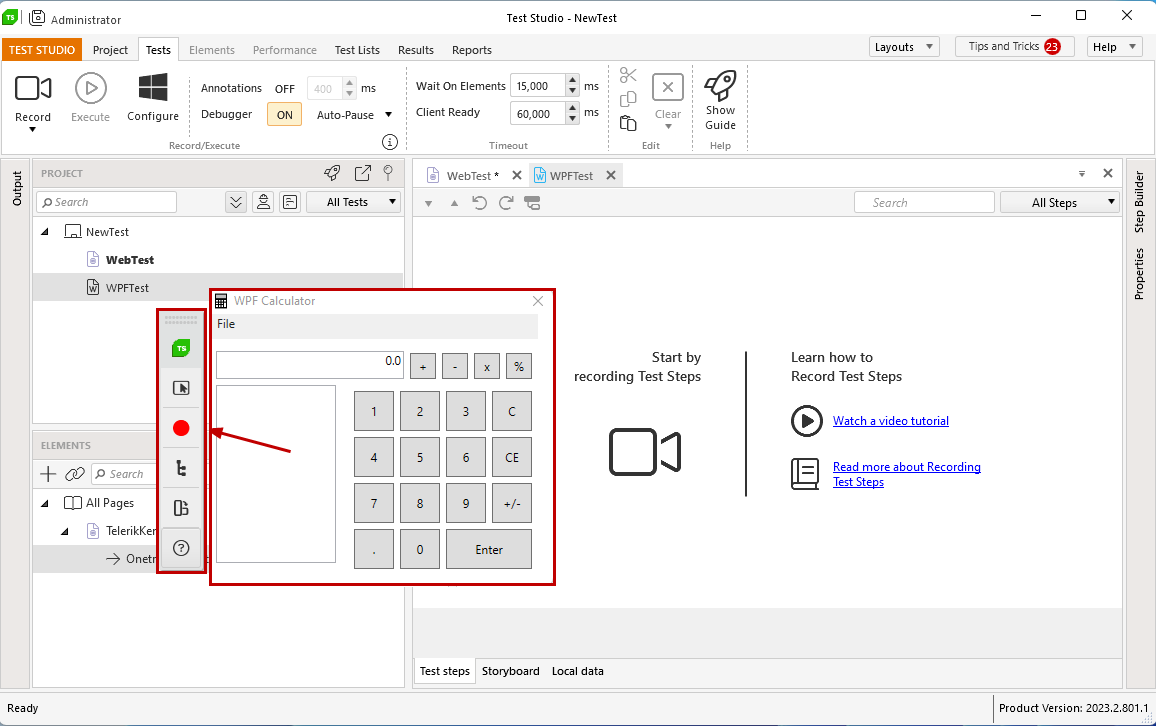
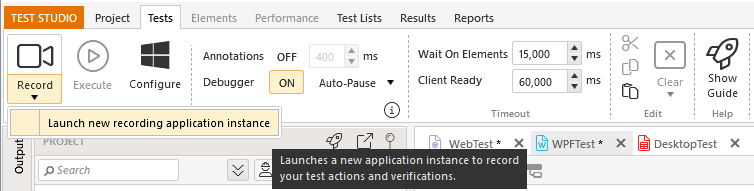
Create a web, desktop or WPF test in the Test Studio project and open it. This changes the tools ribbon to Tests and lets you start a recording session. You can use the Record button from the ribbon, or the camera icon in the opened test pane.
Tip
You can use the keyboard shortcutCtrl+Ror the Project Explorer test context menu option Record to start the recording session.
Web Test Recording
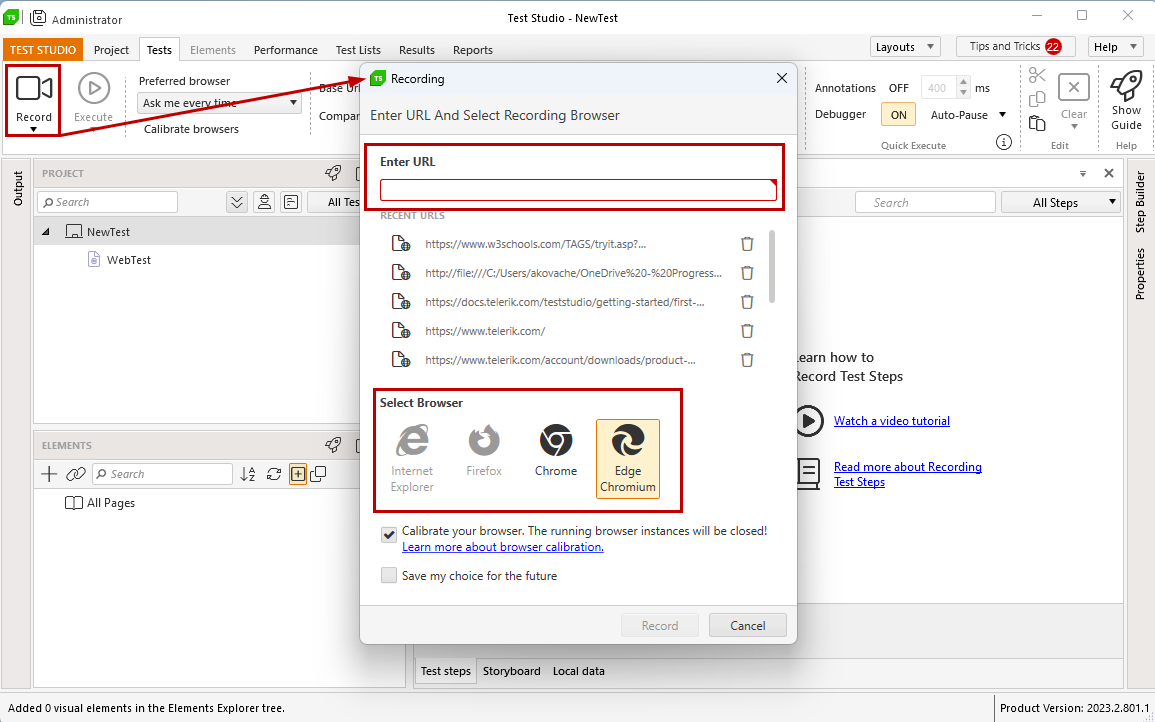
To start a recording session in the context of a web test you need to enter the URL of the page to automate and choose a browser to load the application in. You can define these in the Recording dialog, which appears after clicking the Record button.
Tip
If you plan to use a specific browser for the automation project, you can select that browser and enable the checkbox 'Save my choice for the future' - this will set the browser as a preferred one for this project and you will no longer be prompted to select a browser for recording and execution.
Hit the Record button in the Recording dialog to start the recording - a new instance of the browser starts and loads the selected page. Once the page is loaded the Compact Recording Toolbar appears on top of the browser.
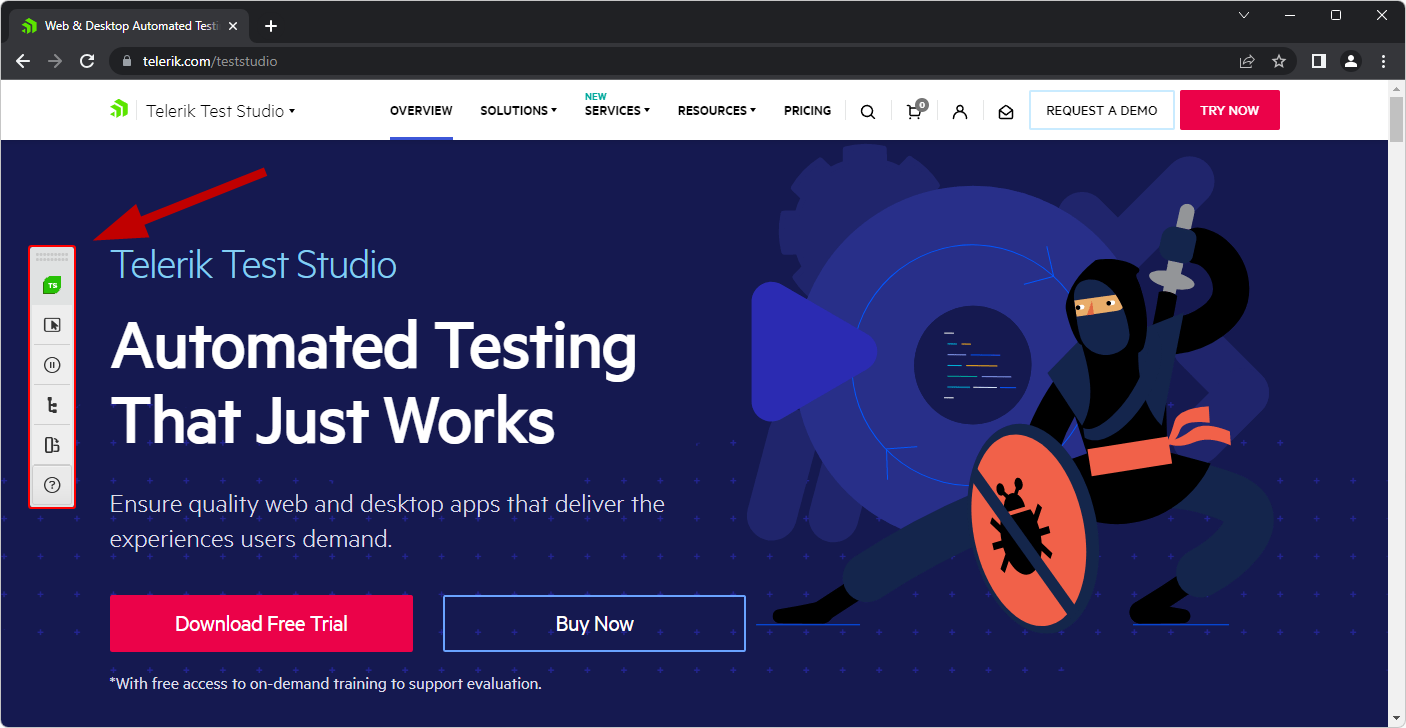
The Test Studio UI remains in the background of the browser and logs the actions as steps in the test - you can switch back to the project to check a Navigate step is recorded with the same URL as defined when starting the recording session.

Note
While recording a web test, do not start another instance of the same browser until the current recording session is finished!
WPF Test Recording
Tip
Check this video tutorial for recording an end-to-end WPF test scenario.
To start a recording session in the context of a WPF test you need to define the WPF application to automate. The first time you click the Record button in the WPF test, it triggers the Configure WPF Application Path dialog where you can browse to the executable file of the WPF app to test.
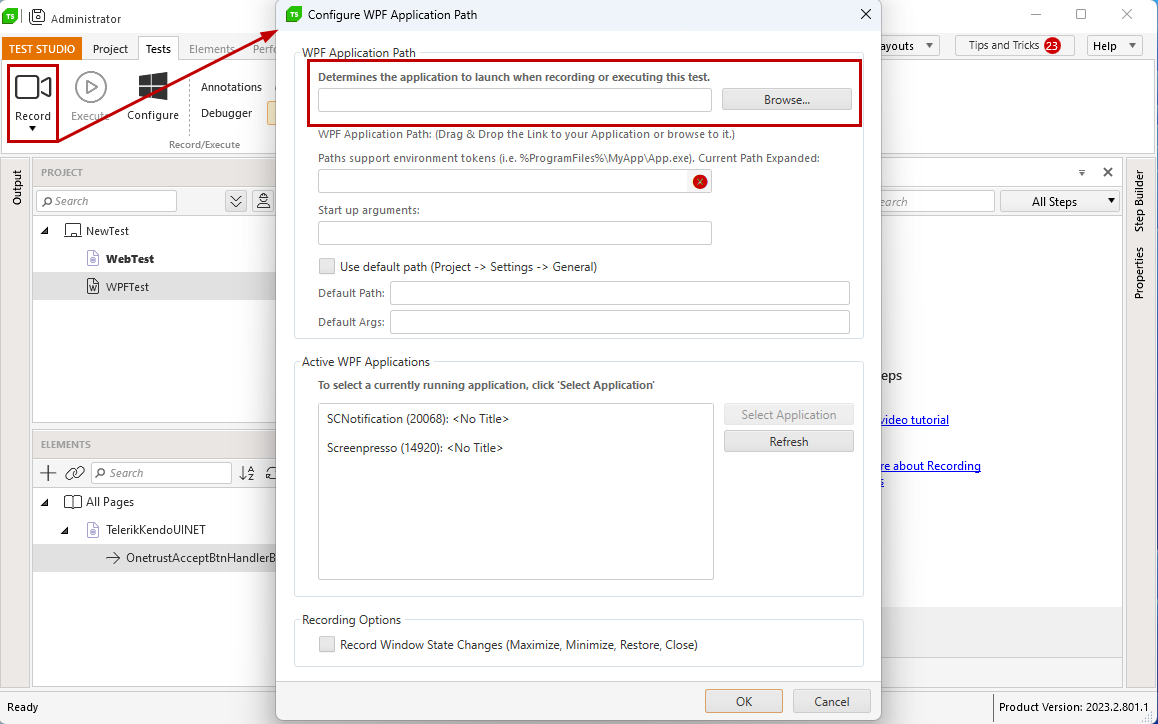
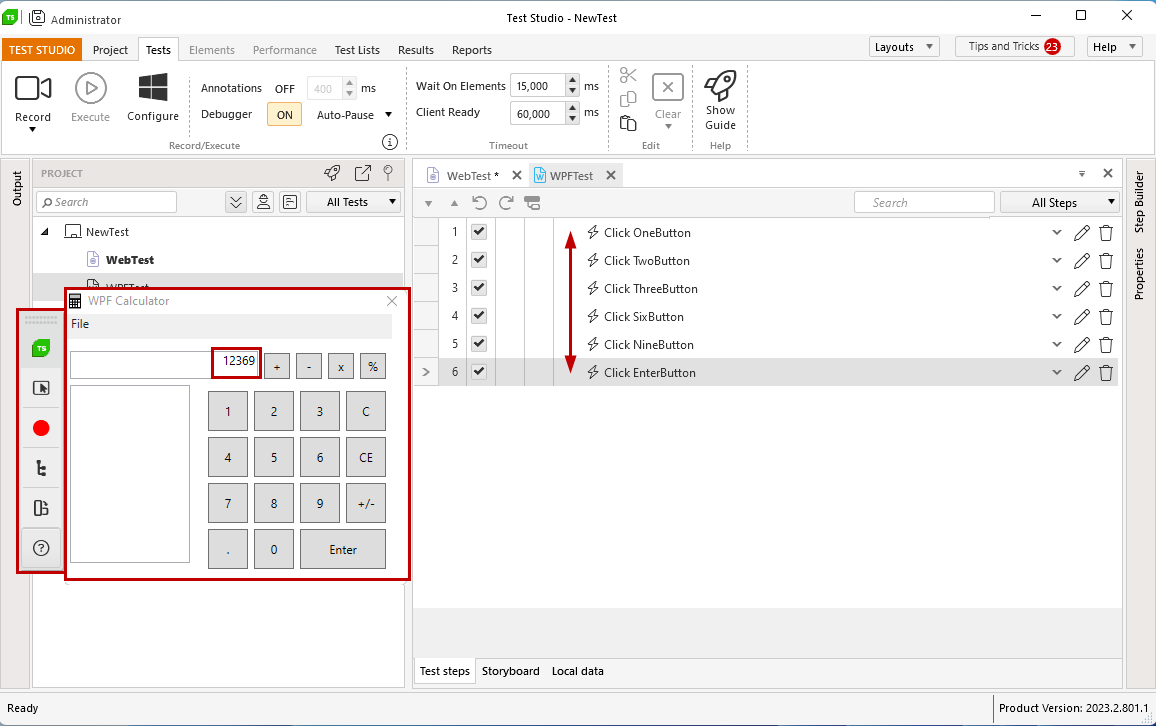
Hit the OK button in the Configure WPF Application Path dialog to start the recording session - a new instance of the application starts and loads as expected when starting it without Test Studio. Once the application is loaded the Compact Recording Toolbar appears on top of the app.
The Test Studio UI remains in the background of the application and logs the actions as steps in the test. You can switch to the Test Studio project at any time and delete or modify the already recorded actions.
Desktop Test Recording
Tip
Check this video tutorial for recording an end-to-end desktop test scenario.
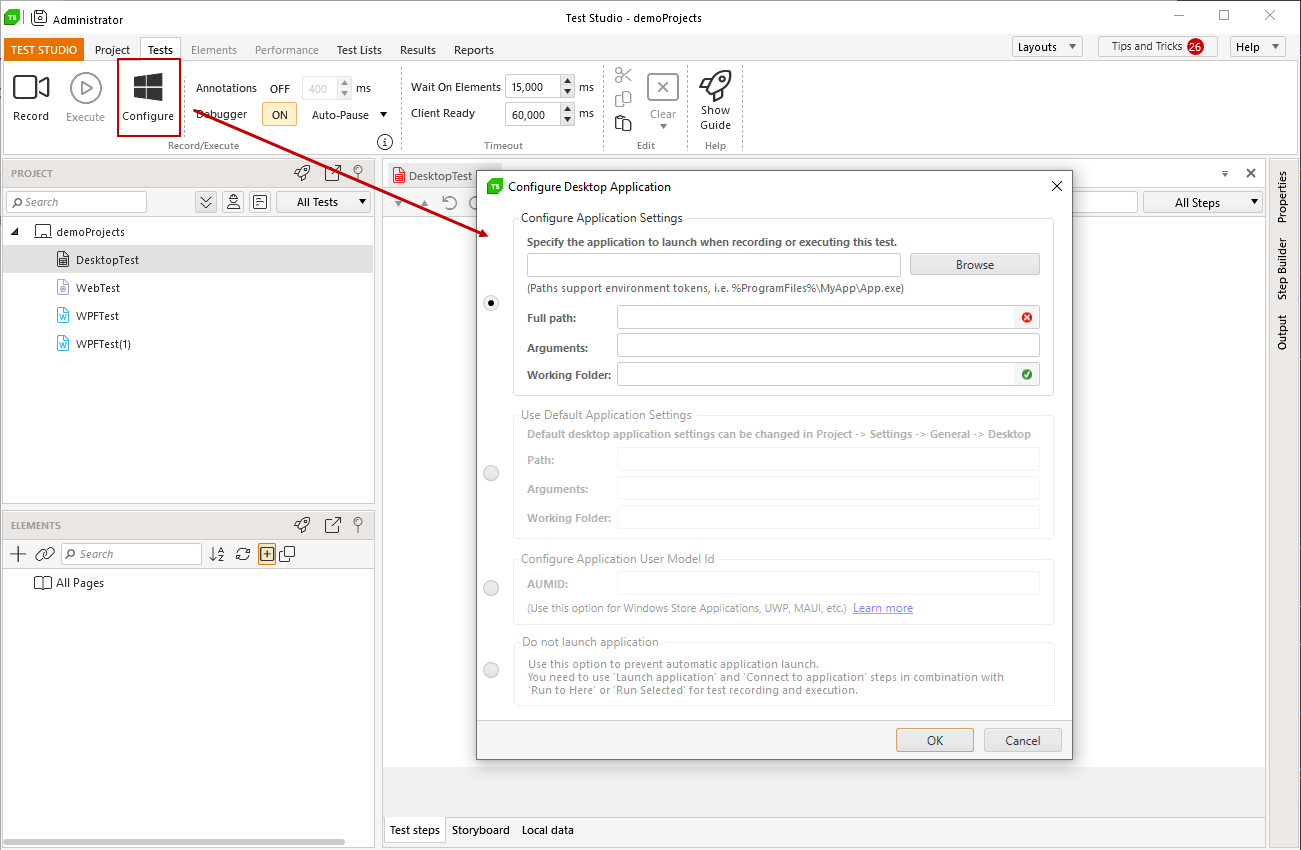
Define the application to automate in the context of a desktop test. The first time you click the Record button in the desktop test, it triggers the Configure Desktop Application Path dialog where you can set which app to use for testing.
Hit the OK button in the Configure Desktop Application Path dialog to start the recording session - a new instance of the application starts and loads as expected when starting it without Test Studio. Once the application is loaded the Compact Recording Toolbar appears on top of the app and you can continue recording the actions to complete the automation scenario.
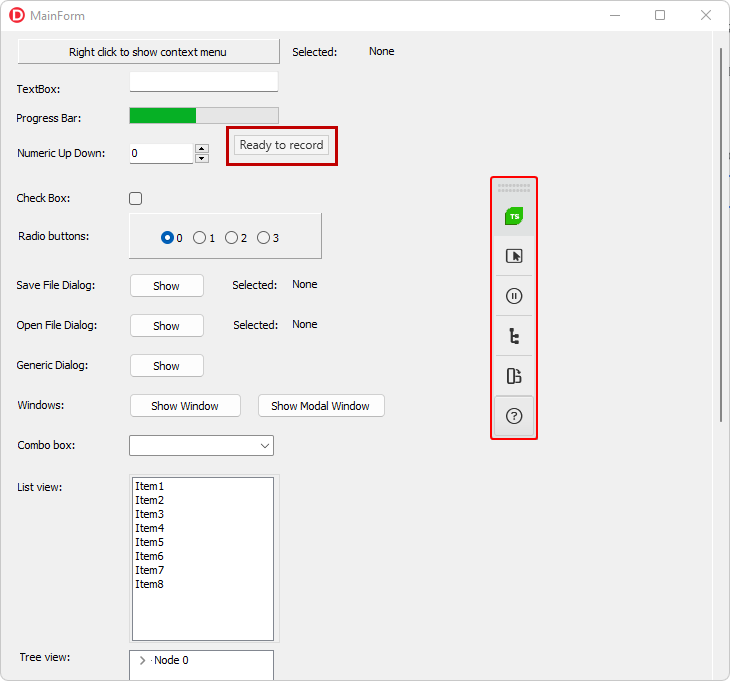
The Test Studio UI remains in the background of the application and logs the actions as steps in the test.
Tip
Check out what specifics have the Desktop test recording and how to handle these.
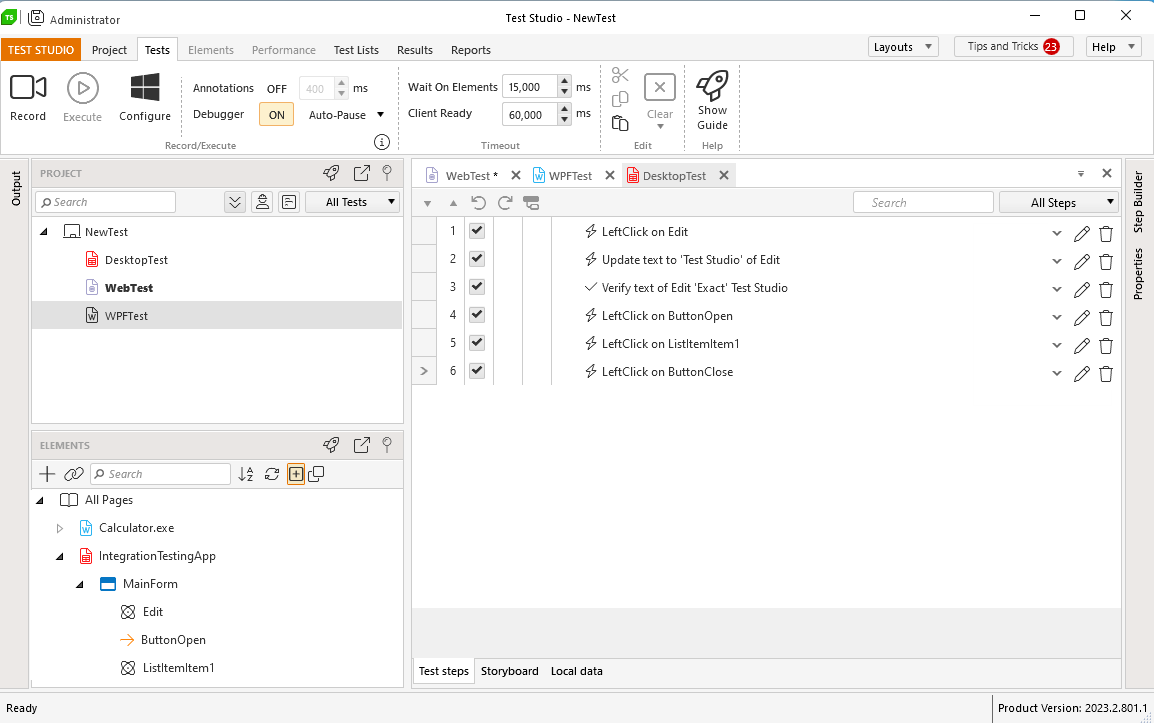
How to Add Steps in the Test
The Test Studio Compact Recording Toolbar detects any actions performed against the application under test - click on any element, enter text, trigger a dialog and handle it, navigate to a page, open a pop-up window and perform actions in it, etc.
Apart from all direct actions towards the tested application, you can add different type of steps from the Quick Highlighting Menu, or build more complex steps in the Advanced Recording Tools.
And, finally, when it comes to steps, which are not related to a specific application or element from it, you can also add Common Steps from the Step Builder pane - like adding a coded step, or a test as step, comment, or refreshing the browser, if...else statement, etc.
Tip
Check out this video tutorial about wait and verification steps in Test Studio.
Stop the Recording Session
To stop the current recording session close the automated browser or WPF/desktop application - this is how all processes and communication channels between the app and Test Studio gets dismissed.
Attach the Recorder to a Running Application
The specifics of the recording process allow to attach a recorder and trigger a recording session to an already running WPF application. To start such recording session you need to use the dropdown under the Record button - in the list you can see all compatible processes, to which Test Studio recorder can be attached. Select one and wait for the Compact Recorder to attach to the application.
 WPF Test - connect to running WPF application instance |
