The
RadListViewcontrol is obsolete and will be removed in Q2 2026. Use the RadCollectionView control instead. TheRadCollectionViewis a complete, ground-up rewrite of the ListView. TheRadCollectionViewoffers improved performance, enhanced features, and a modernized approach to managing lists of data. TheRadCollectionViewincorporates all of the ListView's key features. More about the differences between both components and how to migrate to the newRadCollectionViewis available in the Migrating the Telerik .NET MAUI RadListView to RadCollectionView article.
Getting Started with the .NET MAUI ListView
This guide provides the information you need to start using the Telerik UI for .NET MAUI ListView by adding the control to your project.
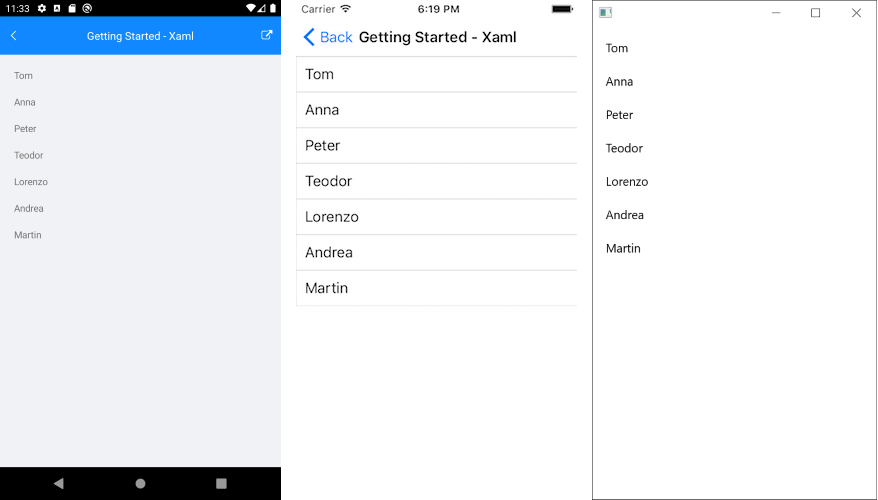
At the end, you will achieve the following result.
Prerequisites
Before adding the ListView, you need to:
Define the Control
When your .NET MAUI application is set up, you are ready to add a ListView control to your page. The following example shows a sample ListView definition populated with sample data.
The ListView provides UI virtualization, which requires the visual parent to provide vertical or horizontal space. To avoid breaking UI virtualization or gesture mechanisms:
- Do not place the ListView inside a
StackLayoutor inside aScrollView. - Do not set the ListView to a
RowDefinition Height="Auto"Grid definition.
1. Set up the RadListView instance:
<telerik:RadListView x:Name="listView" ItemsSource="{Binding Source}">
    <telerik:RadListView.BindingContext>
        <local:ViewModel />
    </telerik:RadListView.BindingContext>
    <telerik:RadListView.ItemTemplate>
        <DataTemplate>
            <telerik:ListViewTemplateCell>
                <telerik:ListViewTemplateCell.View>
                    <Grid>
                        <Label Margin="10" Text="{Binding Name}" />
                    </Grid>
                </telerik:ListViewTemplateCell.View>
            </telerik:ListViewTemplateCell>
        </DataTemplate>
    </telerik:RadListView.ItemTemplate>
</telerik:RadListView>
2. Add the telerik namespaces:
xmlns:telerik="http://schemas.telerik.com/2022/xaml/maui"
3. Create sample Data and ViewModel classes:
public class SourceItem
{
    public SourceItem(string name)
    {
        this.Name = name;
    }

    public string Name { get; set; }
}

public class ViewModel
{
    public ViewModel()
    {
        this.Source = new List<SourceItem>
        {
            new SourceItem("Tom"),
            new SourceItem("Anna"),
            new SourceItem("Peter"),
            new SourceItem("Teodor"),
            new SourceItem("Lorenzo"),
            new SourceItem("Andrea"),
            new SourceItem("Jeremy"),
            new SourceItem("Linda"),
            new SourceItem("Mario"),
            new SourceItem("Alex"),
            new SourceItem("Barbara"),
            new SourceItem("Nicole"),
            new SourceItem("Paul"),
            new SourceItem("Raul"),
            new SourceItem("Lenny"),
            new SourceItem("Laura"),
            new SourceItem("Mike"),
            new SourceItem("Taylor"),
            new SourceItem("Martin")
        };
    }

    public List<SourceItem> Source { get; set; }
}
4. Register the Telerik controls through the Telerik.Maui.Controls.Compatibility.UseTelerik extension method called inside the CreateMauiApp method of the MauiProgram.cs file of your project:
using Telerik.Maui.Controls.Compatibility;

public static class MauiProgram
{
    public static MauiApp CreateMauiApp()
    {
        var builder = MauiApp.CreateBuilder();
        builder
            .UseTelerik()
            .UseMauiApp<App>()
            .ConfigureFonts(fonts =>
            {
                fonts.AddFont("OpenSans-Regular.ttf", "OpenSansRegular");
            });

        return builder.Build();
    }
}
Additional Resources
- .NET MAUI ListView Product Page
- .NET MAUI ListView Forum Page
- Telerik .NET MAUI Blogs
- Telerik .NET MAUI Roadmap