Screen Tips
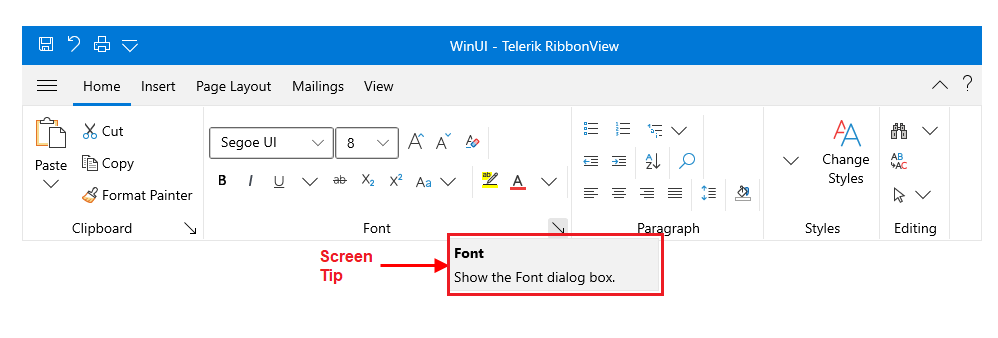
Telerik RadRibbonView provides a simple and consistent way for building interfaces similar to the ribbon control used in Microsoft Office. The RadRibbonView consists of various elements, one of which are the Screen Tips. This topic discusses concepts fundamental to the Screen Tips at first and then goes into the usage of the ScreenTip class and its features.
Before proceeding with this tutorial, it is recommended to get familiar with the Visual Structure of the RadRibbonView control.
Fundamentals
You can access the ScreenTip control through an alias pointing to the Telerik.UI.Xaml.Controls namespace:
xmlns:telerik="using:Telerik.UI.Xaml.Controls"
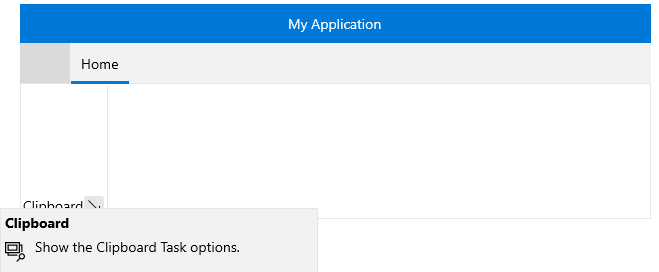
Screen Tip is a UI feature in which a small window appears when the mouse cursor is hovered over an icon or a ribbon element (command). The popup window will provide details that explain the command's function. In some instances, though, the Screen Tip will display only the item's name. When the mouse is moved away from the ribbon element, the Screen Tip will disappear from view.
RadRibbonView fully supports the Microsoft Office guidelines for screen tip implementation. You can set a screen tip to any element (command) in the RadRibbonView.
The ScreenTip consists of three parts:
Title: A property of type string that specifies the title of the screen tip.
Description: A property of types string that specifies the description of the screen tip.
Icon: A property of type IconElement that specifies the image of the screen tip.
Adding Screen Tip
This section shows how to attach a screen tip to a RadRibbon element.
You can attach Screen Tip to each one of the RadRibbon elements.
The following subsections are included:
When you want to set a screen tip, you need to use the ScreenTip attached properties.
Example 1: Setting ScreenTip
<telerik:RadRibbonView x:Name="radRibbonView">
    <telerik:RadRibbonTab Header="Home">
        <telerik:RadRibbonGroup x:Name="radRibbonGroupClipboard"
                        DialogLauncherVisibility="Visible"
                        Header="Clipboard"
                        telerik:ScreenTip.Description="Show the Clipboard Task options."
                        telerik:ScreenTip.Title="Clipboard" >
            <telerik:ScreenTip.Icon>
                <SymbolIcon Symbol="BrowsePhotos"/>
            </telerik:ScreenTip.Icon>
        </telerik:RadRibbonGroup>
    </telerik:RadRibbonTab>
</telerik:RadRibbonView>