Getting Started with the .NET MAUI TreeView
This guide provides the information you need to start using the Telerik UI for .NET MAUI TreeView by adding the control to your project.
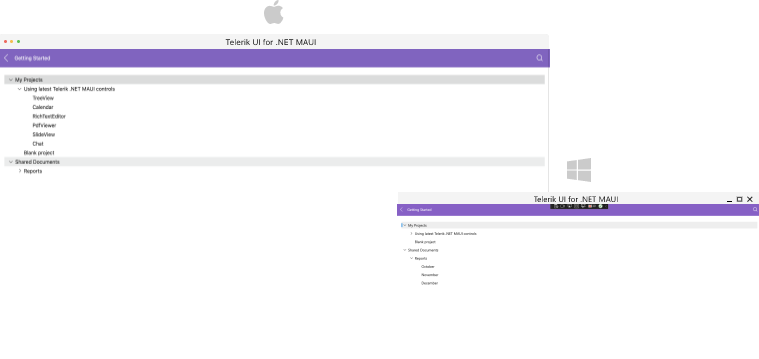
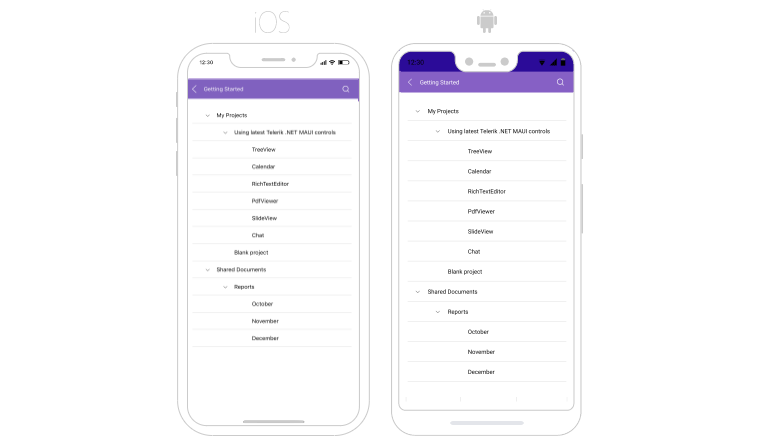
At the end, you will be able to achieve the result on the first image on desktop platforms and the results on the second image on mobile platforms:
Prerequisites
Before adding the TreeView, you need to:
Define the Control
When your .NET MAUI application is set up, you are ready to add a TreeView control to your page. The following example shows a sample TreeView definition populated with sample data.
The TreeView provides UI virtualization, which requires the visual parent to provide vertical or horizontal space. To avoid breaking UI virtualization or gesture mechanisms:
- Do not place the TreeView inside a
StackLayoutor inside aScrollView. - Do not set the TreeView to a
RowDefinition Height="Auto"Grid definition.
1. Set up the RadTreeView instance:
2. Add the telerik namespaces:
3. Create a sample Item class:
4. Add the ViewModel class:
5. Register the Telerik controls through the Telerik.Maui.Controls.Compatibility.UseTelerik extension method called inside the CreateMauiApp method of the MauiProgram.cs file of your project:
For a runnable example with the TreeView Getting Started scenario, see the SDKBrowser Demo Application and go to TreeView > Getting Started category.