Getting Started with WinUI Chat
This topic will guide you through the process of creating a sample application containing RadChat.
Prerequisites
Before adding the Badge, you need to:
-
Create your Telerik UI for WinUI application and install the Telerik UI for WinUI components depending on the required installation approach:
Add the Assembly References
To use the RadChat component, add references to Telerik.WinUI.Controls.dll and Telerik.Licensing.Runtime.dll.
Define the Component
To use the control, create a new RadChat instance.
Defining RadChat
<telerik:RadChat x:Name="chat"/>

Adding Authors to RadChat
Two authors will be defined for the following example. Note, that the CurrentAuthor property of RadChat must be set.
Adding Authors to RadChat
public partial class MainWindow : Window
{
    private Author currentAuthor;
    private Author otherAuthor;

    public MainWindow()
    {
        InitializeComponent();

        currentAuthor = new Author("Peter");
        otherAuthor = new Author("Steven");
        this.chat.CurrentAuthor = currentAuthor;
    }
}
Handling the Sent Message
The user's input can be handled by hooking up to the SendMessage event of RadChat. The event arguments are of the type of SendMessageEventArgs.
Subscribing to the SendMessage event
<telerik:RadChat x:Name="chat" SendMessage="RadChat_SendMessage" />
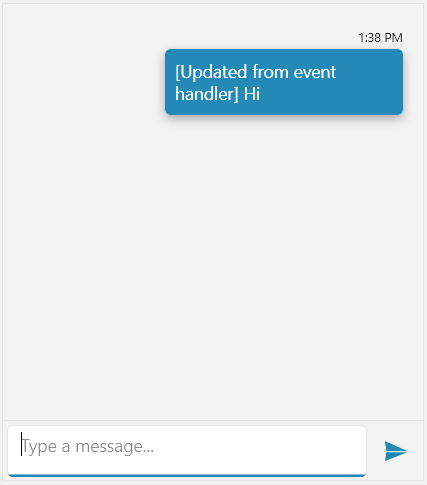
SendMessage event handler
private void RadChat_SendMessage(object sender, SendMessageEventArgs e)
{
    // We will handle the event in order to add a new message manually
    e.Handled = true;

    var updatedMessageText = "[Updated from event handler] " + (e.Message as TextMessage).Text;
    this.chat.AddMessage(this.chat.CurrentAuthor, updatedMessageText);
}

Telerik UI for WinUI Learning Resources
- Telerik UI for WinUI Chat Component
- Getting Started with Telerik UI for WinUI Components
- Telerik UI for WinUI Installation
- Telerik UI for WinUI Examples
- Telerik UI for WinUI Accessibility
- Telerik UI for WinUI License Agreement