Getting Started with WinUI BusyIndicator
This guide provides the information you need to start using the Telerik UI for .NET WinUI BusyIndicator by adding the control to your project.
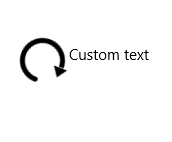
At the end, you will be able to achieve the following result.
Prerequisites
Before adding the Badge, you need to:
-
Create your Telerik UI for WinUI application and install the Telerik UI for WinUI components depending on the required installation approach:
Add the Assembly References
To use the RadBusyIndicator component, add references to Telerik.WinUI.Controls.dll and Telerik.Licensing.Runtime.dll.
Define the Component
The following example demonstrates how to define the BusyIndicator component. You can access the BusyIndicator through the xmlns:primitives="using:Telerik.UI.Xaml.Controls.Primitives" alias that points to the Telerik.UI.Xaml.Controls.Primitives namespace.
To show and hide the animated indicator, set the IsActive property of the control.
To display an additional content element next to the indicator, set the ContentPosition and Content properties.
Note that the BusyIndicator is displayed on the UI thread and if the thread is blocked, the control will not be shown. It is intended that the user is informed about a long-running background process.
Define the BusyIndicator
<primitives:RadBusyIndicator x:Name="radBusyIndicator" IsActive="True" ContentPosition="Right" Content="Custom text"/>