Grouping
RadListView supports both custom grouping and automatic grouping based on a certain property.
Basic Grouping
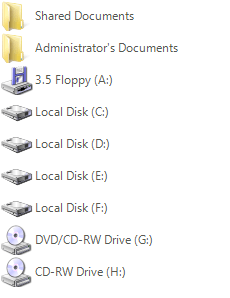
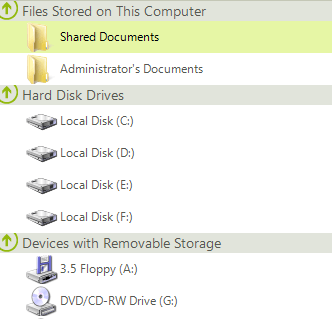
The basic grouping is achievable by enabling the EnableGrouping and ShowGroups properties and then adding the desired GroupDescriptors to the GroupDescriptors collection of the control. The following code will group the items according to their Value property:
Group by value
radListView1.EnableGrouping = true;
radListView1.ShowGroups = true;
GroupDescriptor groupByValue = new GroupDescriptor(new SortDescriptor[] { new SortDescriptor("Value", ListSortDirection.Descending) });
radListView1.GroupDescriptors.Add(groupByValue);
RadListView1.EnableGrouping = True
RadListView1.ShowGroups = True
Dim groupByValue As New GroupDescriptor(New SortDescriptor() {New SortDescriptor("Value", ListSortDirection.Descending)})
RadListView1.GroupDescriptors.Add(groupByValue)
| Before Grouping | After Grouping |
|---|---|
 |
 |
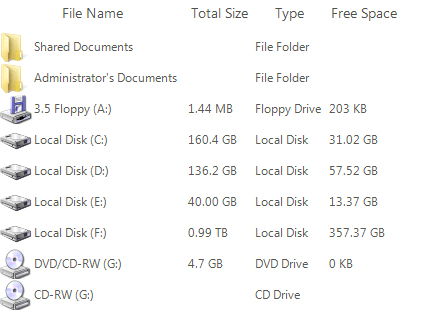
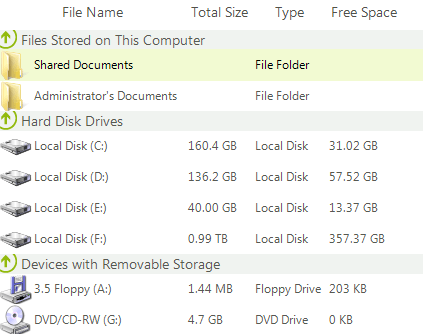
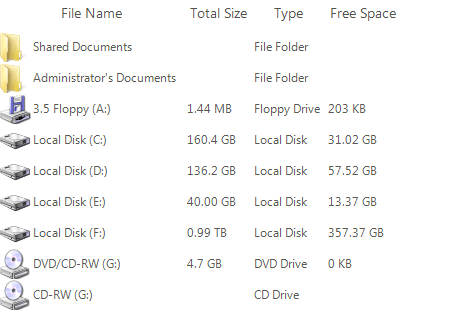
And here is how you can group by a certain column when DetailsView is used:
Group by column "Type"
radListView1.EnableGrouping = true;
radListView1.ShowGroups = true;
GroupDescriptor groupByType = new GroupDescriptor(new SortDescriptor[]
{
    new SortDescriptor("Type", ListSortDirection.Descending),
});
radListView1.GroupDescriptors.Add(groupByType);
RadListView1.EnableGrouping = True
RadListView1.ShowGroups = True
Dim groupByType As New GroupDescriptor(New SortDescriptor() {New SortDescriptor("Type", ListSortDirection.Descending)})
RadListView1.GroupDescriptors.Add(groupByType)
| Before Grouping | After Grouping |
|---|---|
 |
 |
Custom Grouping
To take advantage of the custom grouping feature of RadListView, just enable the EnableCustomGrouping property and specify the Group for each item. Here is an example for custom grouping:
Custom Grouping
radListView1.EnableCustomGrouping = true;
radListView1.ShowGroups = true;
ListViewDataItemGroup docGroup = new ListViewDataItemGroup("Documents");
ListViewDataItemGroup diskGroup = new ListViewDataItemGroup("Disks");
radListView1.Groups.Add(docGroup);
radListView1.Groups.Add(diskGroup);
foreach (ListViewDataItem item in radListView1.Items)
{
    if (item.Value.ToString() == "Shared Documents" || item.Value.ToString() == "Administrator's Documents")
    {
        item.Group = docGroup;
    }
    else
    {
        item.Group = diskGroup;
    }
}
RadListView1.EnableCustomGrouping = True
RadListView1.ShowGroups = True
Dim docGroup As New ListViewDataItemGroup("Documents")
Dim diskGroup As New ListViewDataItemGroup("Disks")
RadListView1.Groups.Add(docGroup)
RadListView1.Groups.Add(diskGroup)
For Each item As ListViewDataItem In RadListView1.Items
    If item.Value = "Shared Documents" OrElse item.Value = "Administrator's Documents" Then
        item.Group = docGroup
    Else
        item.Group = diskGroup
    End If
Next
Items in a certain group are sorted in the order of setting the Group property of each ListViewDataItem.
Please note, that if you are using data binding, you can use the ItemDataBound event, to assign certain item to a certain group.
| Before grouping | After grouping |
|---|---|
 |
 |
When grouping is enabled you have the option to quickly expand or collapse all groups in RadListView throught the ExpandAll and CollapseAll methods:
Expand and Collapse All Groups
this.radListView1.ExpandAll();
this.radListView1.CollapseAll();
Me.RadListView1.ExpandAll()
Me.RadListView1.CollapseAll()