Remote Scheduled Execution (Single Machine Setup)
With Test Studio you can schedule test lists on a single machine, but using the Test Studio services and simulating remote test list execution. The Scheduling service setup allows you to keep the generated results in a storage database.
The below article describes how to enable scheduling tests for a Standalone Test Studio installation on a single machine.
Tip
You refer to this Step-By-Step blog post about setting up Test Studio Scheduling.
- Remote Scheduled Execution (Single Machine Setup)
Installing Test Studio for Remote Scheduled Execution
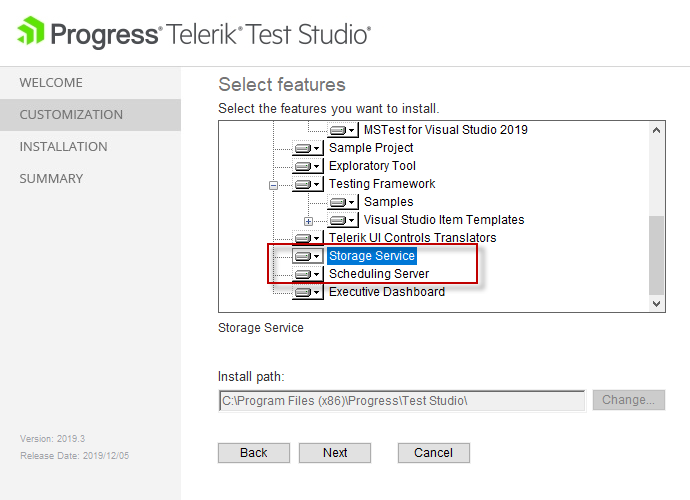
Install Test Studio product and ensure to include the Test Studio Scheduling Service and Storage Service components in the Customize Installation dialog.
Note
The Test Studio services can be also added by changing the already installed product.
Note
The Storage service uses MongoDB as a storage database. The Test Studio installation wizard automatically detects if an existing installation of the third party tool is present. If MongoDB is not installed the installation wizard initiates the additional installation automatically.
Configure the Test Studio Services
Important
If the machine has active firewall, ensure that the following ports are opened in both the inbound and outbound directions:
- Scheduling Service: 8009
- Storage Service: 8492
- Execution Machine(s): 55555
Open a Test Studio project and select Configure button under the Project -> Scheduling ribbon and wait for the Test Studio Scheduling Config wizard to get opened.

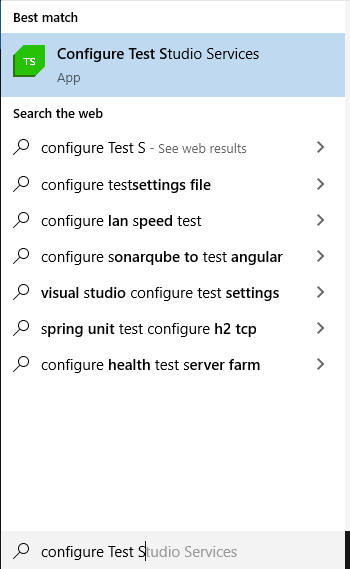
Optionally, the Configure Services wizard can be accessed through the Windows Start menu by typing Configure Test Studio Services.
Go through each tab to setup the Test Studio services:
- Communication Tab
- MongoDB Tab
- Storage Tab
- Scheduling Tab
- Automatic Email for Scheduled Test Lists
- Executive Dashboard Tab
- Execution Server Tab
Communication Tab
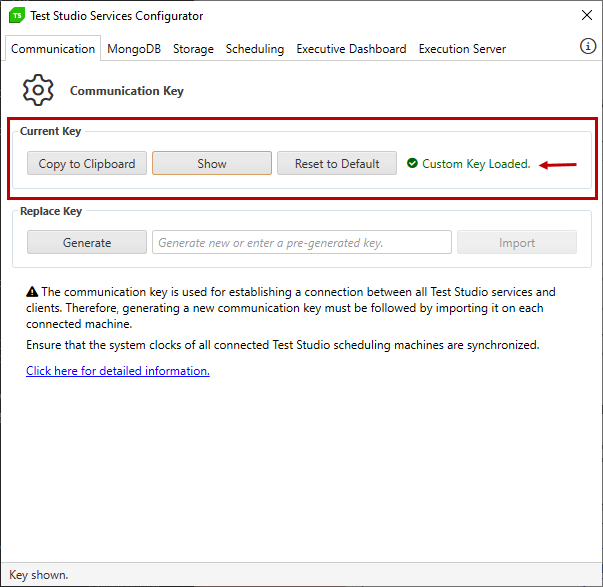
The Communication tab lets you manage the Communication Key which is required by all Test Studio Scheduling components - services and clients. It is used to establish the connection and successful communication between each of the Scheduling modules.
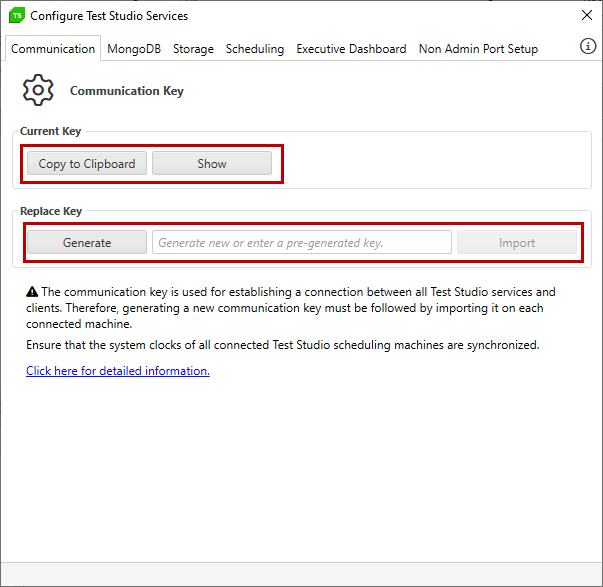
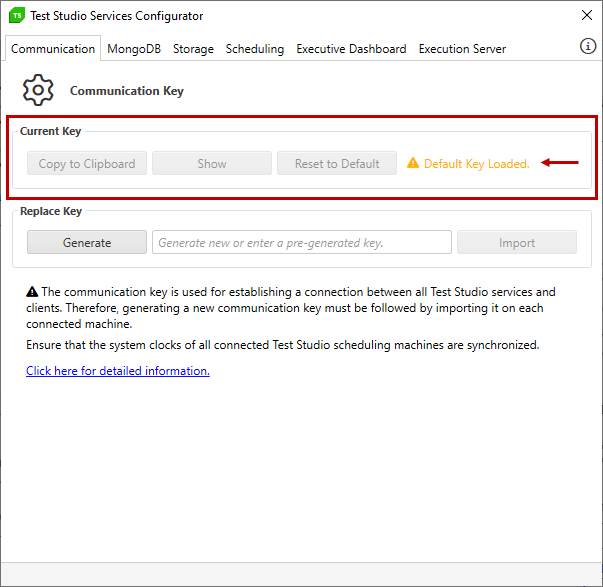
The Current Key section indicates which is the key in use. The Scheduling setup is configured to use a default communication key for each Test Studio installation. Thus, after initial install you see the current key is the Default Key Loaded. In this configuration you can't copy or see the key.
Tip
We strongly recommend to generate a new custom communication key and replace it for all machines in the setup.
See here step-by-step instructions on updating the communication key.
Once a custom key is generated and imported, the Current Key section allows you to copy the value of the key using the Copy to Clipboard button, or see it using the Show button (for the cases when copying is not an option). The key value can be reset to the default value using the Reset to Default button.
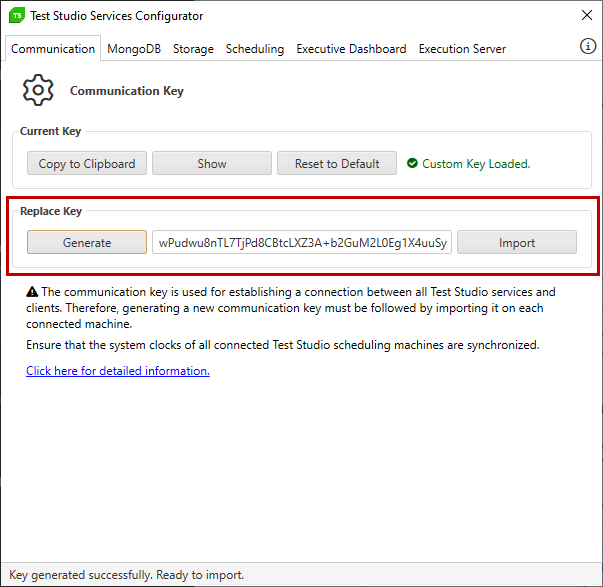
The Replace Key section lets you Generate a new key. Once generated, the new value is populated in the text field and is ready to be imported. Hit the Import button to replace the current key with the new one.
Note
Importing a new key in the Scheduling Config wizard restarts the Scheduling service on that same machine to apply the new value.
The Execution Client application is stopped but you need to start it manually. If Test Studio application is also running on the same machine at the time of renewing the communication key, it is not automatically restarted. To apply the recent changes you need to restart the standalone Test Studio app manually.
See here step-by-step instructions on updating the communication key.
MongoDB Tab
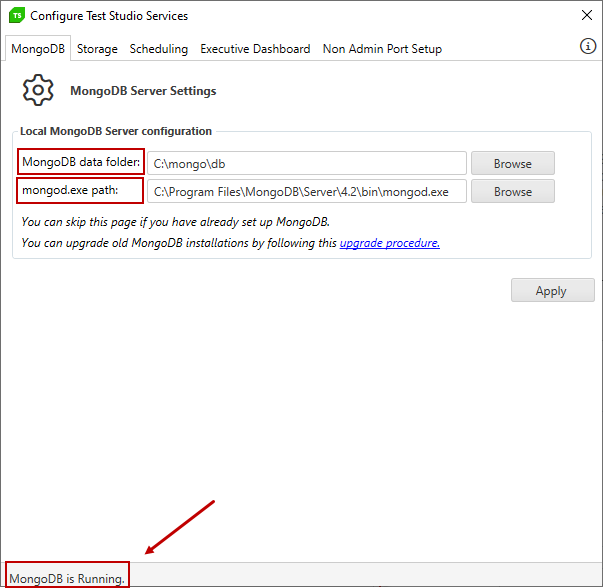
The MongoDB tab contains the details required for the MongoDB database, which is used as a storage database in the Scheduling configuration.
The MongoDB data path and mongod.exe path fields are populated with the values for a default MongoDB installation, so you need to change these, only if the MongoDB installation was modified.
Hit the Apply button and confirm the 'MongoDB is running' status appears in the lower left corner of the wizard.
Storage Tab
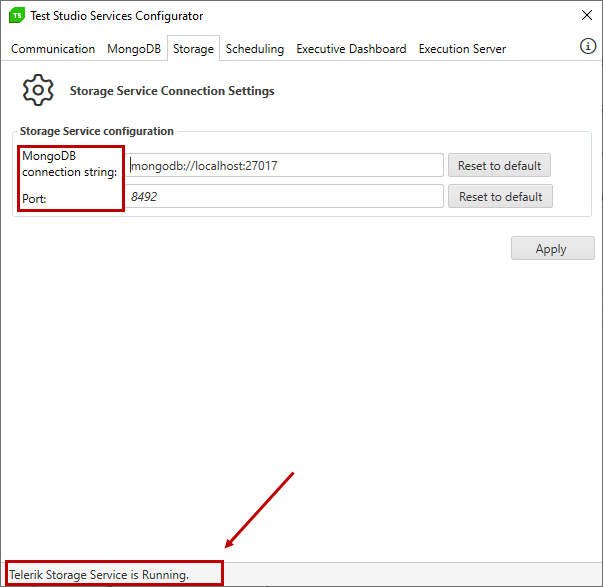
The Storage tab displays the connection details used from Test Studio Storage Service to access the MongoDB. The listed MongoDB connection string is the default connection string to be used for MongoDB database and is the only valid connection option for the Storage service.
Hit the Apply button and check the 'Telerik Storage Service is started' status appears in the lower left corner of the wizard.
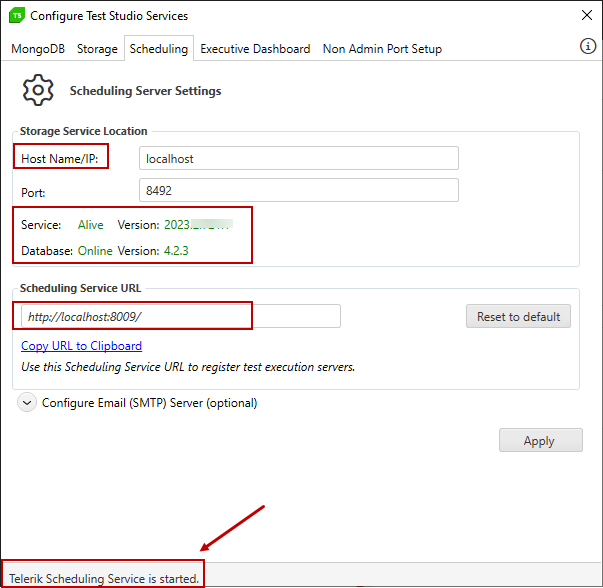
Scheduling Tab
The Scheduling tab contains information about the location of the Test Studio Storage and Scheduling services. The default populated values are pointing to the local machine - localhost.
For this particular configuration, these can remain unchanged and you can hit the Apply button. This starts the scheduling service which is indicated with a message in the lower left corner of the wizard stating 'Telerik Scheduling Service is running'.
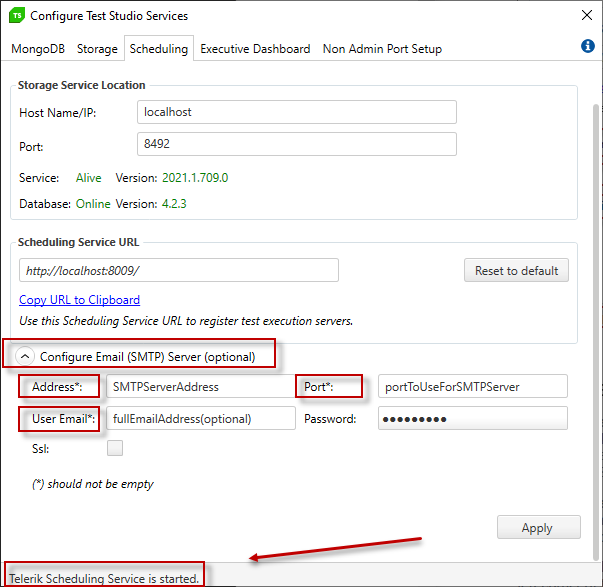
Automatic Email for Scheduled Test Lists
Optionally, you can configure the Test Studio Scheduling service to use an Email (SMTP) server by specifying few additional details. These settings allow you to send an automatic email with the results of a scheduled test list.
The SMTP server settings are listed in the expandable section Configure Email (SMTP) server in the Scheduling tab. Mandatory fields are the 'SMTP server address' and the 'Port' to communicate with it, and the 'User Email', who sends the email. Depending on the SMTP server configuration, the 'Password' field and 'Ssl' checkbox may not be explicitly required.
Once the necessary data is entered, hit the Apply button to reflect the changes to the Scheduling service and check if the status 'Telerik Scheduling Service is running' appears in the lower left corner of the wizard.
Note
If you are using an Outlook account with two-factor authentication enabled, you need to use an Application password created for the SMTP configuration. See the response in this Microsoft forum post for further details.
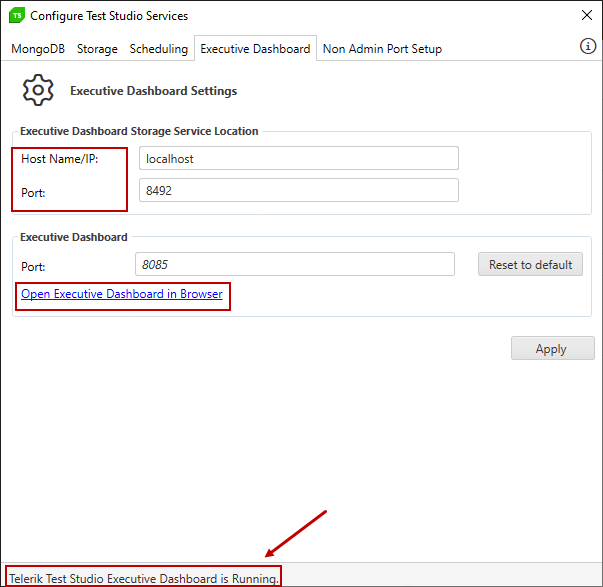
Executive Dashboard Tab
The Executive Dashboard tab contains information about the Storage service location used to get scheduled results from, and links the URL on which the Dashboard is hosted. The default populated values point to the local machine - localhost.
For this particular configuration, these can remain unchanged and you can hit the Apply button. This will start the Executive Dashboard service - you will see a message in the lower left corner of the wizard stating 'Telerik Test Studio Executive Dashboard Service is running'.
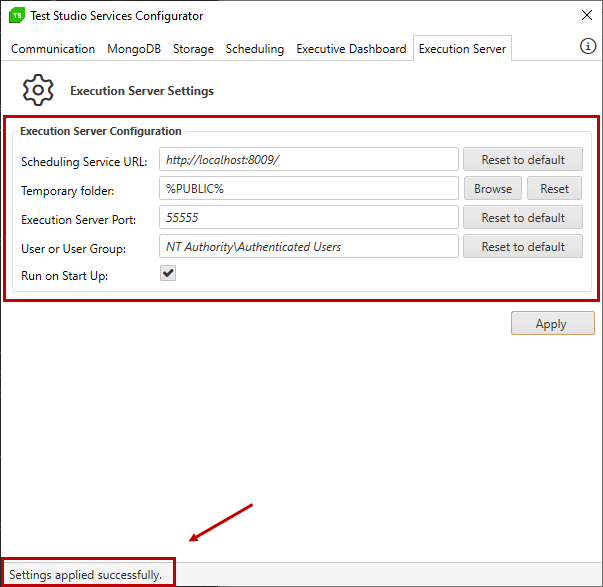
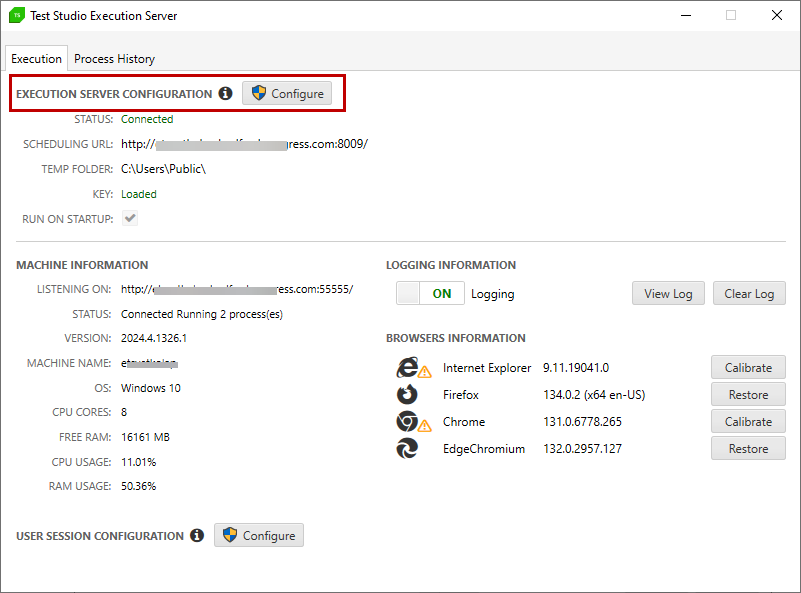
Execution Server Tab
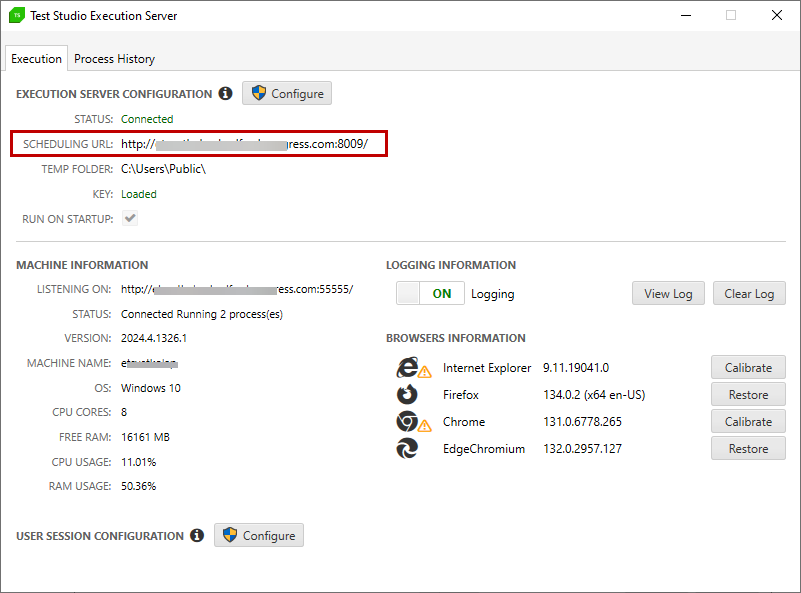
The Execution Server tab contains information for the configuration settings of the Execution client application. In this tab you can change the Scheduling URL to which the Execution client is connected, the port and temp folder it uses, and whether to run it on startup.
The default populated values point to the local machine Scheduling service - localhost using the port 55555. Hit the Apply button to apply any changes - wait until you see a message in the lower left corner of the wizard stating 'Changes applied successfully'.
Configure the Execution Client
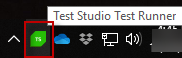
Open the Test Studio Test Runner from the System Tray (it is started with Test Studio, or automatically on startup of the system, if the respective option is set).
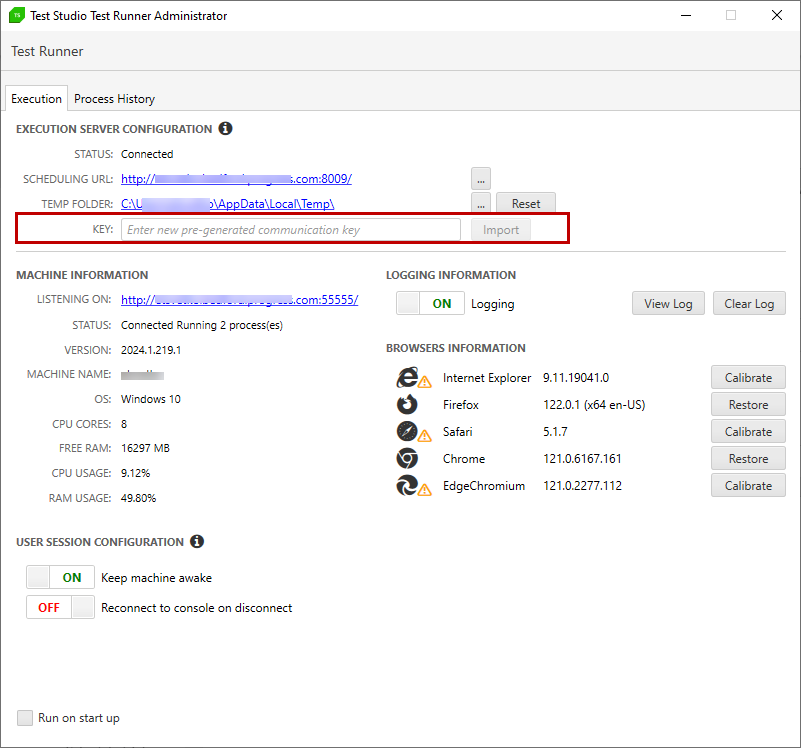
Use the Configure button If you need to change anything in the configuration of the Execution Server. It opens up the Scheduling config wizard on its Execution Server tab.
Ensure the Scheduling URL points to the local machine - localhost will be resolved to the absolute name of the machine.
The communication Key is required to establish the connection and to enable the communication to the Scheduling server. A key is generated in the Scheduling Config wizard and if it's not matching on both the Scheduler and Execution machines, the connection between these is not possible.
Note
See here step-by-step instructions on updating the communication key.
Setting Up a Project for Remote Scheduled Runs
Open the Test Studio project which contains the test list to schedule for unattended execution and click the Connect button from the Scheduling ribbon in the Project tab.

In the Scheduling Server Settings dialog, choose Remote radio button to connect the project to the configured Scheduling server. Enter the Scheduling machine name or, for the current setup, use localhost and click the Connect button.
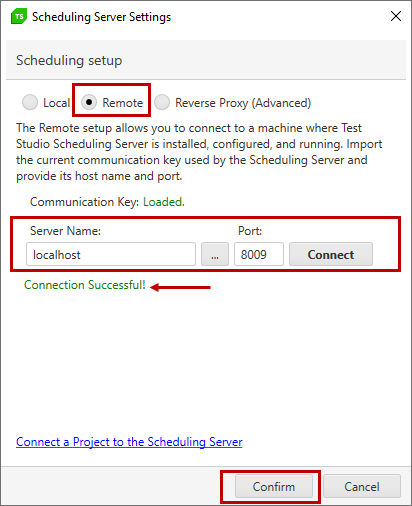
A confirmation message appears when the connection is successful. Confirm the connection by pressing the Confirm button in the dialog.
Schedule a Test List
Schedule Test List execution in the Test Lists view. You will be able to choose between the connected Execution machines.
View Results of Remote Scheduled Run
View Scheduling Results after the scheduled test list run is finished.