Generate New Communication Key
The Communication Key is required by all Test Studio Scheduling components - services and clients, to establish the connection and communicate between each other. You can get the current key or generate a new one in the Scheduling Config wizard.
- Manage the Communication Key
- Generate and Import Key in Single Machine Scheduling Setup
- Generate and Import Key in Multiple Machines Scheduling Setup
Manage the Communication Key
Find useful details on the available options to manage the Communication key value.
Default Communication Key
The Communication tab in the Scheduling Config wizard lets you manage the current key in use or generate and import a new one.
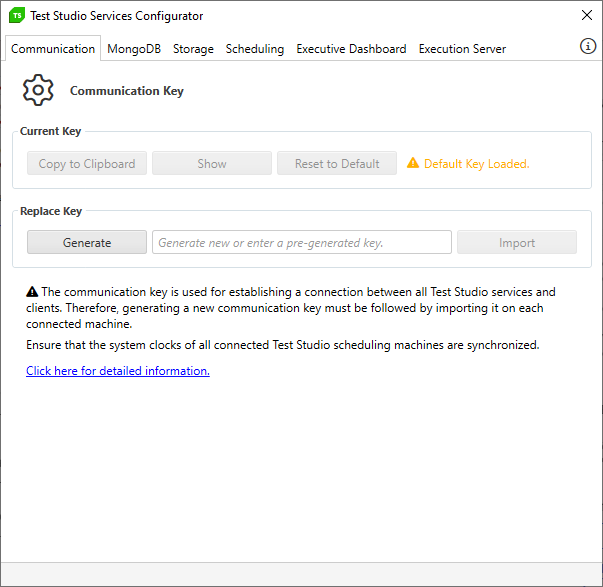
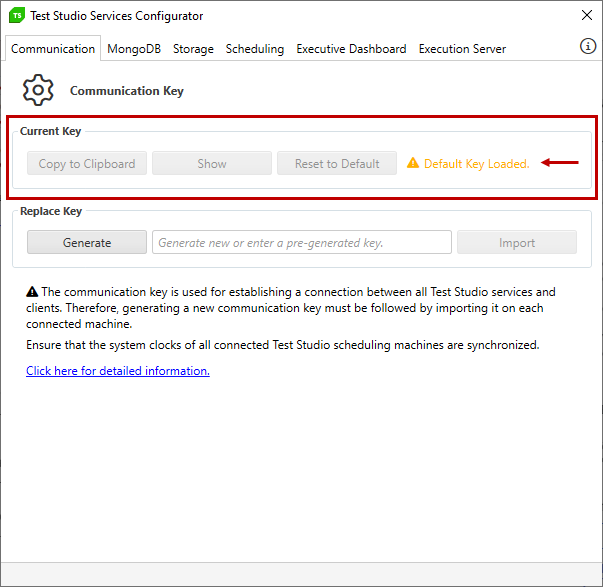
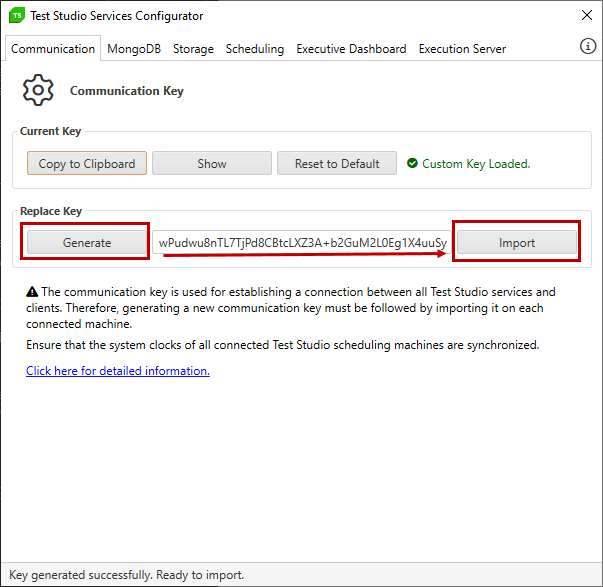
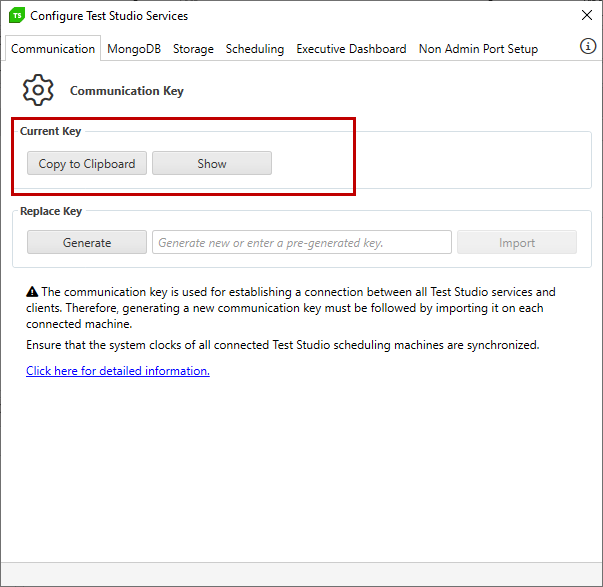
The Current Key section indicates which is the key in use. The Scheduling setup is configured to use a default communication key for each Test Studio installation. Thus, after initial install you see the current key is the Default Key Loaded. In this configuration you can't copy or see the key.
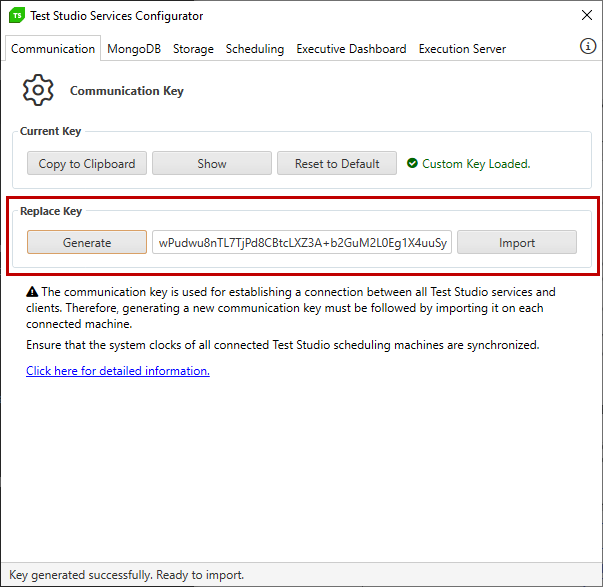
Generate New Key
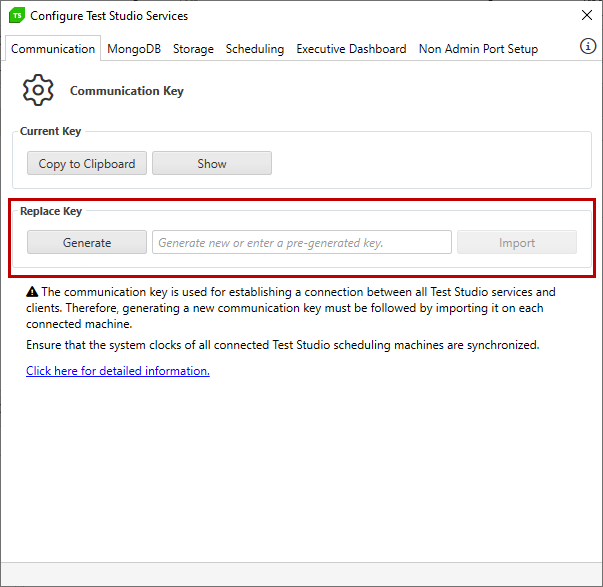
The Replace Key section lets you Generate a new key. Once generated, the new value is populated in the text field and is ready to be imported. Hit the Import button to replace the current key with the new one.
Note
Importing a new key in the Scheduling Config wizard restarts the Scheduling service on that same machine to apply the new value.
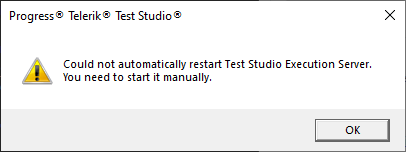
The Execution Client application is stopped but you need to start it manually. If Test Studio application is also running on the same machine at the time of renewing the communication key, it is not automatically restarted. To apply the recent changes you need to restart the standalone Test Studio app manually.
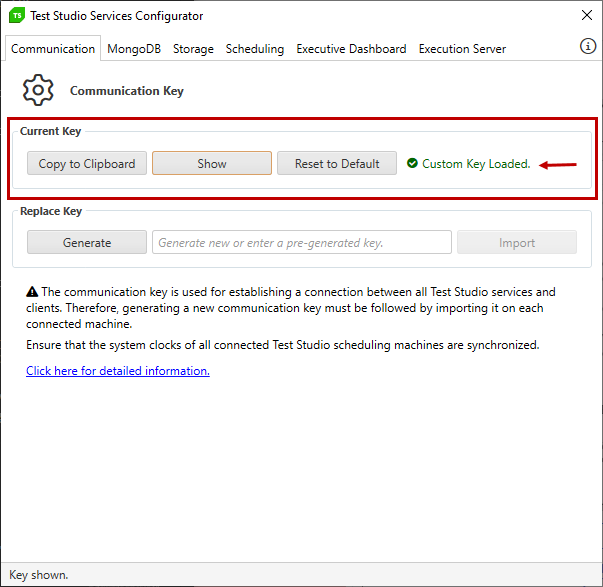
Copy Current Key
Once a custom key is generated and imported, the Current Key section allows you to copy the value of the key using the Copy to Clipboard button, or see it using the Show button (for the cases when copying is not an option). The key value can be reset to the default value using the Reset to Default button.
Important!
The copied key must be imported on all machines included in the Test Studio Scheduling setup.
Note
The communication key is set per machine. This means that importing a key on one machine lets all other components on the same machine to use it. If you see any troubles with the imported key on a machine, be sure to restart all Test Studio processes.
Generate and Import Key in Single Machine Scheduling Setup
Once you generate a new key, hit the Import button to replace the current key in use for the Scheduling service. This triggers restart of the service to take the new key and restart of the Execution client application.
In the setup where all components of the Scheduling configuration are on the same machine, you only need to restart all Test Studio processes to ensure the new key is imported. Follow the below steps:
- Open the Scheduling config wizard.
- Switch to the Communication tab and generate new communication key.
-
Hit the Import button and wait for a while.
The Scheduling service is restarted in the background.
-
The Execution client application from the system tray is restarted.
Note! You may see a message that the Execution server app is closed and you need to start it manually.
Restart Test Studio standalone application.
- Continue with connecting the project to the Scheduler and scheduling test lists.
Generate and Import Key in Multiple Machines Scheduling Setup
Once you generate a new key, hit the Import button to replace the current key in use for the Scheduling service. This triggers restart of the service to take the new key and restart of the Execution client application on that same machine.
In the setup where all components of the Scheduling configuration are on different machines, you need to import the new key on each machine. Follow the below steps:
- Open the Scheduling config wizard on the machine where the Scheduling service is.
- In the Communicaion tab generate new communication key.
-
Hit the Import button and wait for a while.
The Scheduling service is restarted in the background.
-
The Execution client application from the system tray on this machine is restarted.
Note! You may see a message that the Execution server app is closed and you need to start it manually.
-
On this same machine copy the new key value from the Current Key section in the Scheduling config wizard->Communication tab. Be sure to safely distribute the key as per your local security policies.
Logon to each of the machine utilized as Execution servers in the Scheduling setup.
- Start the Test Studio Services configuration wizard.
-
Switch to the Communication tab and use the copied key from the Scheduling machine (Step 6. in this list) to import it. Be sure to safely distribute the key as per your local security policies.
Hit the Import button and wait for a while.
-
If running the Execution client application from the system tray is restarted.
Note! You may see a message that the Execution server app is closed and you need to start it manually.
If the machine with the project is a separate machine repeat steps 8. to 10. also for it. If Test Studio application is running while importing the new key be sure to restart it.
- Continue with connecting the project to the Scheduler and scheduling test lists.