.NET MAUI Map Shapes Styling
The Map ShapefileLayer
exposes ShapeStyle
property which helps you to style the shapes, as well as the selected shapes using the SelectedShapeStyle
proeprty. A conditional styling is applied using the ShapeStyleSelector
proeprty.
Shapes Styles
ShapeStyle
and SelectedShapeStyle
properties of type( MapShapeStyle
) provides the following styling options for the shapes:
StrokeWidth
StrokeColor
FillColor
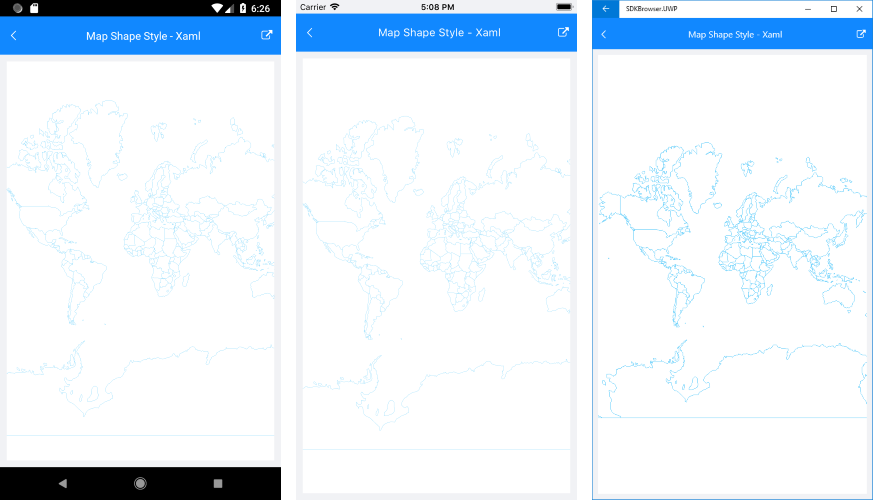
The snippet below shows how ShapeStyle property can be applied:
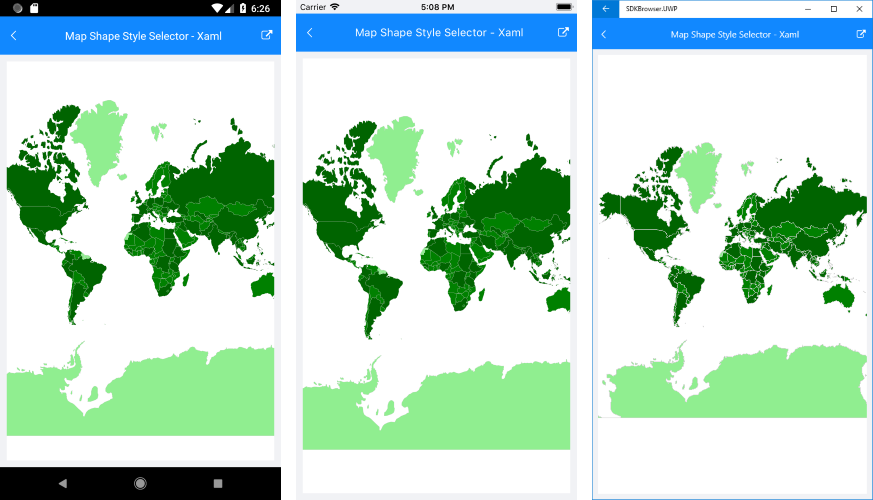
<telerik:RadMap x:Name="map">
<telerik:RadMap.Layers>
<telerik:ShapefileLayer>
<telerik:ShapefileLayer.Reader>
<telerik:MapShapeReader x:Name="reader"/>
</telerik:ShapefileLayer.Reader>
<telerik:ShapefileLayer.ShapeStyle>
<telerik:MapShapeStyle FillColor="White"
StrokeColor="#7BD5FB"/>
</telerik:ShapefileLayer.ShapeStyle>
</telerik:ShapefileLayer>
</telerik:RadMap.Layers>
</telerik:RadMap>
Here is the result:
where the Source
and the DataSource
of the MapShapeReader should be set to a .shp and .dbf files, respectively:
var assembly = this.GetType().Assembly;
var source = MapSource.FromResource("SDKBrowserMaui.Examples.MapControl.world.shp", assembly);
this.reader.Source = source;
Style Selector for Shapes
Using the ShapeStyleSelector
property of the ShapefileLayer
you could implement conditional styling.
The example below shows how to apply different styles to shapes according to certain property value of each shape.
-
First, create the selector class which inherit from
MapShapeStyleSelector
:public class PopulationShapeStyleSelector : MapShapeStyleSelector { public MapShapeStyle HighPopulationShapeStyle { get; set; } public MapShapeStyle MediumPopulationShapeStyle { get; set; } public MapShapeStyle LowPopulationShapeStyle { get; set; } public override MapShapeStyle SelectStyle(object shape, BindableObject container) { var attributesShape = shape as IShape; if (attributesShape != null) { var populationText = attributesShape.GetAttribute("POP_CNTRY").ToString(); int population; if (int.TryParse(populationText, out population)) { if (population > 20000000) { return this.HighPopulationShapeStyle; } else if (population < 1000000) { return this.LowPopulationShapeStyle; } return this.MediumPopulationShapeStyle; } } return null; } }
-
Define the selector with the Styles as a resource inside a ResourceDictionary:
<ResourceDictionary> <local:PopulationShapeStyleSelector x:Key="PopulationShapeStyleSelector"> <local:PopulationShapeStyleSelector.HighPopulationShapeStyle> <telerik:MapShapeStyle FillColor="DarkGreen" StrokeColor="LightGray"/> </local:PopulationShapeStyleSelector.HighPopulationShapeStyle> <local:PopulationShapeStyleSelector.MediumPopulationShapeStyle> <telerik:MapShapeStyle FillColor="Green" StrokeColor="LightGray"/> </local:PopulationShapeStyleSelector.MediumPopulationShapeStyle> <local:PopulationShapeStyleSelector.LowPopulationShapeStyle> <telerik:MapShapeStyle FillColor="LightGreen" StrokeColor="LightGray"/> </local:PopulationShapeStyleSelector.LowPopulationShapeStyle> </local:PopulationShapeStyleSelector> </ResourceDictionary>
-
Add the definition of the RadMap control with the PopulationShapeStyleSelector applied;
<telerik:RadMap x:Name="map"> <telerik:RadMap.Layers> <telerik:ShapefileLayer ShapeStyleSelector="{StaticResource PopulationShapeStyleSelector}"> <telerik:ShapefileLayer.Reader> <telerik:MapShapeReader x:Name="reader"/> </telerik:ShapefileLayer.Reader> </telerik:ShapefileLayer> </telerik:RadMap.Layers> </telerik:RadMap>
-
Add the namespace:
xmlns:telerik="http://schemas.telerik.com/2022/xaml/maui"
Check the result in the screenshot below: