Recording Specifics for Desktop Tests in Test Studio
Test Studio recording feature supports various desktop applications. Once a desktop test is configured for specific application you can start recording the automation scenarios.
This article guides you through the specifics of recording steps in a desktop test.
- Ready State for Desktop Recording
- Highlighting Menu
- Advanced Recording Tools
- Elements in Desktop Tests
Recording Ready State
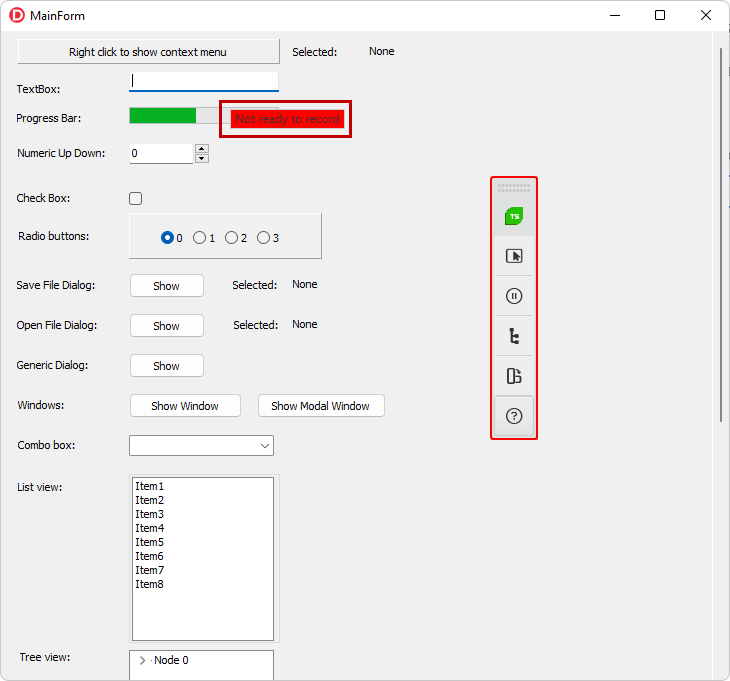
The recording of desktop tests can sometimes be relatively slower than recording web or WPF tests. To make sure that all actions are recorded properly and help you build robust tests Test Studio's recorder encompass a mechanism for element state detection. When an action is performed too early, before the element is ready for automation, the recorder indicates this with a red label stating 'Not ready to record'.
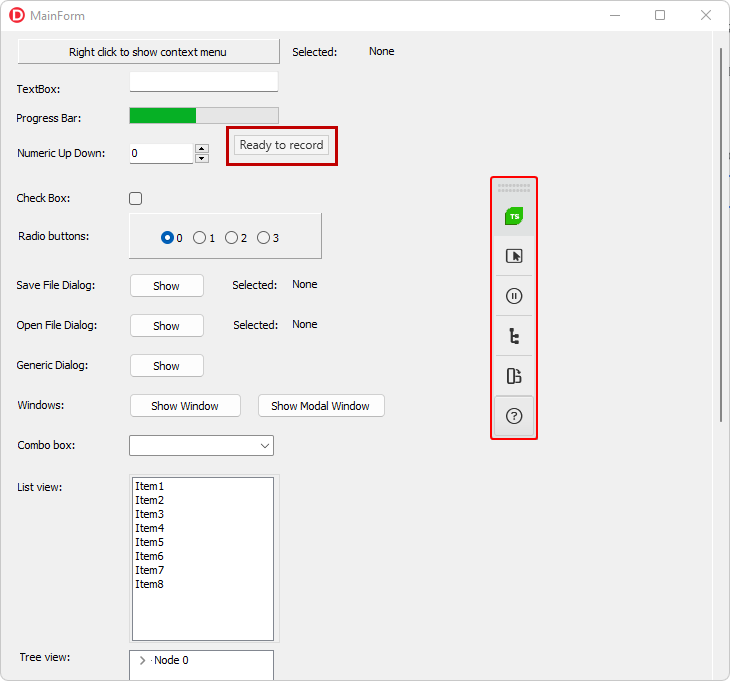
If you hold the mouse on an element for a while pops up another gray label stating 'Ready to record'.
Tip
Check this video tutorial for recording an end-to-end Desktop test scenario.
Highlighting Menu in Desktop Recording
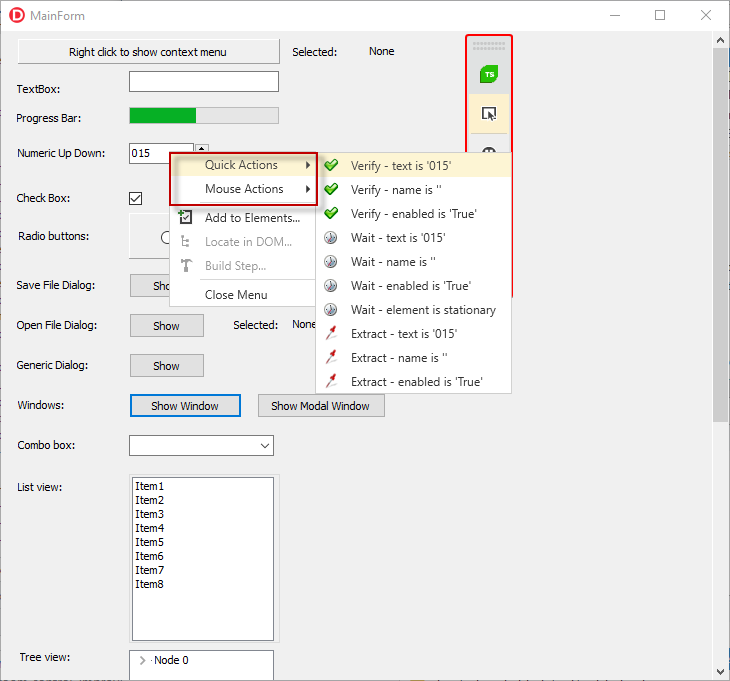
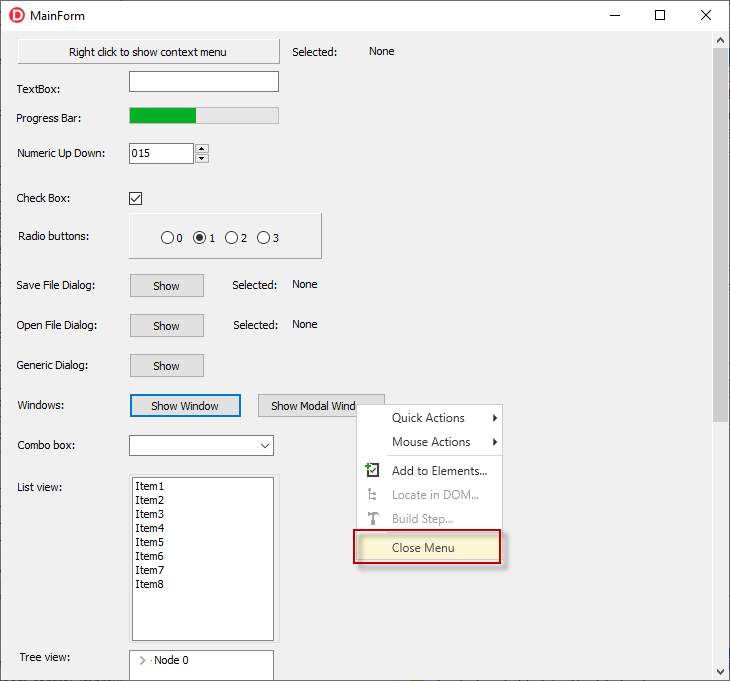
Highlighting is enabled from the Compact Recording Toolbar. The highlighting menu appears after you hold the mouse shortly over an element and allows you to add basic verification and action steps.
The highlighting menu lists additional options related to the highlighted element
- To add the target element to the Elements Explorer;
- Select the target element in the DOM Explorer in the Advanced Recording tools;
- Select the target element in the DOM Explorer and expose the options for adding steps for it.
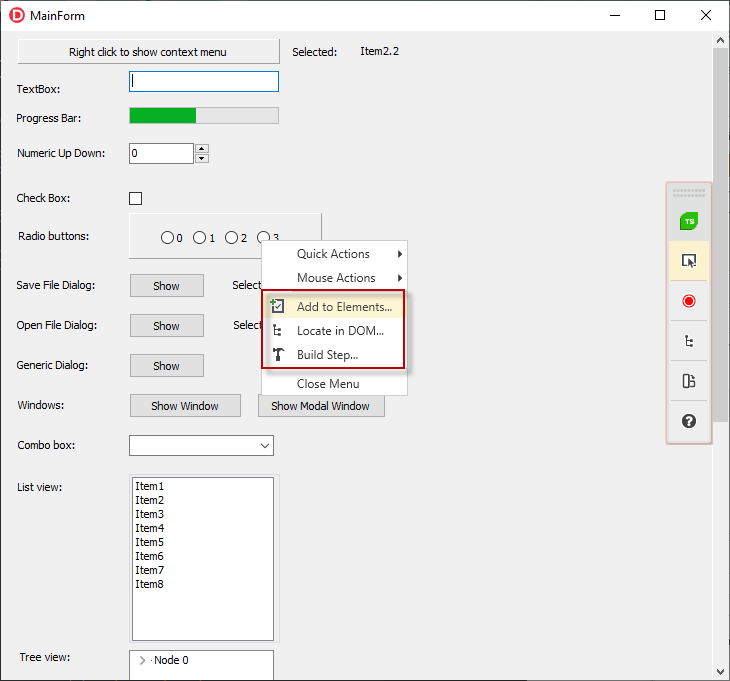
The highlighting menu in desktop applications may remain opened over part of the application you want to interact with. In such cases you can use the Close Menu option to hide it.
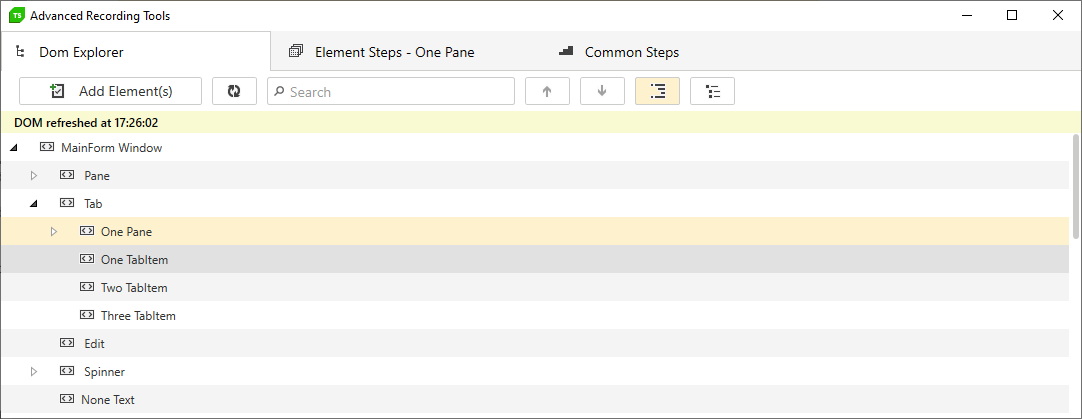
Advanced Recording Tools in Desktop Recording
The Advanced Recording Tools window provides all its functionalities in a recording session for desktop application - the DOM Explorer tab, the Elements Steps and Common Steps tabs.
Elements in Desktop Tests
The elements recorded in desktop applications have their own TechnologyType, which is called Desktop.
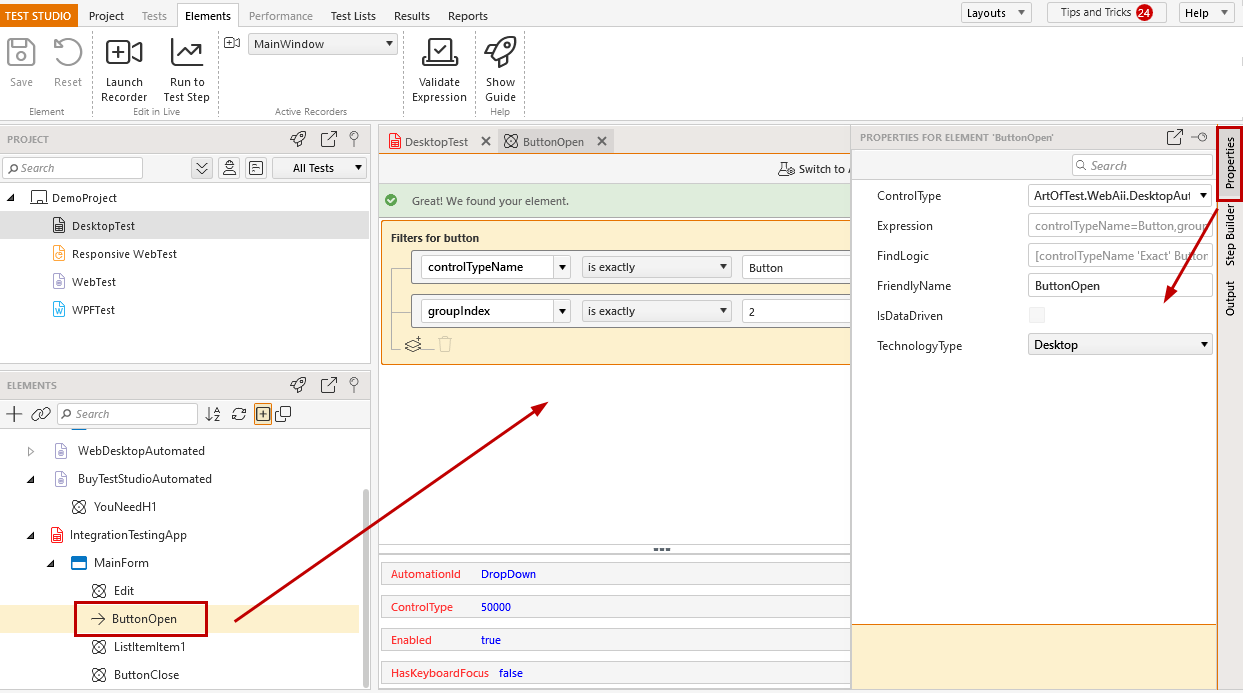
Test Studio automatically generates find expressions for the elements from the tested desktop application. It uses the Smart Find Logic setting for desktop elements to choose which attribute to use in generating the elements expressions.
Tip
The default set attribute for generating find expressions is 'ControlTypeName'. Depending on the tested desktop app specifics, you can choose to create elements using 'xPath' or 'ClassName' by changing the Smart Find Logic settings on project level.
Open an element in Edit mode during a live recording session to see the list of its attributes, which can be used in the find expression.
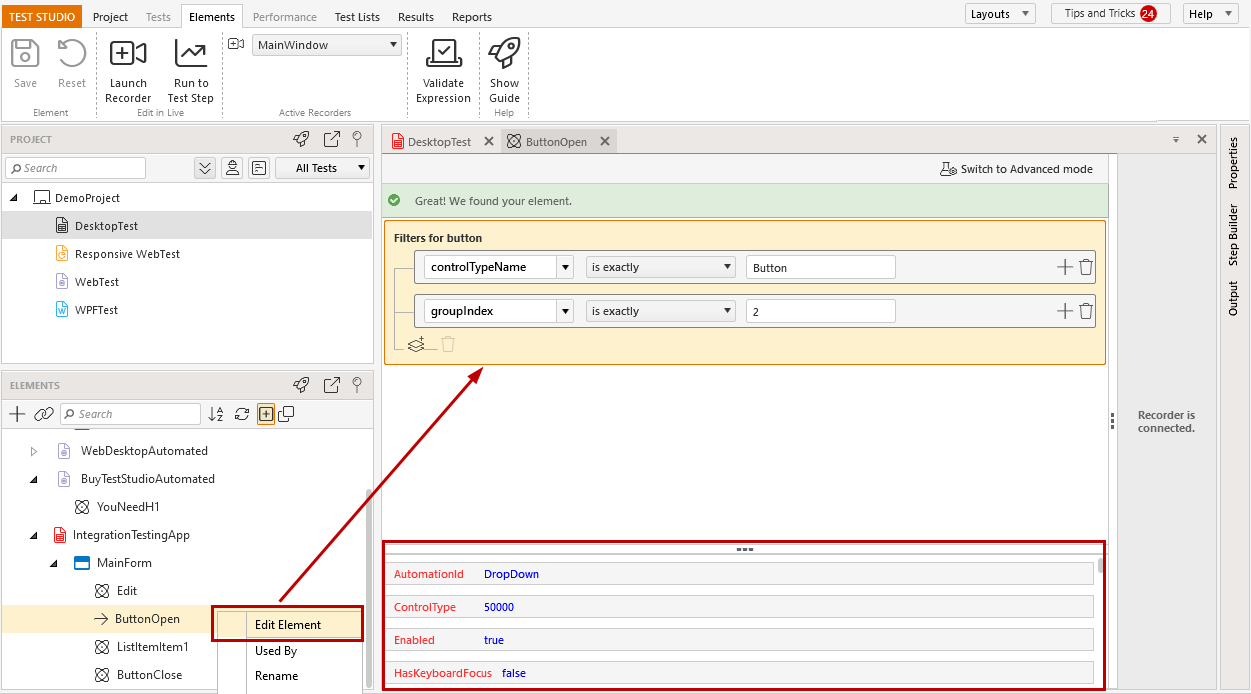
Tip
You can maintain the desktop elements also without active recording session although there will be no list of element properties. All options for adding steps offline through the Step Builder are applicable.