Getting Started with the Map Report Item
This guide shows how to add the Telerik Reporting Map report item to reports.
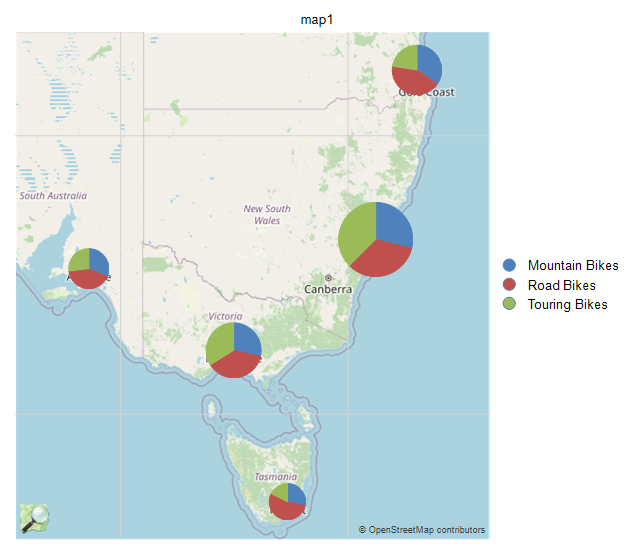
The suggested implementation demonstrates how to create a Map which will present the sales distribution by products among several states using the Adventure Works sample database and the Standalone Report Designer. The steps are valid for the Visual Studio Report Designer as well and can be reproduced with code too.
After the completion of this guide, you will be able to achieve the following result.
Prerequisites
- Obtain a valid Location Provider key to authenticate your geocoding requests.
- If you don't want to use a location provider, provide the geographical coordinates of your points yourself and set up the
MapSeriesaccordingly. For more information, refer to the article on location providers.
Adding the Map
-
(For new reports) Select the
Map Wizardicon from theAvailable Templatespage.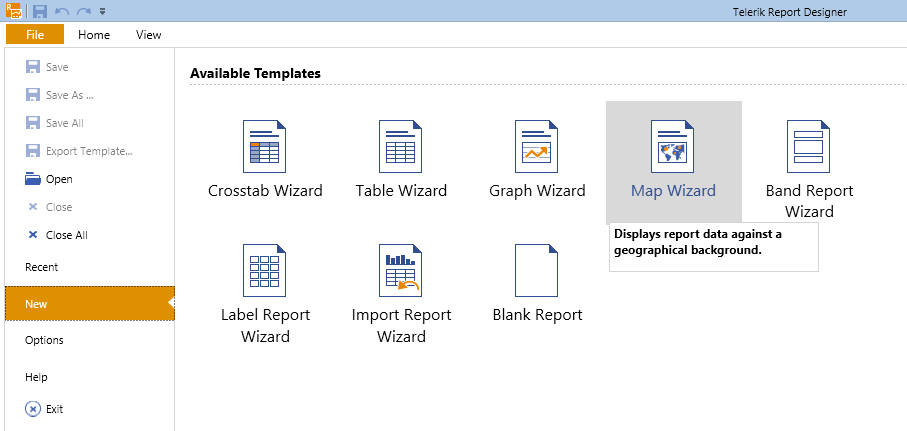
-
(For existing reports) Select the
Mapitem from theInsertmenu. This will start the Map Wizard which will guide you through the creation process.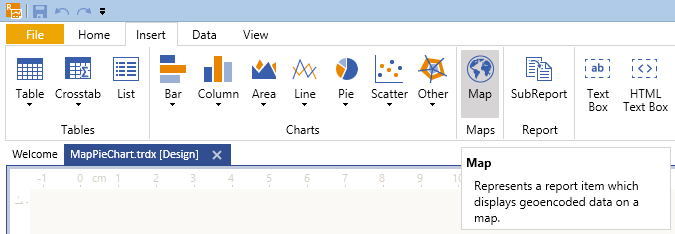
Adding the Data Source
On the Choose Data Source page, add a new SqlDataSource.
- Set the connection string to the demo AdventureWorks database.
-
Paste the following query in the Select Statement box:
SELECT
PS.Name AS ProductSubCategory,
SP.Name + ', ' + CR.Name AS State,
SOD.LineTotal as LineTotal
FROM

Production.Product AS P
INNER JOIN Production.ProductSubcategory AS PS ON P.ProductSubcategoryID = PS.ProductSubcategoryID
INNER JOIN Production.ProductCategory AS PC ON PS.ProductCategoryID = PC.ProductCategoryID
INNER JOIN Sales.SalesOrderDetail AS SOD ON P.ProductID = SOD.ProductID
INNER JOIN Sales.SalesOrderHeader AS SOH ON SOD.SalesOrderID = SOH.SalesOrderID
INNER JOIN Person.Address AS ADDR ON ADDR.AddressID = SOH.ShipToAddressID
INNER JOIN Person.StateProvince AS SP ON SP.StateProvinceID = ADDR.StateProvinceID
INNER JOIN Person.CountryRegion AS CR ON CR.CountryRegionCode = SP.CountryRegionCode

WHERE
CR.Name IN ('Australia')
AND DATEPART(YEAR, SOH.OrderDate) IN (2003, 2004)
AND PC.Name = 'Bikes'
Click
Execute Query...to check if everything is OK with the database connection.- Click
Finishwhen you are ready.
Building the Map Charts
- In the Available data sources list you will see the data source you've already created. Select it and click Next.
- On the next page, select the fields which will be used to build the Map charts. Since the map will use a location provider, you don't have to provide the Latitude and Longitude coordinates by yourself and you can leave these boxes empty. Define a location group which will set the geocoding string.
- From the Datapoints type box, select the Pie Chart radio button.
- Select the ProductSubCategory field and drag it to the Series (color) box.
- Select the State field and drag it to the Categories (location) box.
-
Select the LineTotal field and drag it to the Size box where it will be transformed to Sum(LineTotal).
Your Arrange map fields page will look similar to one in the following image:
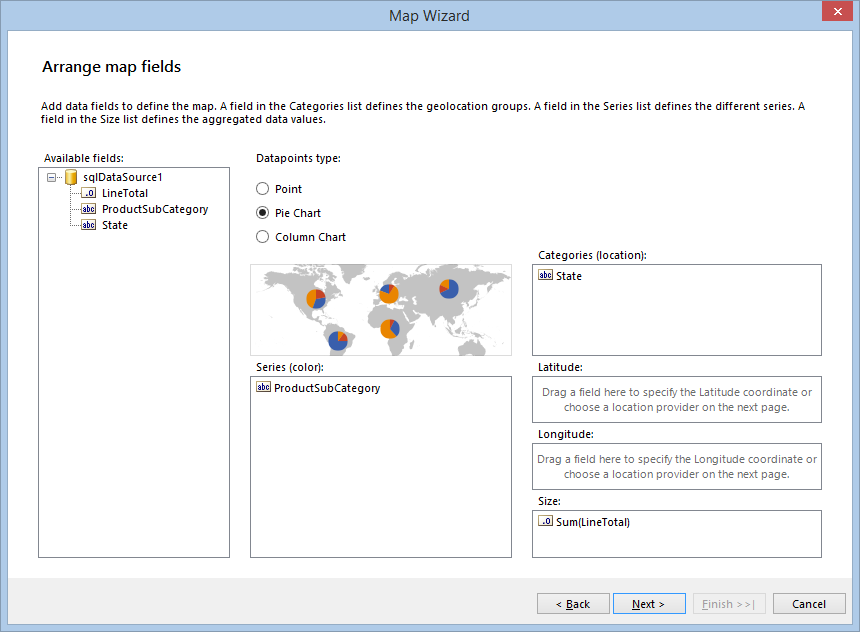
Once the mandatory fields are set up, the Next button will get enabled. Click it to go to the next page.
Defining the Location Provider
-
On the Choose a location provider page, select the location provider that will be used to geocode the State field that was dragged in the Categories (location) box on the previous page. Currently, the supported providers are
MapQuestOpenAPILocationProvider,MapQuestLocationProvider,BingLocationProvider, andAzureLocationProvider. They all require a valid client token (key) to authenticate the geocoding requests that will be sent from the Map item.Once you obtain the key, paste it in the Client token box:
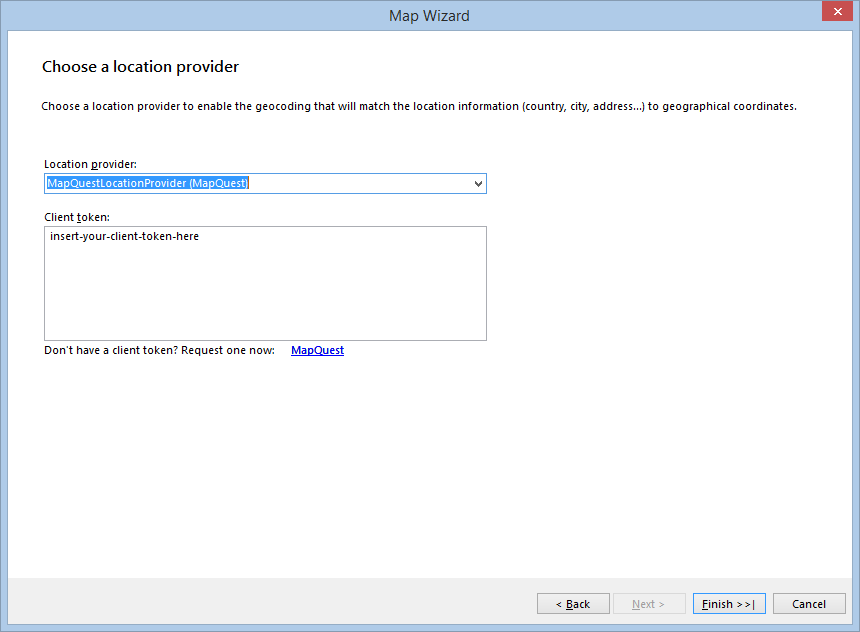
When you click Finish, the Wizard will create the definition of the Map item, show it in the designer, and start requesting the geocode and tiles information from the providers asynchronously. Initially, it will take a few seconds to fetch all the data from the geocoding service, but the following requests will be executed faster. The tiles, needed to prepare the Map background, will be displayed as they arrive, but the Map will stay responsive and you can examine and change its definition. When finished, your Map will look similar to the one shown in beginning of this tutorial.
You may download the demo report from our Reporting Samples GitHub repository - MapWithMapWizard.trdp.
Next Steps
- (Demo) Product Catalog Report with a Document Map
- Map Class API Reference
- Demo Page for Telerik Reporting
- Knowledge Base Section