Getting Started with WPF AIPrompt
This tutorial will walk you through the creation of a sample application that contains a RadAIPrompt control.
Adding Telerik Assemblies Using NuGet
To use RadAIPrompt when working with NuGet packages, install the Telerik.Windows.Controls.ConversationalUI.for.Wpf.Xaml package. The package name may vary slightly based on the Telerik dlls set - Xaml or NoXaml
Read more about NuGet installation in the Installing UI for WPF from NuGet Package article.
With the 2025 Q1 release, the Telerik UI for WPF has a new licensing mechanism. You can learn more about it here.
Adding Assembly References Manually
If you are not using NuGet packages, you can add a reference to the following assemblies:
- Telerik.Licensing.Runtime
- Telerik.Windows.Controls
- Telerik.Windows.Controls.ConversationalUI
- Telerik.Windows.Controls.Input
- Telerik.Windows.Controls.Navigation
- Telerik.Windows.Data
Defining the RadAIPrompt
You can add RadAIPrompt manually in XAML as demonstrated in the following example:
Defining the RadAIPrompt in XAML
<telerik:RadAIPrompt x:Name="aiPrompt">
</telerik:RadAIPrompt>
Items collection.
To learn more about the views, check this article.
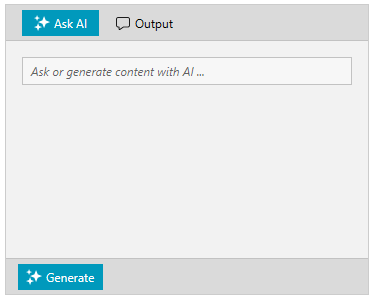
In this example, the input and output views will be added.
Adding the input and output views
<telerik:RadAIPrompt x:Name="aiPrompt">
    <telerik:RadAIPromptInputItem />
    <telerik:RadAIPromptOutputItem />
</telerik:RadAIPrompt>
Requesting a Response
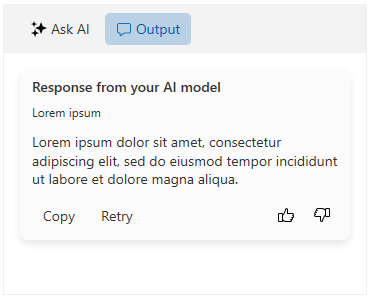
When the input button is clicked, the RadAIPrompt control will raise the PromptRequest event. In it, you can contact your AI model with the request. The PromptRequestEventArgs event arguments provide information about the input text and if the request is initiated to retry an already generated response. You can create a new AIPromptOutputItemModel instance and fill it with returned response from the AI model. Then, add it to the OutputItems collection of RadAIPrompt. This will create a new card in the RadAIPromptOutputItem view where you can interact with the response.
Subscribing to the PromptRequest event
<telerik:RadAIPrompt x:Name="aiPrompt" PromptRequest="OnPromptRequested">
    <telerik:RadAIPromptInputItem />
    <telerik:RadAIPromptOutputItem />
</telerik:RadAIPrompt>
Handling the PromptRequest event
private void OnPromptRequested(object sender, PromptRequestEventArgs e)
{
    RadAIPrompt radAIPrompt = (RadAIPrompt)sender;

    //You can pass the e.InputText property to your AI model, in order to receive a response.

    AIPromptOutputItemModel responseAIPromptOutputItemModel = new AIPromptOutputItemModel()
    {
        Title = "Response from your AI model",
        InputText = e.InputText,
        ResponseText = "Lorem ipsum dolor sit amet, consectetur adipiscing elit, sed do eiusmod tempor incididunt ut labore et dolore magna aliqua.", // Here you can set the string value returned from your AI model
    };

    radAIPrompt.OutputItems.Add(responseAIPromptOutputItemModel);
}
Setting a Theme
The controls from our suite support different themes. You can see how to apply a theme different than the default one in the Setting a Theme help article.
Changing the theme using implicit styles will affect all controls that have styles defined in the merged resource dictionaries. This is applicable only for the controls in the scope in which the resources are merged.
- Choose between the themes and add reference to the corresponding theme assembly (ex: Telerik.Windows.Themes.Fluent.dll). You can see the different themes applied in the Theming examples from our WPF Controls Examples application.
-
Merge the ResourceDictionaries with the namespace required for the controls that you are using from the theme assembly. For the RadAIPrompt, you will need to merge the following resources:
- Telerik.Windows.Controls
- Telerik.Windows.Controls.ConversationalUI
- Telerik.Windows.Controls.Input
- Telerik.Windows.Controls.Navigation
The following example demonstrates how to merge the ResourceDictionaries so that they are applied globally for the entire application.
Merge the ResourceDictionaries
<Application.Resources>
    <ResourceDictionary>
        <ResourceDictionary.MergedDictionaries>
            <ResourceDictionary Source="/Telerik.Windows.Themes.Fluent;component/Themes/System.Windows.xaml"/>
            <ResourceDictionary Source="/Telerik.Windows.Themes.Fluent;component/Themes/Telerik.Windows.Controls.xaml"/>
            <ResourceDictionary Source="/Telerik.Windows.Themes.Fluent;component/Themes/Telerik.Windows.Controls.ConversationalUI.xaml"/>
            <ResourceDictionary Source="/Telerik.Windows.Themes.Fluent;component/Themes/Telerik.Windows.Controls.Input.xaml"/>
            <ResourceDictionary Source="/Telerik.Windows.Themes.Fluent;component/Themes/Telerik.Windows.Controls.Navigation.xaml"/>
        </ResourceDictionary.MergedDictionaries>
    </ResourceDictionary>
</Application.Resources>
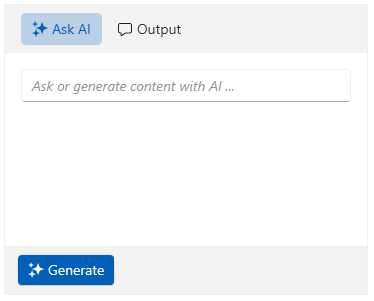
Alternatively, you can use the theme of the control via the StyleManager. The following image shows a RadAIPrompt with the Fluent theme applied.
RadAIPrompt with the Fluent theme