Exporting Icons from Figma
The ThemeBuilder plugin for Figma provides a wizard that allows you to quickly export SVG icons from the design. As a result, the developers can use them as font icons in ThemeBuilder.
You can draw and add your own SVG icons to the design document in Figma. The ThemeBuilder plugin for Figma allows you to export these icons as font icons and use them in ThemeBuilder. When you export SVG icons, the ThemeBuilder plugin for Figma converts them to font icons with specific Unicodes that you can use to reference the individual font icons in the application.
Starting with version 2024 Q4, the ThemeBuilder plugin for Figma is also available in Dev Mode.
Attention, Designers!
The icons export capability is provided by the Telerik and Kendo UI component libraries. To learn more about our unique approach to UI design, see the blog post Why Designers Should Care About Telerik and Kendo UI Component Libraries.
To export your icons from Figma:
To generate and export your font icons properly, follow the recommended structure for the icons design in Figma.
Launching the Export Icons Wizard
Open your design in Figma.
Go to the Main menu.
-
Hover over Plugins, then select Progress ThemeBuilder.
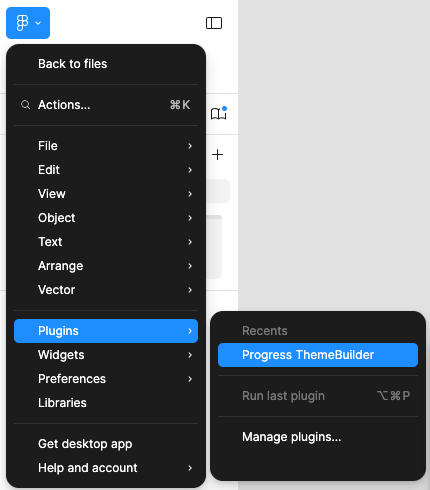
Log in with your Telerik account.
Select the Font Icons option from the plugin screen.

Selecting a ThemeBuilder Project
To export the icons, choose the ThemeBuilder project that will act as a container for them.
If you have no ThemeBuilder projects yet, go to the ThemeBuilder application and create a project. Skip this step if you already have a target project where you will export the icons.
On the Projects screen, select the ThemeBuilder project where you want these icons to be available for the developers, and then click the Select button.
Exporting the Icons
After you choose the target project, the plugin loads a list with all frames in your current Figma document.
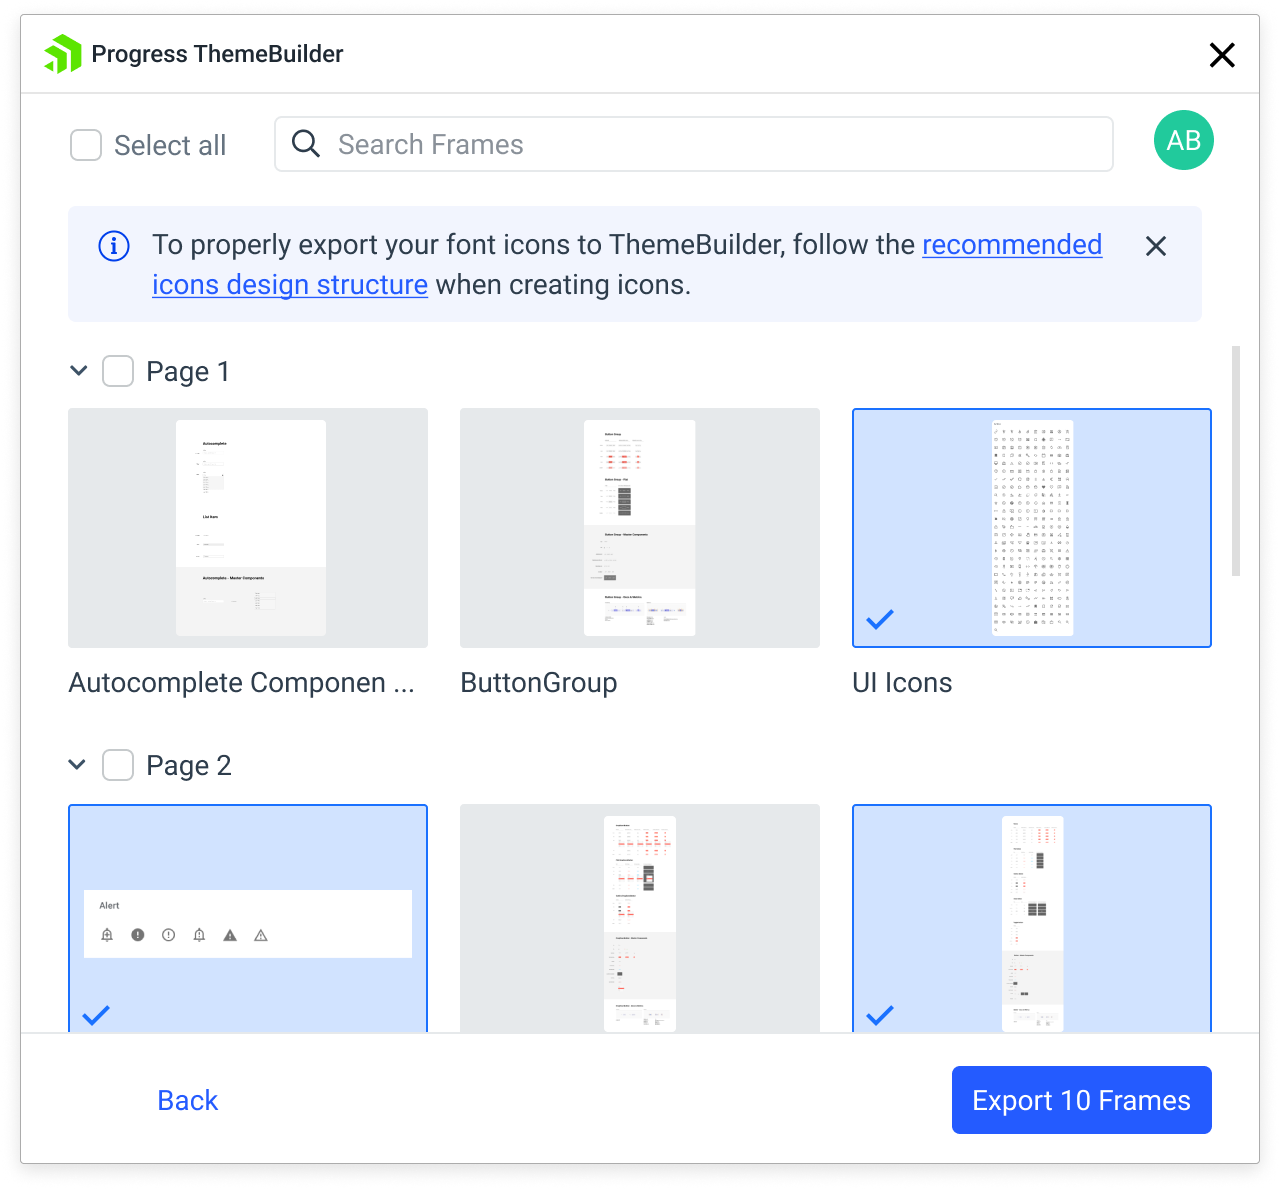
To export the icons:
-
Select the design frames that contain the desired icons
To export all icons from all frames in the design, use the Select all checkbox.
To export individual pages or frames, select only the desired pages.
Select Export Frames.
- To export frames from a file in Figma, you need
can editaccess to the file.- Hidden frames and frames with masks can't be exported. These frames are not available for preview in the export window.
Editing Already Exported Icons
If you have already exported icons to a particular ThemeBuilder project, you may need to edit them later. Editing already exported icons is a two-step process where you:
Apply all changes to the icons in your Figma document.
-
Export the changed icons to the same ThemeBuilder project that you have used previously. When exporting the icons, you have two options:
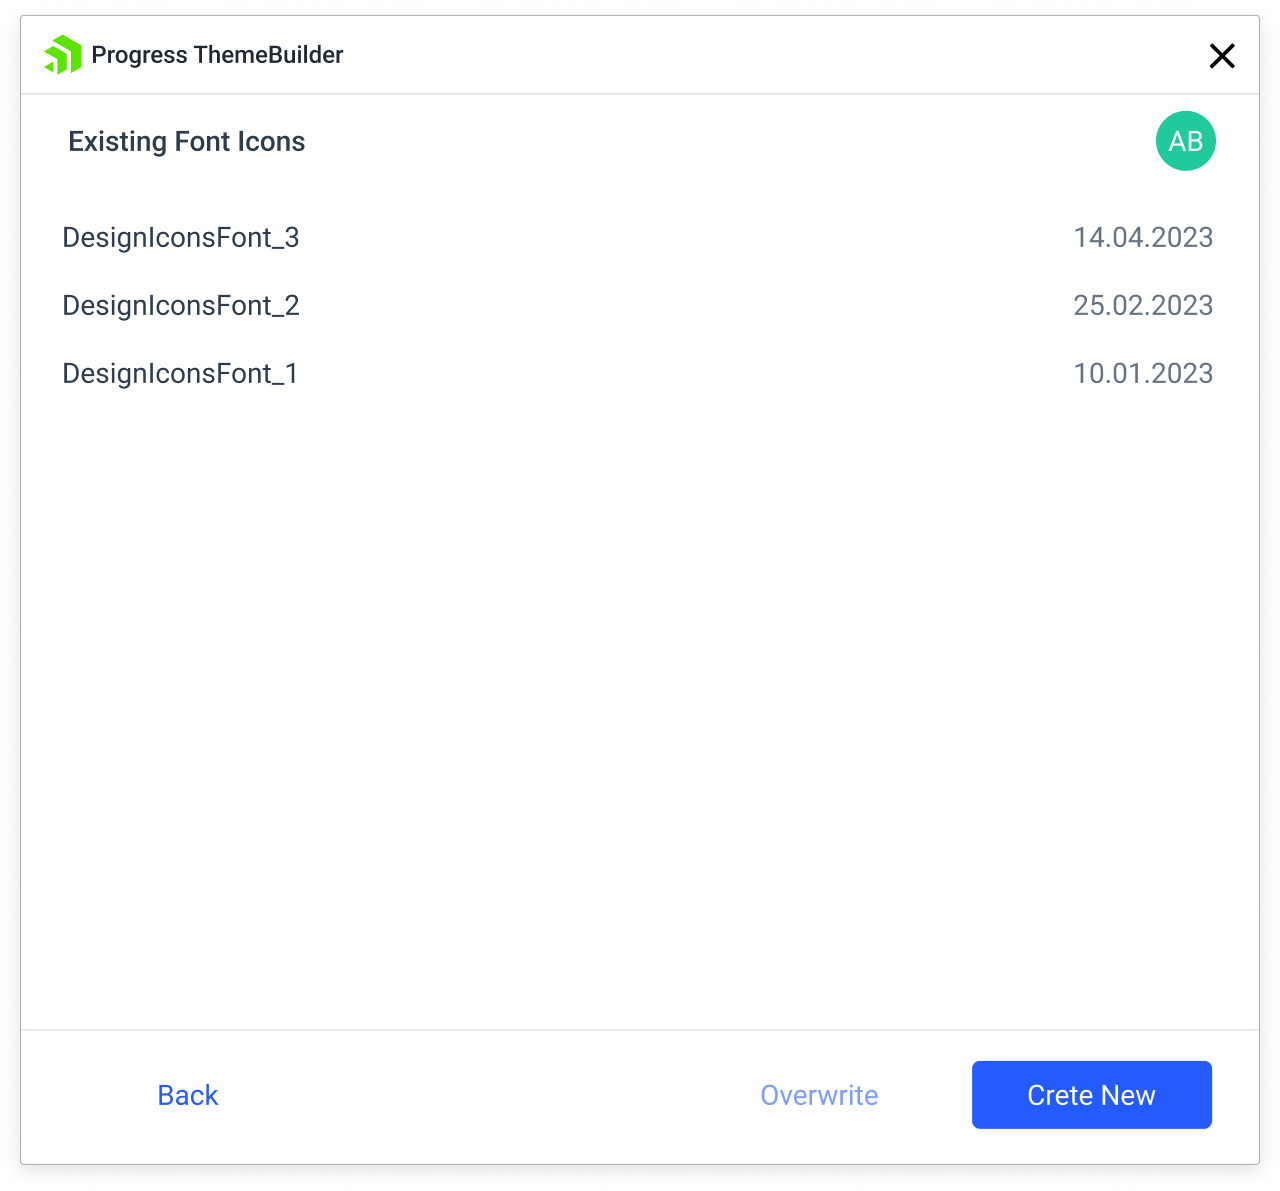
Overwriting the Existing Font Icons
- Launch the Export Icons wizard.
- Select the target ThemeBuilder project.
- Selected the frames with the icons that you want to export.
- From the list with all previously created fonts, select the existing font icons that will be overwritten.
- Select Overwrite.
Creating a New Icon Font
- Launch the Export Icons wizard.
- Select the target ThemeBuilder project.
- Selected the frames with the icons that you want to export.
- On the Existing Font Icons screen, select Create New.