Exporting Color and Number Variables
The ThemeBuilder plugin for Figma allows you to export color and number variables to any ThemeBuilder project. Once exported, these variables will be available for use within ThemeBuilder, enabling you to customize both Telerik and Kendo UI components, as well as any custom components you create.
Starting with version 2024 Q4, the ThemeBuilder plugin for Figma is also available in Dev Mode.
To export the desired variables:
- Launch the Export Variables Wizard.
- Select a ThemeBuilder project.
- Select the variables for the export.
- Generate names for the ThemeBuilder variables.
- Map the variable modes.
Step 1: Launch the Export Variables Wizard
Open your design in Figma.
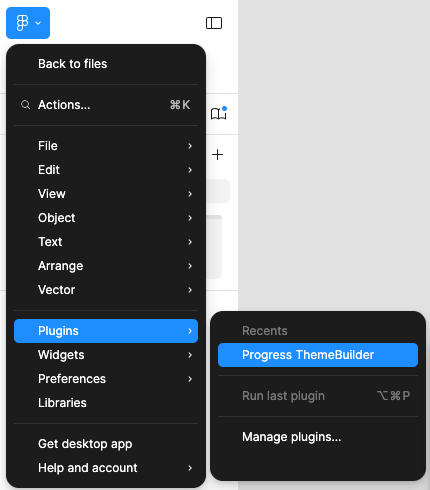
Go to the Main menu.
-
Hover over Plugins, then select Progress ThemeBuilder.
Log in with your Telerik account.
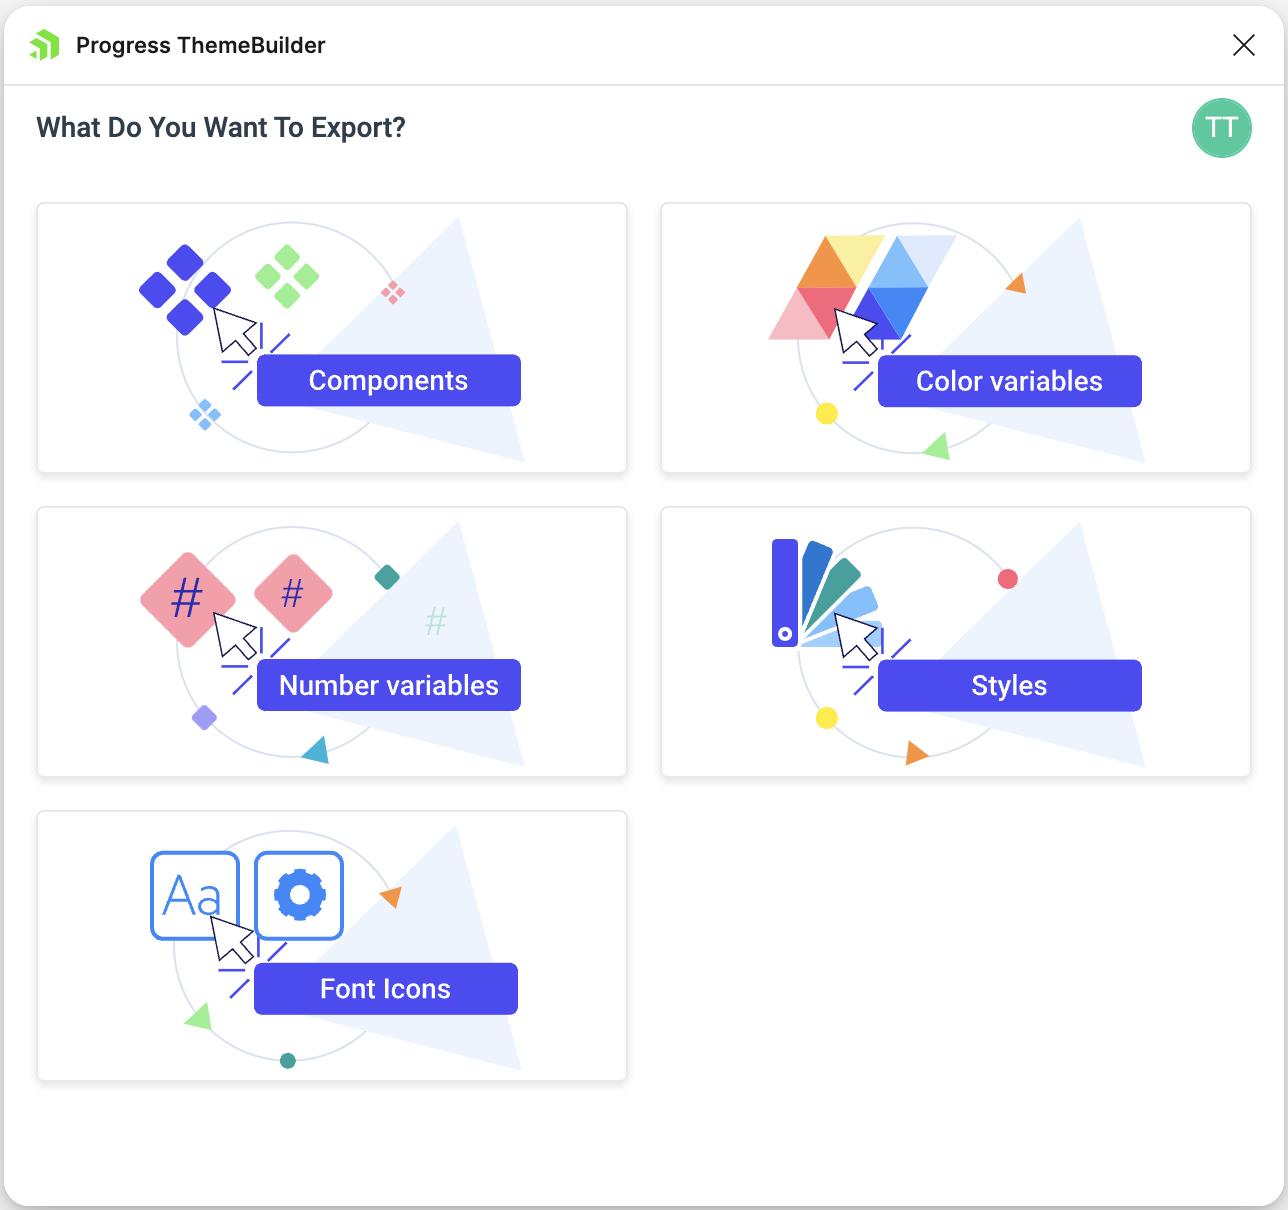
Select the Color Variables or Number Variables option from the plugin screen based on your needs.
Step 2: Select a ThemeBuilder Project
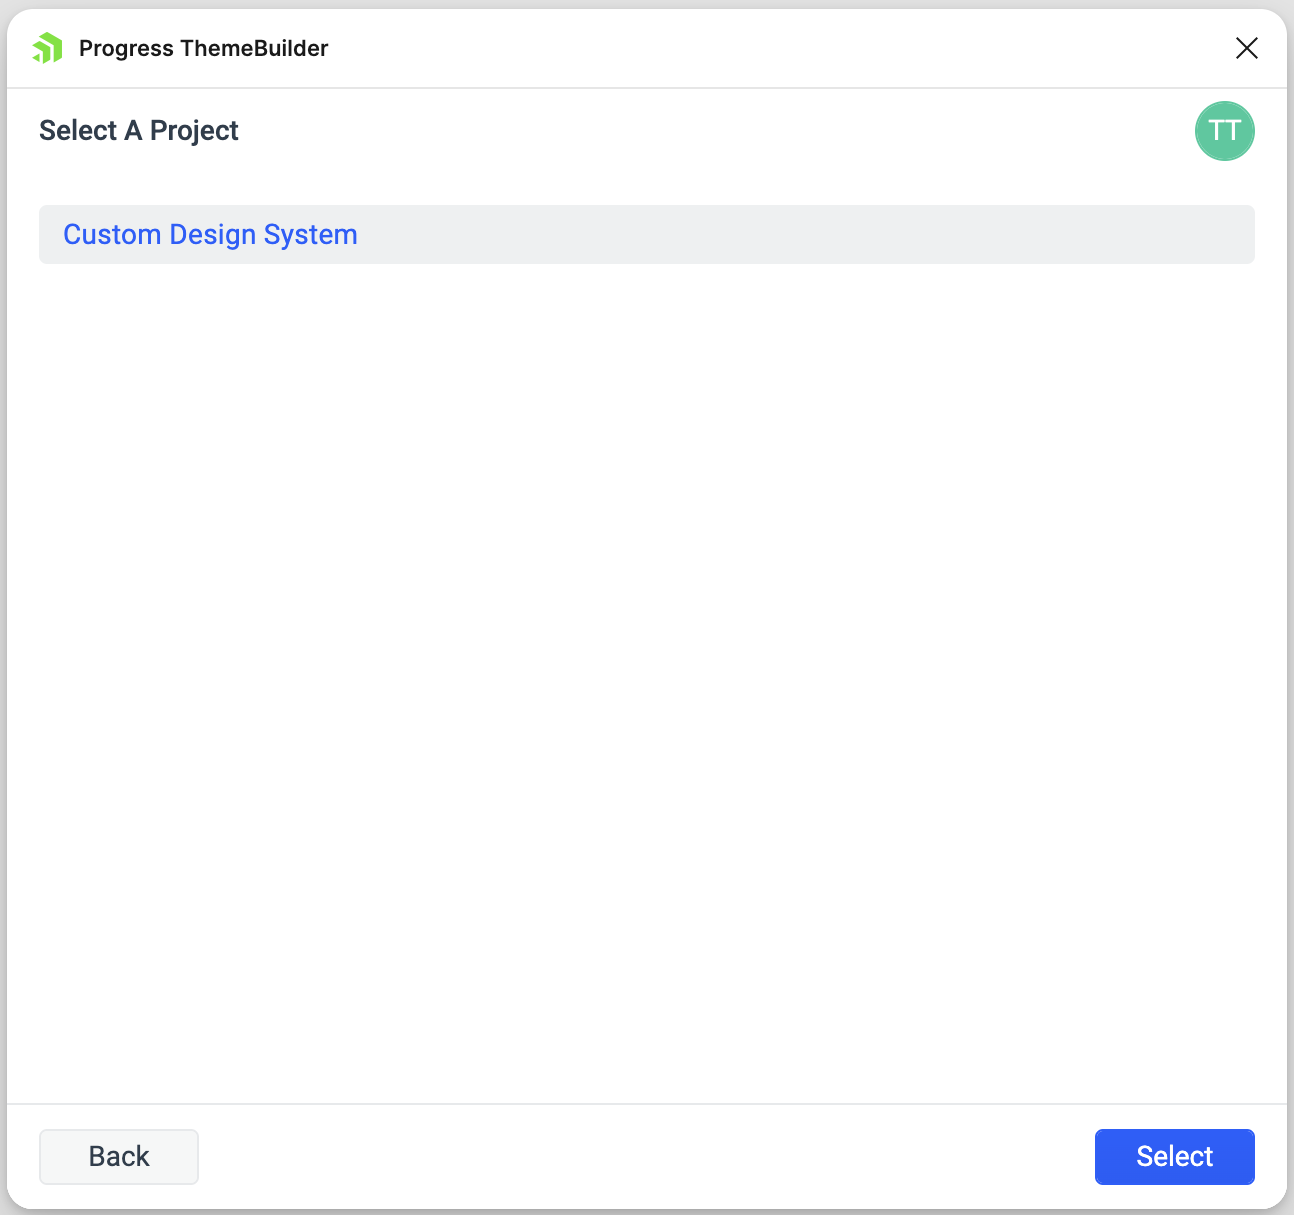
To begin using the Export Variables Wizard, you first need to select a ThemeBuilder project where you want to export the variables. If you haven't created any ThemeBuilder projects yet, you can do so by following the instructions in Creating a New ThemeBuilder Project. If you already have existing projects, choose one from the ThemeBuilder Projects screen and then click Select.
Step 3: Select the Variables for the Export
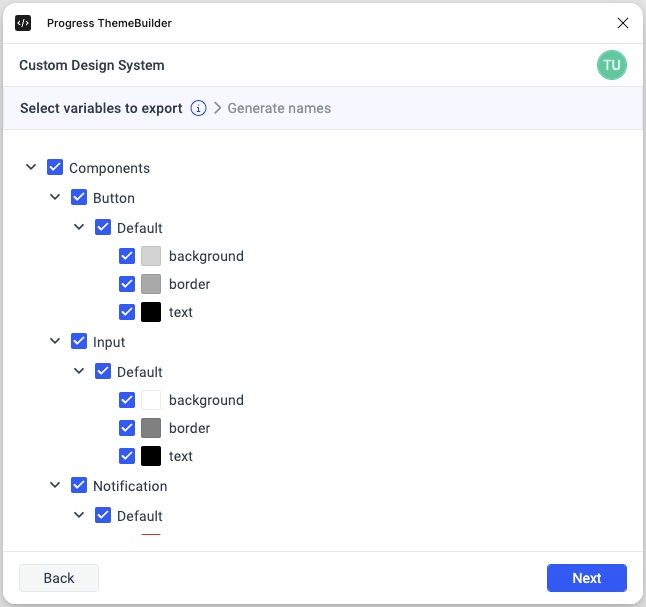
Once you select a project, the plugin shows a tree structure of the color or number variables available in your current Figma document. To export the variables you want, check them and then click Next.
Consider the following when exporting color and number variables from Figma:
If you export to a project with existing variables, the plugin will list only the new or the updated ones.
Some variables may be linked by other variables. Selecting or deselecting these variables also selects or deselects their dependent variables.
Currently, the Figma API does not allow plugins to access libraries in Figma projects. As a result, the ThemeBuilder plugin is unable to export variables from files that are used as libraries in another project. However, you can export these variables by using the plugin's export functionality directly within the relevant files.
Step 4: Generate Names for the ThemeBuilder Variables
Variables in Figma can have complex paths because they may belong to nested groups. For example, a variable might be categorized as Colors/Components/Input/Default/Validation/info. When exporting these variables, you can choose the names under which they will be imported into ThemeBuilder.
To generate names for the ThemeBuilder variables, select the chips corresponding to the collection and groups you want to include. They will be appended as prefixes to the name of the variable.
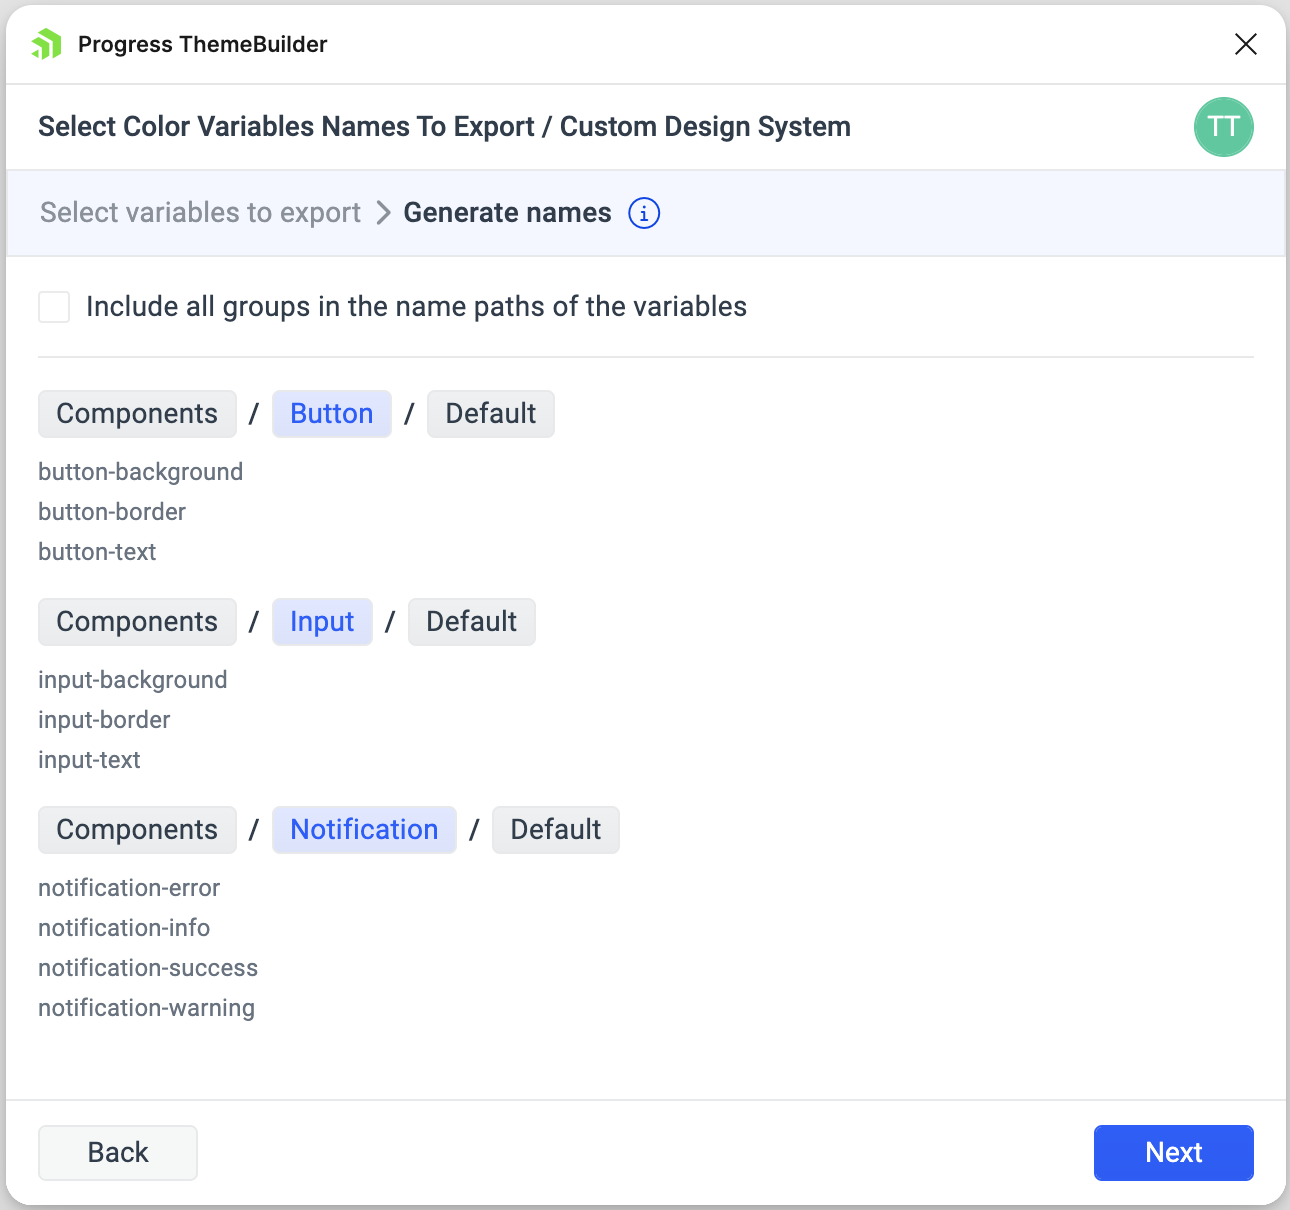
Resolving Name Conflicts
If the chosen naming scheme leads to conflicts due to some variables sharing the same name, you will see a warning icon next to the affected variable group. To resolve the issue, use either of the following approaches:
- Add more elements to the names of the affected variables by selecting chips of additional groups in the path.
- Use the Auto Resolve button.
Step 5: Map the Variable Modes
A common practice in Figma is to use variable modes. Before exporting color or number variables that include modes, it's essential to map the Figma modes to the ThemeBuilder modes. Note that this mapping can only be done if you have previously created variable modes in Figma.
To map the Figma modes to the ThemeBuilder modes, follow these steps:
-
Review detected modes
The left column shows detected Figma modes grouped by collection. The right column shows ThemeBuilder project modes for the selected project.If your ThemeBuilder project currently has no modes, you will only see the Default mode in the ThemeBuilder modes column.
-
Map one or more Figma modes to a ThemeBuilder mode
Select a single Figma mode, then select a ThemeBuilder mode and click Map. Repeat this for each Figma mode you want to map. A ThemeBuilder mode can accumulate multiple Figma modes (many-to-one), but you must follow these rules:- One source per Figma mode — a single Figma mode may map to only one ThemeBuilder mode (no one-to-many).
- No mixing inside a collection — two different modes from the same Figma collection cannot map to the same ThemeBuilder mode.
- Collection coverage — for every Figma collection included in the export, at least one of its modes must be mapped to a ThemeBuilder mode; other modes may remain unmapped.
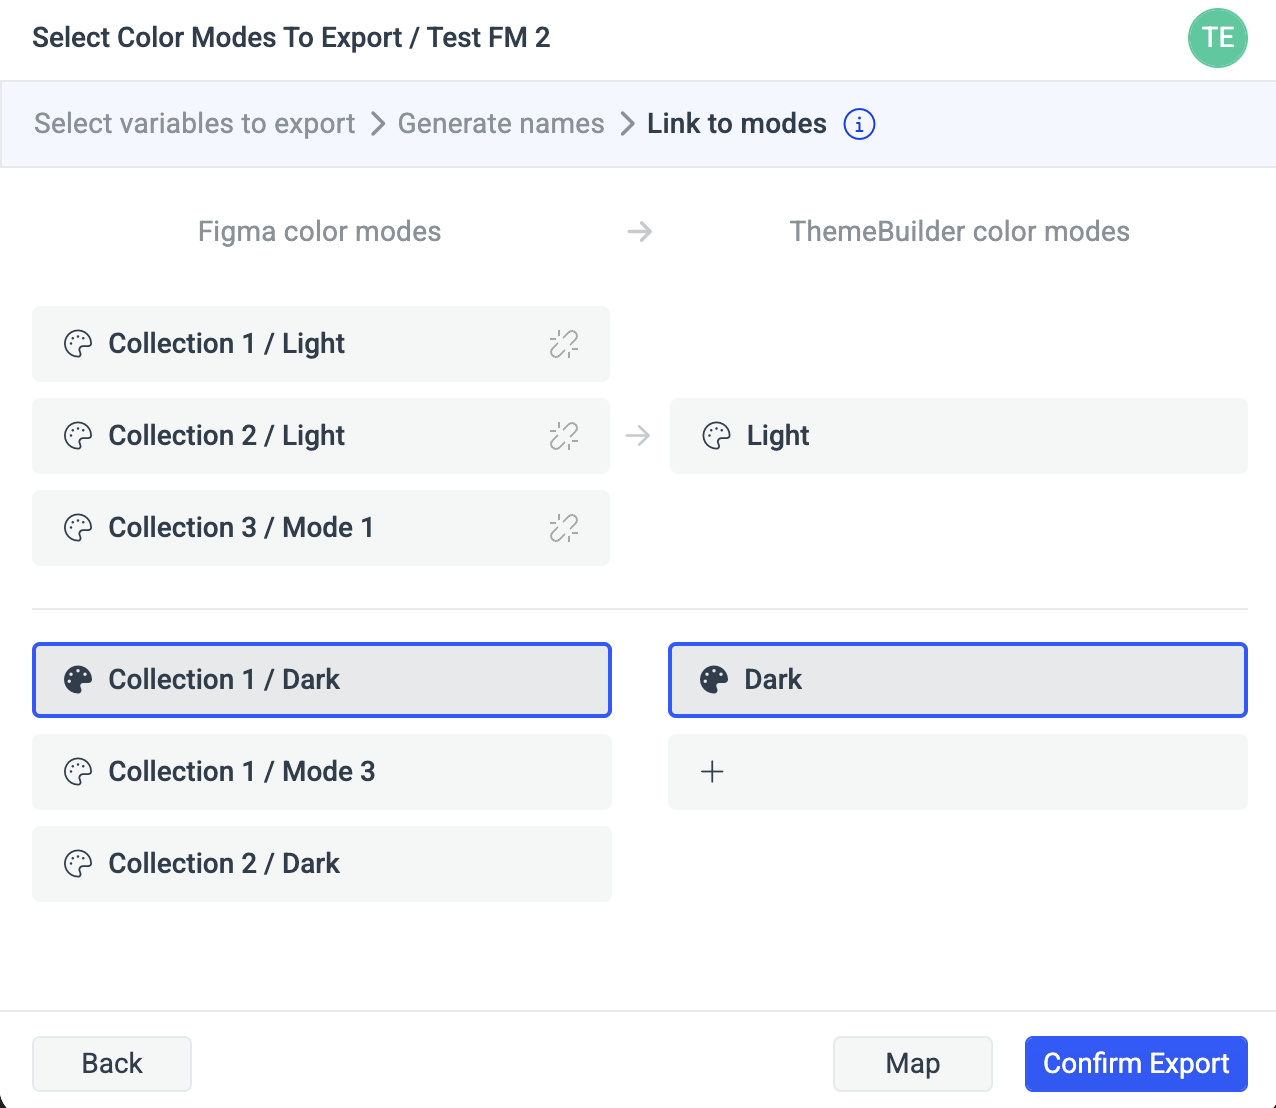
Click Confirm Export to export the variables.
Once exported, the variables appear under the Figma variable group in ThemeBuilder's THEME STYLES pane.
Using the Exported Variables
You can use the Figma variables imported in ThemeBuilder to customize the components by using one of these two approaches:
- Map the imported variables to your existing ThemeBuilder variables that are already used by the components.
- Apply the variables directly to specific properties of the components.
This is a one-time effort—afterward, every time you export variables from Figma to ThemeBuilder, the changes will take effect immediately if you have previously followed either of the approaches.
The imported ThemeBuilder are set as read-only to ensure consistent exporting as designers work on their project. This prevents issues that could arise if such modifications are allowed. For instance, if a developer makes changes to a variable through ThemeBuilder and the designer then unintentionally exports the same variable with a different value from Figma, the developer's modifications will be overwritten and lost.