TimeIndicators
RadScheduleView provides the option to visually mark a specific time on the timeline.
The time indicator is visualized with a straight line that goes across the timer ruler and appointments area of RadScheduleView. To add an indicator set the TimeIndicatorsCollection property of the control and populate it with TimeIndicator objects.
The TimeIndicator class allows you to set Offset and Location.
-
Offset is a
TimeSpanproperty which determines an offset relative to the current DateTime (DateTime.Now). -
Location is a
CurrentTimeIndicatorLocationproperty which determines the location of the indicator. This can be set to the following locations:- TimeRulerArea: The indicator is drawn only in the TimeRulerArea.
- AppointmentsArea: The indicator is drawn only in the AppointmentsArea.
- WholeArea: The indicator is drawn in both areas - TimeRulerArea and AppointmentsArea.
Example 1: Adding time indicators in XAML
<telerik:RadScheduleView AppointmentsSource="{Binding Appointments}">
    <telerik:RadScheduleView.ViewDefinitions>
        <telerik:DayViewDefinition />
    </telerik:RadScheduleView.ViewDefinitions>
    <telerik:RadScheduleView.TimeIndicatorsCollection>
        <telerik:TimeIndicatorsCollection>
            <telerik:TimeIndicator Location="WholeArea" />
            <telerik:TimeIndicator Offset="-02:15" Location="WholeArea" />
        </telerik:TimeIndicatorsCollection>
    </telerik:RadScheduleView.TimeIndicatorsCollection>
</telerik:RadScheduleView>
Example 2: Adding time indicators in code
var collection = new TimeIndicatorsCollection();
collection.Add(new TimeIndicator() { Location = CurrentTimeIndicatorLocation.WholeArea });
collection.Add(new TimeIndicator() { Location = CurrentTimeIndicatorLocation.WholeArea, Offset = new TimeSpan(-2, -15, 0) });
this.radScheduleView.TimeIndicatorsCollection = collection;
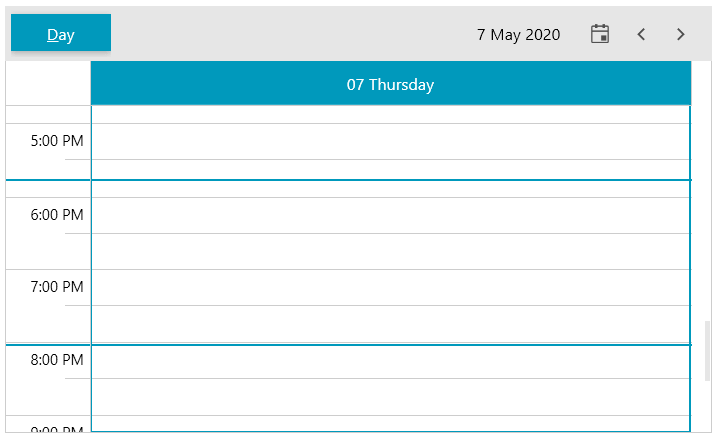
Figure 1: RadScheduleView with two time indicators

TimeIndicatorStyleSelector
The TimeIndicatorStyleSelector property of RadScheduleView is used to provide styles for the TimeIndicatorItem controls generated from the TimeIndicators in the TimeIndicatorsCollection.
The default TimeIndicatorStyleSelector class can be used to customize the time indicators in the different locations (TimeRulerArea, AppointmentsArea and WholeArea).
Additionally, a class that derives from StyleSelector can be created in order to provide custom style selection logic.
CurrentTimeIndicator
This a special time indicator that is not in the TimeIndicatorsCollection, but it is displayed in the same way, with the sole difference that it shows on the current DateTime (DateTime.Now). The offset of the TimeIndicator items is relative to the position of the current time indicator. Read more in the CurrentTimeIndicator article.
Custom TimeIndicator
The following example shows how to inherit the TimeIndicator class and override its GetDateTime method. This allows creating an indicator with a concrete date, instead of using an offset.
Example 3: Creating a custom TimeIndicator
public class CustomTimeIndicator : TimeIndicator
{
    public DateTime DateTime { get; set; }

    public override DateTime GetDateTime()
    {
        return this.DateTime;
    }
}
Example 4: Using the custom TimeIndicator
<telerik:RadScheduleView.TimeIndicatorsCollection>
    <telerik:TimeIndicatorsCollection>
        <local:CustomTimeIndicator DateTime="5/7/2020 16:15" />
    </telerik:TimeIndicatorsCollection>
</telerik:RadScheduleView.TimeIndicatorsCollection>