Data Fields
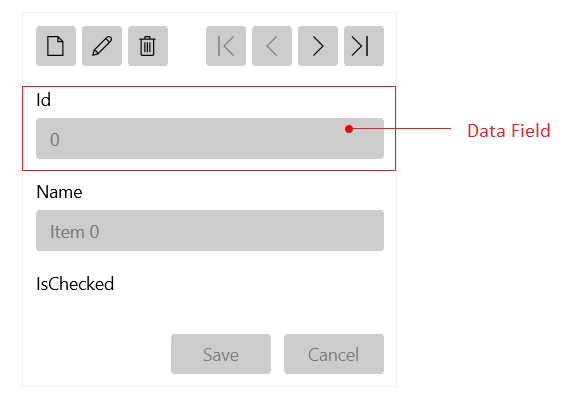
The data fields of the DataForm are the rows representing the properties of the underlying data object.
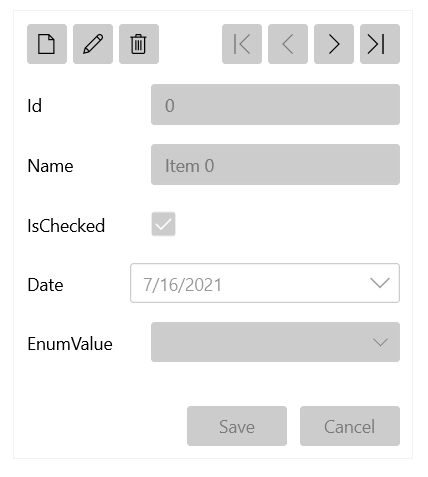
A data field is auto-generated for each property in the current data item and contains a label showing the property name and an editor that allows the changing of the value. Based on the property data type, the proper data field type is created.

The DataForm supports the following types of data field implementations, which provide different editors.
-
DataFormDataField—Used for editingstringproperties. The editor is aTextBox. Any data type that doesn't have a dedicated editor will use this data field type. -
DataFormCheckBoxData—Used for editingboolproperties. The editor is aCheckBoxcontrol. -
DataFormComboBoxField—Used for editingenumvalues. The editor is aComboBoxpopulated with a collection containing all values from theenum. -
DataFormDateField—Used for editing properties of typeDateTime. The editor is aRadDateTimePicker.
Modifying Auto-Generated Data Fields
To access the auto-generated fields, you can use the AutoGeneratingField event. The event arguments provide access to the currently generated data field object, which can be adjusted accordingly to your needs.
Use the AutoGeneratingField Event
private void dataForm_AutoGeneratingField(object sender, Telerik.UI.Xaml.Controls.Data.DataForm.AutoGeneratingFieldEventArgs e)
{
    if (e.PropertyName == "FirstName")
    {
        e.DataField.Label = "First Name";
    }
}
Cancel property of the event arguments.
Cancel Data Field Creation
private void dataForm_AutoGeneratingField(object sender, Telerik.UI.Xaml.Controls.Data.DataForm.AutoGeneratingFieldEventArgs e)
{
    if (e.PropertyName == "FirstName")
    {
        e.Cancel = true;
    }
}
Defining Data Fields Manually
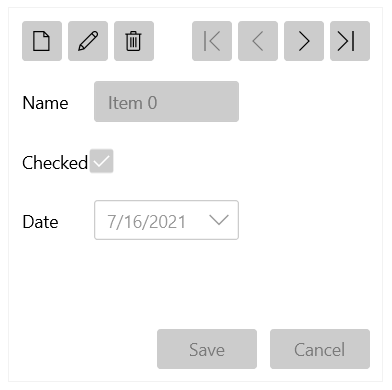
To gain more control over the created data fields, disable the auto-generation by setting the AutoGenerateFields property of the DataForm to false and define the data fields manually by using the ReadOnlyTemplate and EditTemplate properties to add the custom data field elements.
Manual Data Fields Definition
<telerik:RadDataForm AutoGenerateFields="False">
    <telerik:RadDataForm.ReadOnlyTemplate>
        <DataTemplate>
            <StackPanel>
                <telerik:DataFormDataField Label="Name" LabelPosition="Beside" IsReadOnly="True" DataMemberBinding="{Binding Name, Mode=TwoWay}" />
                <telerik:DataFormCheckBoxField Label="Checked" IsReadOnly="True" LabelPosition="Beside" DataMemberBinding="{Binding IsChecked, Mode=TwoWay}" />
                <telerik:DataFormDateField Label="Date" IsReadOnly="True" LabelPosition="Beside" DataMemberBinding="{Binding Date, Mode=TwoWay}" />
            </StackPanel>
        </DataTemplate>
    </telerik:RadDataForm.ReadOnlyTemplate>
    <telerik:RadDataForm.EditTemplate>
        <DataTemplate>
            <StackPanel>
                <telerik:DataFormDataField Label="Name" LabelPosition="Beside" DataMemberBinding="{Binding Name, Mode=TwoWay}" />
                <telerik:DataFormCheckBoxField Label="Is Checked" LabelPosition="Beside" DataMemberBinding="{Binding IsChecked, Mode=TwoWay}" />
                <telerik:DataFormDateField Label="Date" LabelPosition="Beside" DataMemberBinding="{Binding Date, Mode=TwoWay}" />
            </StackPanel>
        </DataTemplate>
    </telerik:RadDataForm.EditTemplate>
</telerik:RadDataForm>

The binding to the model property behind each field is created with the DataMemberBinding property of the data field.
To mark a data field as read-only, set its IsReadOnly property.
Setting Label Position
By default, the data field labels are positioned above the editor. To change their location , set the LabelPosition property of the DataFormDataField element to Beside.
Set the LabelPosition
<telerik:DataFormDataField DataMemberBinding="{Binding Name, Mode=TwoWay}" Label="Name" LabelPosition="Beside"/>

Showing Data-Field Description
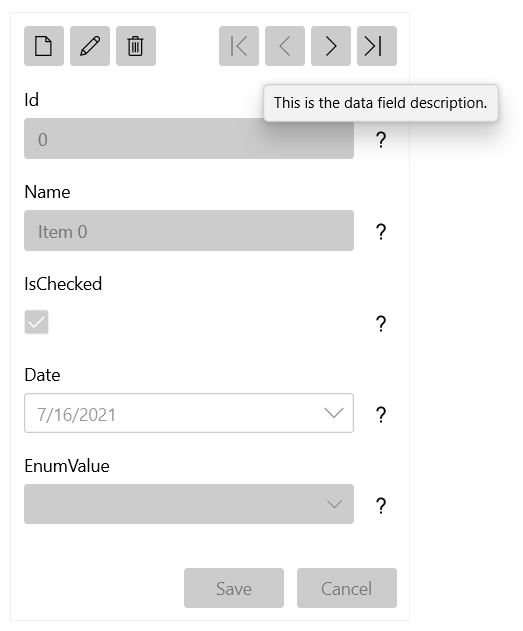
Each data field object exposes a Description property that is used to provide additional information about the property. The information is shown in a tooltip that appears on hovering over the question mark icon next to the data field editor.
Show the Description of a Data Field
<telerik:DataFormDataField DataMemberBinding="{Binding Name, Mode=TwoWay}" Description="This is the data field description."/>
