Getting Started with WinUI Barcode
This guide provides the information you need to start using the Telerik UI for WinUI Barcode by adding the component to your project.
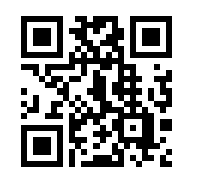
At the end, you will be able to achieve the following result.
Prerequisites
Before adding the Barcode, you need to:
-
Create your Telerik UI for WinUI application and install the Telerik UI for WinUI components depending on the required installation approach:
Add the Assembly References
To use the components from the Barcode suite in your projects, add references to Telerik.WinUI.Controls.dll and Telerik.Licensing.Runtime.dll.
Define the Component
The following example demonstrates how to use the QRCode symbology.
Define the Barcode
<Grid HorizontalAlignment="Center" VerticalAlignment="Center" xmlns:telerikDataViz="using:Telerik.UI.Xaml.Controls.DataVisualization">
    <telerikDataViz:RadBarcode Value="https://www.telerik.com/winui"  Height="200" Width="200" x:Name="barcode">
        <telerikDataViz:RadBarcode.Symbology>
            <telerikDataViz:QRCode />
        </telerikDataViz:RadBarcode.Symbology>
    </telerikDataViz:RadBarcode>
</Grid>
Telerik UI for WinUI Learning Resources
- Telerik UI for WinUI Barcode Component
- Getting Started with Telerik UI for WinUI Components
- Telerik UI for WinUI Installation
- Telerik UI for WinUI Examples
- Telerik UI for WinUI Accessibility
- Telerik UI for WinUI License Agreement