Getting Started with WinForms ToolbarForm
This article shows how you can start using RadToolbarForm.
Adding Telerik Assemblies Using NuGet
To use RadToolbarForm when working with NuGet packages, install the Telerik.UI.for.WinForms.AllControls package. The package target framework version may vary.
Read more about NuGet installation in the Install using NuGet Packages article.
With the 2025 Q1 release, the Telerik UI for WinForms has a new licensing mechanism. You can learn more about it here.
Adding Assembly References Manually
When dragging and dropping a control from the Visual Studio (VS) Toolbox onto the Form Designer, VS automatically adds the necessary assemblies. However, if you're adding the control programmatically, you'll need to manually reference the following assemblies:
- Telerik.Licensing.Runtime
- Telerik.WinControls
- Telerik.WinControls.UI
- TelerikCommon
The Telerik UI for WinForms assemblies can be install by using one of the available installation approaches.
Defining the RadToolbarForm
This topic will walk you through the creating process of RadToolbarForm.
1. Create a blank new Telerik WinForms application using the standard template.
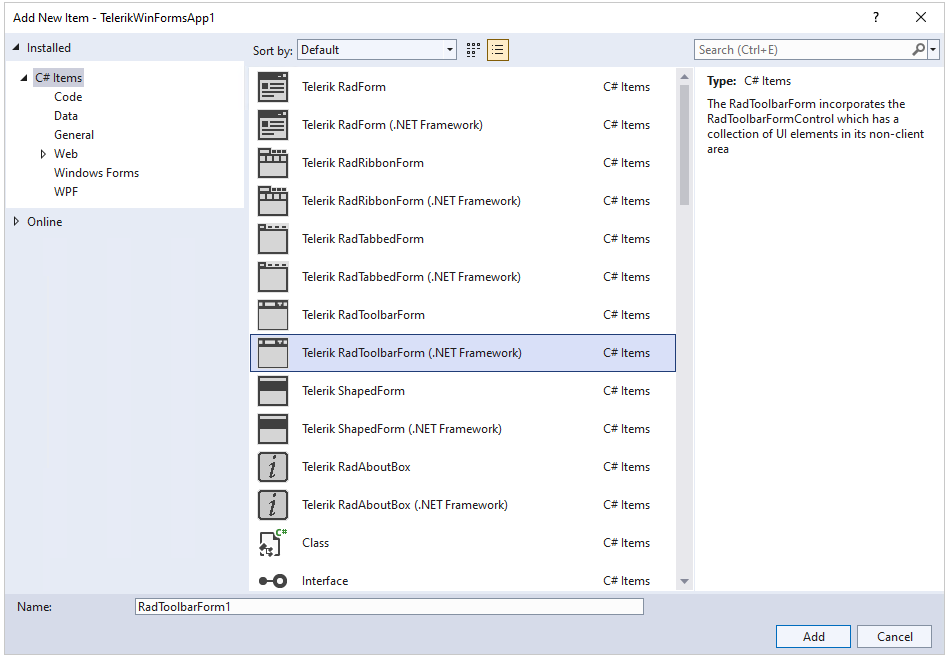
2. Add a new Toolbar form from Visual Studio. Go to Project -> Add Windows Form and then select Telerik RadToolbarForm.
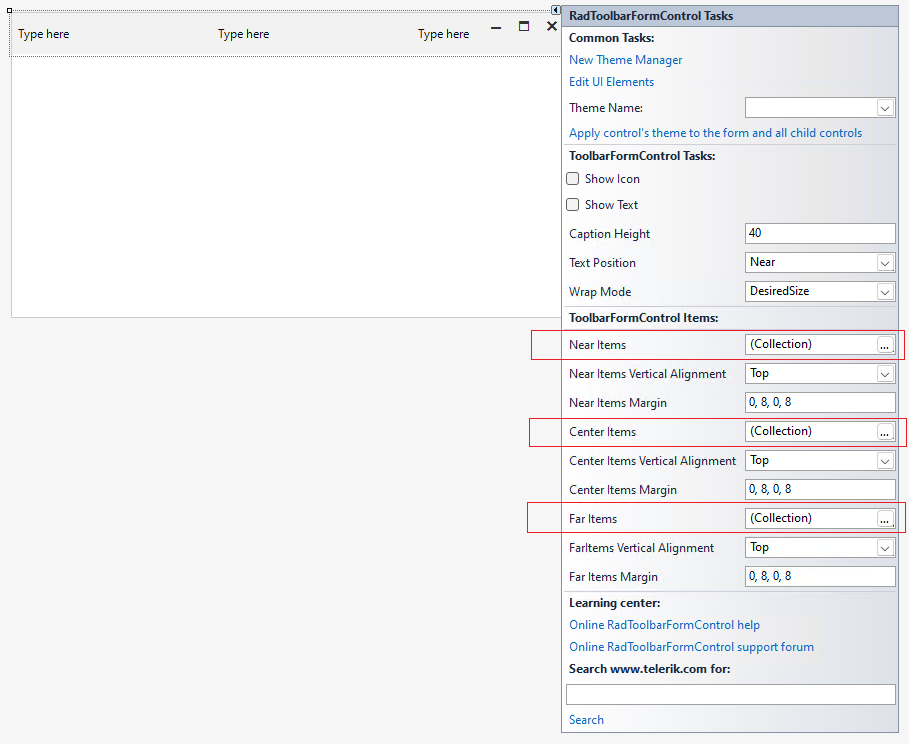
3. From the Smart Tag we can populate each of the three sections of the RadToolbarForm.
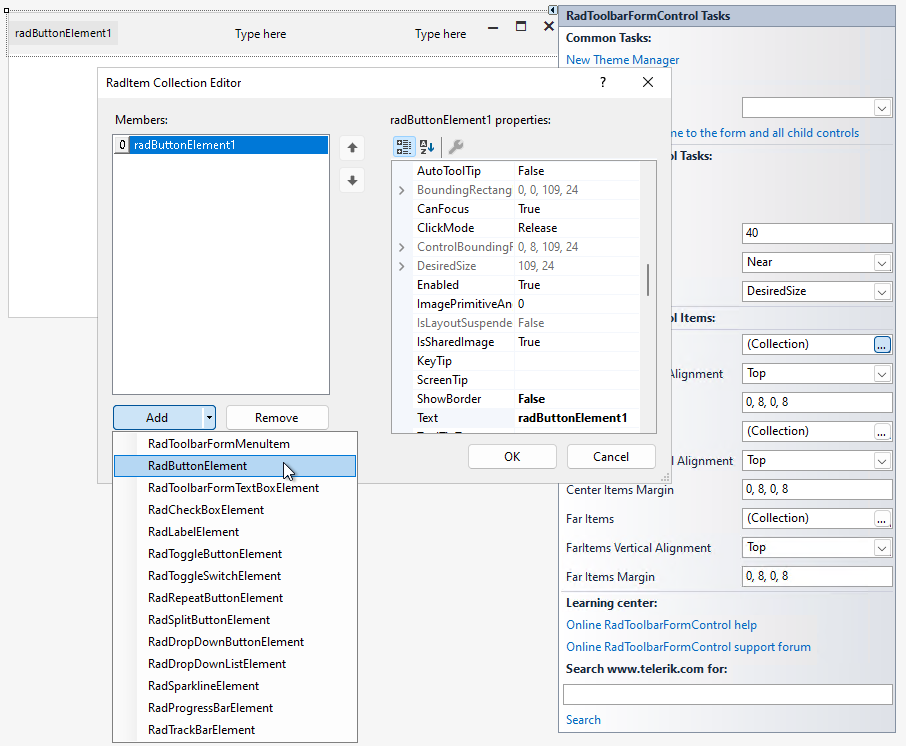
4. From the Collection Editor window you can choose from a variety of elements to populate each of the three sections of the control.
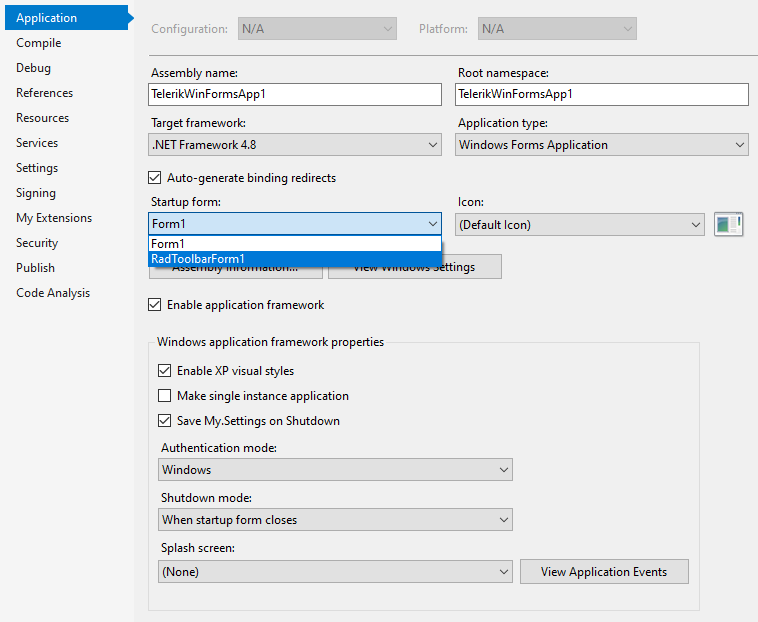
5. Go to the Program.cs and change the startup form.
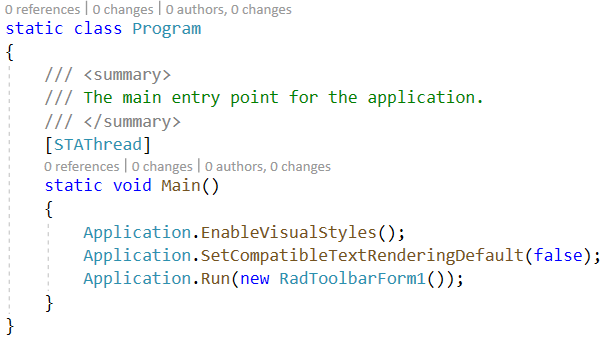
In VB.NET this can be done from the project's properties.
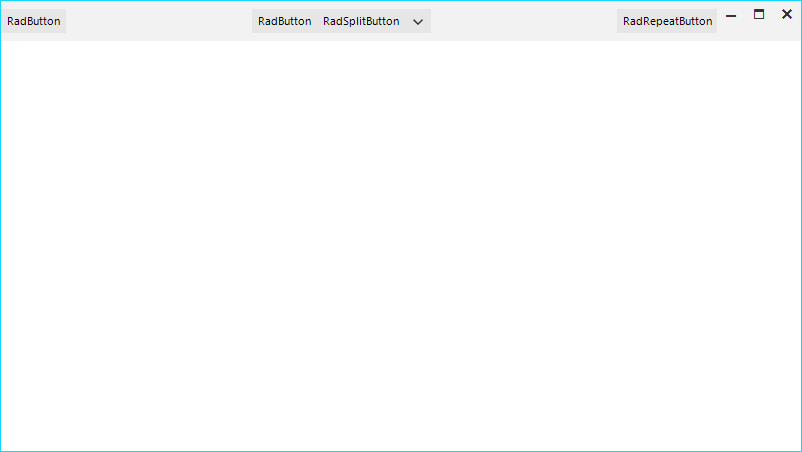
5. Start the application.
See Also
Telerik UI for WinForms Learning Resources
- Telerik UI for WinForms Toolbarform Component
- Getting Started with Telerik UI for WinForms Components
- Telerik UI for WinForms Setup
- Telerik UI for WinForms Application Modernization
- Telerik UI for WinForms Visual Studio Templates
- Deploy Telerik UI for WinForms Applications
- Telerik UI for WinForms Virtual Classroom(Training Courses for Registered Users)
- Telerik UI for WinForms License Agreement)