Toolbar Items for Working With Images
This article describes the built-in toolbar items for insert and edit images in the .NET MAUI RichTextEditor control.
Insert Images
Use the following toolbar items for adding/inserting an image in the editor.
-
RichTextEditorAddImageToolbarItem—Allows you to add an image; the RichTextEditorPickImageevent is fired, so you can handle the logic for selecting an image. The toolbar is enabled if no image is selected. -
RichTextEditorAddOrEditImageToolbarItem—Adds or edits images depending whether image is selected. If image is selected, the editor opens a dialog to edit the image. If image is not selected thePickImageevent fires. -
RichTextEditorImageNavigationToolbarItem—Adds images or navigates to additional toolbar items depending whether image is selected. If image is selected, the editor navigates to image operation toolbar items. If image is not selected thePickImageevent fires.
Additional Toolbar Items for Image Operations
The RichTextEditorImageNavigationToolbarItem has the following items:
-
RichTextEditorEditImageToolbarItem—Allows you to resize the image. In addition the toolbar allows you to pick an image (the RichTextEditor.PickImageevent is fired) if you haven't selected one. Check Edit Image Toolbar Item for more details. -
RichTextEditorCutToolbarItem—Allows you to cut the selected HTML/image to the clipboard. -
RichTextEditorCopyToolbarItem—Allows you to copy the selected HTML/image to the clipboard. -
RichTextEditorPasteHtmlToolbarItem—Allows you to paste HTML/image from the clipboard. -
RichTextEditorRemoveImageToolbarItem—Allows you to remove the currently selected image from the document.
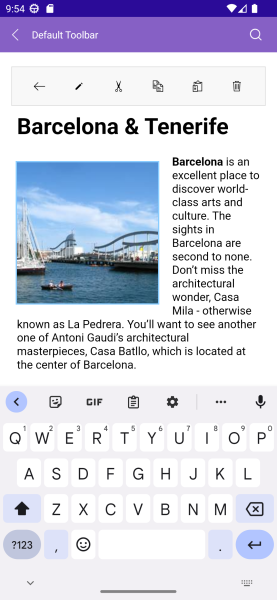
How the editing toolbar looks when image is selected:
Edit Image Toolbar Item
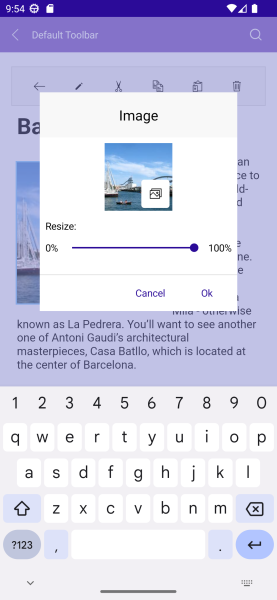
RichTextEditorEditImageToolbarItem allows you to resize the image and pick an image. When tapping on the RichTextEditorImageDialogToolbarItem, a dialog is displayed. The options for customization are described in the table below:
| RichTextEditor ImageDialog ToolbarItem Options | Description |
|---|---|
Text |
|
RichTextEditorFontSizeToolbarItem |
|
ResizeLabelText |
Defines the text of the Resize Label. Default value Resize:
|
MinimumLabelText |
Defines the text of the Minimum. Default value 0%
|
MaximumLabelText |
Defines the text of the Maximum. Default value 100%
|
PickButtonText |
Defines the text of the button(RadButton) that allows you to pick images. Note that PickImage event is raised when PickButton is pressed. |
HeaderText |
Defines the header text value. Default string Image
|
PopupContentStyle |
Defines the Style applied to the popup content. |
PopupContentTemplate |
Defines the control template of the popup. |
PopupOutsideBackgroundColor |
Defines the backgrounf color applied outside of the popup content. |
OkButtonText |
Defines the text for Ok button. Default value Ok
|
CancelButtonText |
Defines the text for Cancel button. Default value: Cancel
|
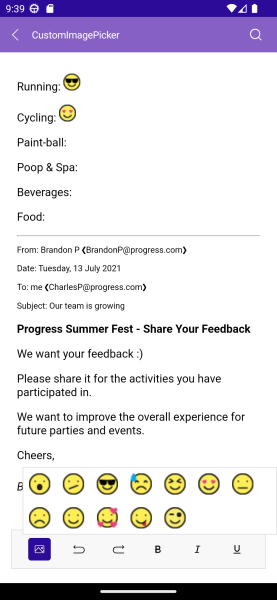
ImagePickerToolbar Item
-
RichTextEditorImagePickerToolbarItem(Telerik.Maui.Controls.RichTextEditor.RichTextEditorListPickerButtonToolbarItem)—Allows you to pick an image from a collection of pre-defined images.
Example
1. RichTextEditor and toolbar definitions in XAML:
<Grid RowDefinitions="{OnIdiom Desktop='Auto, *', Phone='*, Auto'}">
    <telerik:RadRichTextEditor x:Name="richTextEditor"
                               Grid.Row="{OnIdiom Desktop=1, Phone=0}"
                               Source="{Binding RTSource}" />
    <telerik:RadRichTextEditorToolbar x:Name="richTextToolbar"
                                      Grid.Row="{OnIdiom Desktop=0, Phone=1}"
                                      RichTextEditor="{x:Reference richTextEditor}"
                                      AutoGenerateItems="False">
        <telerik:RichTextEditorImagePickerToolbarItem ItemsSource="{Binding EmojiSource}"/>
        <telerik:RichTextEditorUndoToolbarItem />
        <telerik:RichTextEditorRedoToolbarItem />
        <telerik:RichTextEditorBoldToolbarItem />
        <telerik:RichTextEditorItalicToolbarItem />
        <telerik:RichTextEditorUnderlineToolbarItem />
        <telerik:RichTextEditorTextColorToolbarItem />
    </telerik:RadRichTextEditorToolbar>
</Grid>
In addition to this, you need to add the following namespace:
2. Add the telerik namespaces:
xmlns:telerik="http://schemas.telerik.com/2022/xaml/maui"
3. The VieWModel for the ImagePicker Items Source and RichTextEditor Source:
public class ViewModel
{
    public ViewModel()
    {
        this.RTSource = RichTextSource.FromStream(() =>
        {
            Assembly assembly = typeof(ViewModel).GetTypeInfo().Assembly;
            string fileName = assembly.GetManifestResourceNames()
                .FirstOrDefault(n => n.Contains("pick-image-demo.html"));

            return assembly.GetManifestResourceStream(fileName);
        });
        this.InitializeImages();
    }
    public List<RichTextImageSource> EmojiSource { get; private set; }

    public RichTextSource RTSource {get; private set; }

    private void InitializeImages()
    {
        var currentAssembly = typeof(ViewModel).GetTypeInfo().Assembly;
        var resourceNames = currentAssembly.GetManifestResourceNames();
        var imageSources = new List<RichTextImageSource>();

        foreach (var resourceName in resourceNames)
        {
            if (resourceName.Contains("emoji"))
            {
                var imageSource = RichTextImageSource.FromStream(() =>
                    currentAssembly.GetManifestResourceStream(resourceName), RichTextImageType.Png);

                imageSources.Add(imageSource);
            }
        }

        this.EmojiSource = imageSources;
    }
}
For the RichTextEditor Custom Image Picker example refer to the SDKBrowser Demo Application RichTextEditor -> Features category.