Modifying Element's Image
As of Test Studio release 2019 R2 (v.2019.2.619) the elements' find expression is enhanced with an image and thus, each newly recorded element gets an image along with its automatically generated find expression. The image will be used as a backup search criteria in case the element's find clauses didn't match any element on the page.
Edit Image in Elements Edit Mode
The image for each element can be edited separately from the find expression.

If there are any current unsaved changes applied in the Find Expression of the element, you will be prompted to either save or reset these, before you proceed to modifying the image settings.
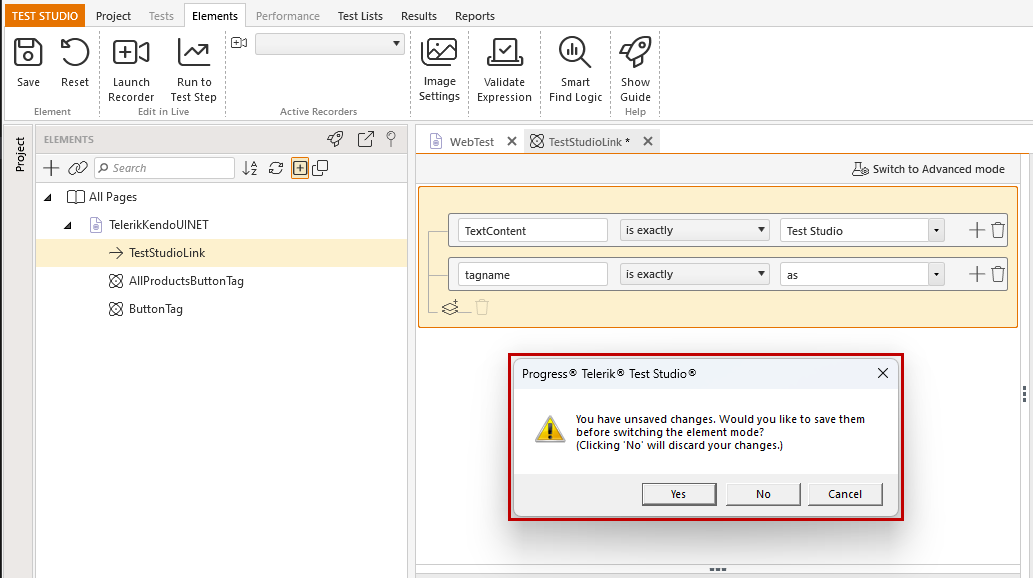
Yes - will save the current changes and will switch to Image settings.
No - will reset the current changes and will switch to Image settings.
Cancel - will leave the Edit pane in the Find Expression mode.
Image Settings in Elements Edit Mode
A preview of the recorded image is displayed when an element in the Elements Explorer is hovered over.

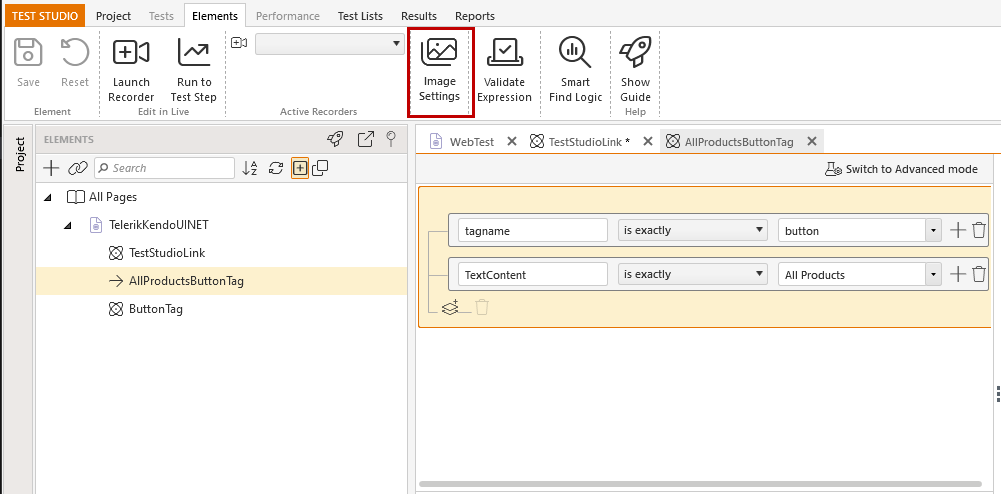
Once an element is opened in the Edit Elements pane you can switch the view to review and/or edit the corresponding image settings.
The Elements Settings view remains the same with or without an active recording browser session.
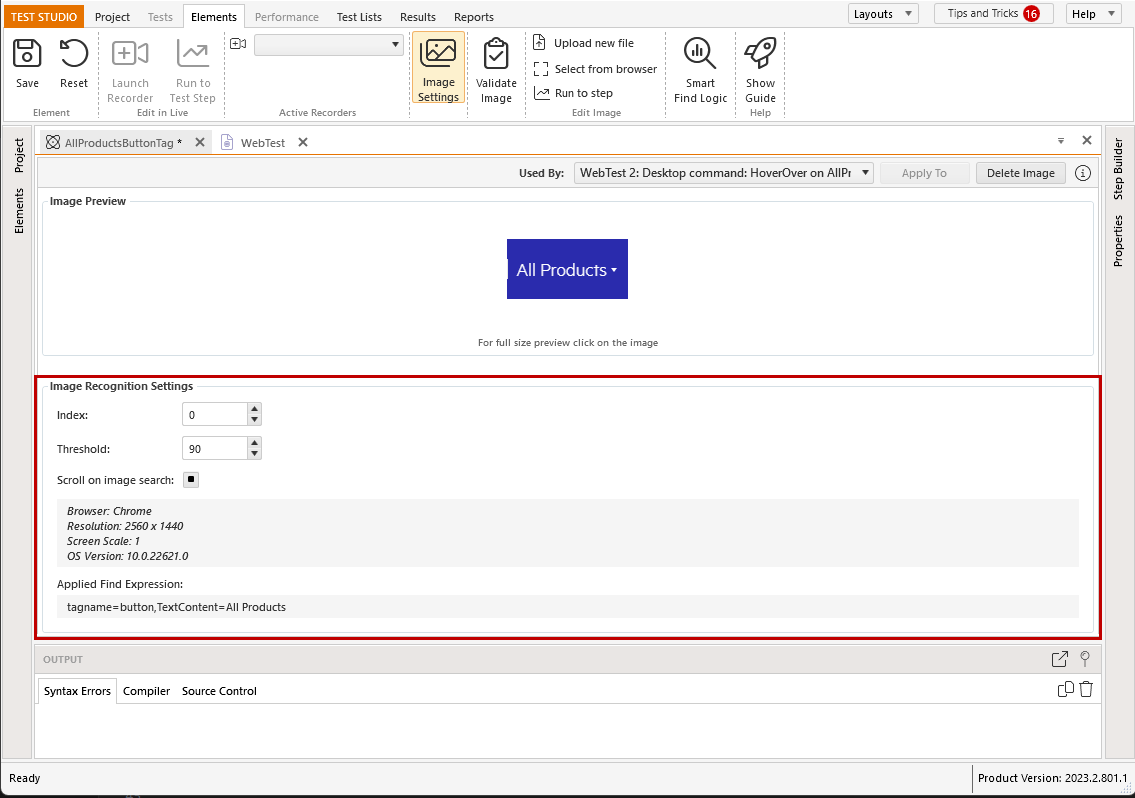
Image Usage Details
The Image Settings section lists all steps, which use this element and image.

Apply To - by default updating the image will apply the change only for the current selected step that uses that element. If you want to apply current changes for other steps also, use the Apply To button. See also: One Element with Multiple Images.
Delete - this button will remove the image without prompt warning. The deleted image for an element is deleted only for the current selected step. The change can be reverted with the 'Reset' button but will be permanent, once the changes for an element are saved.
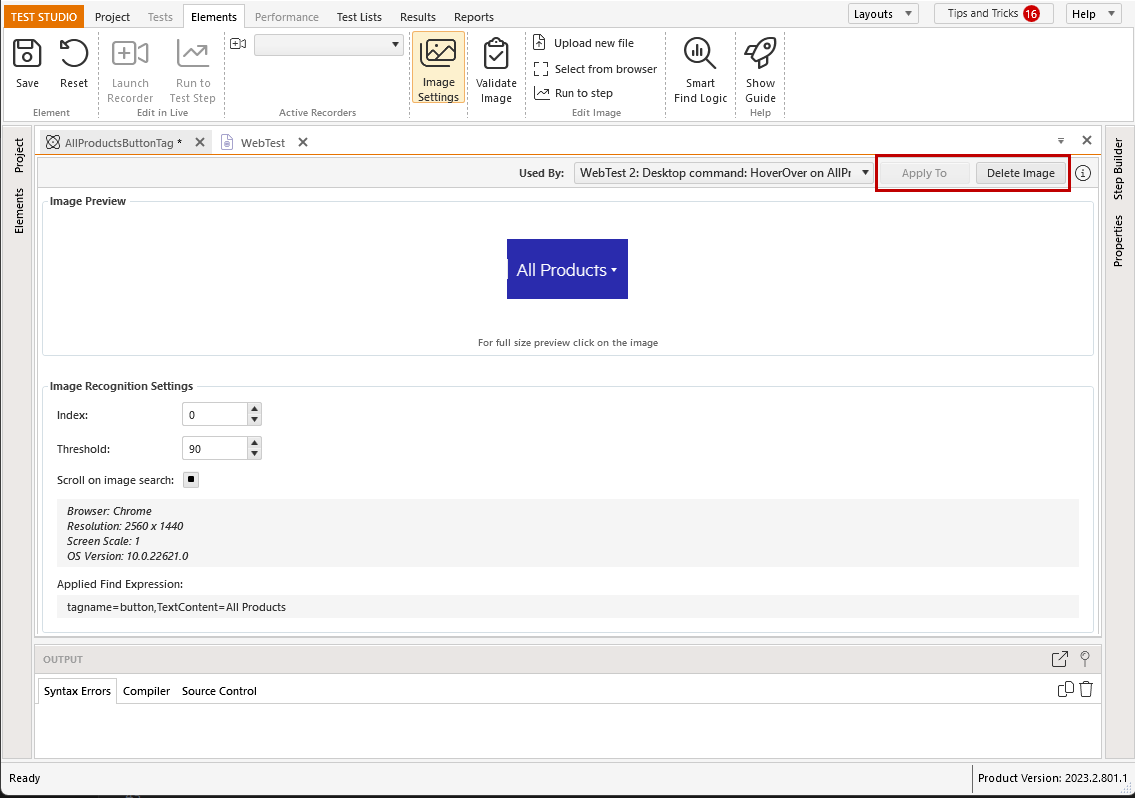
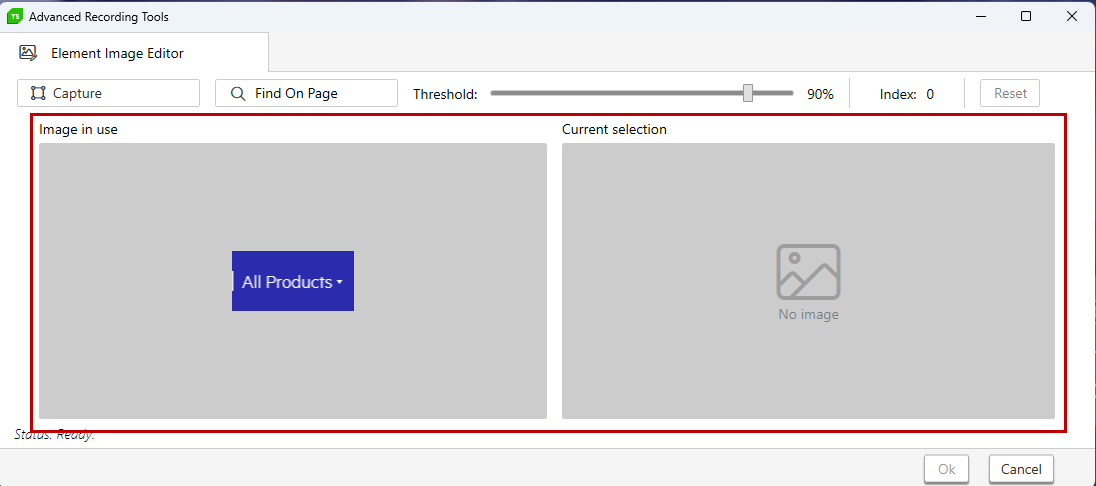
Image Preview
The recorded image is displayed in the Image Preview section.
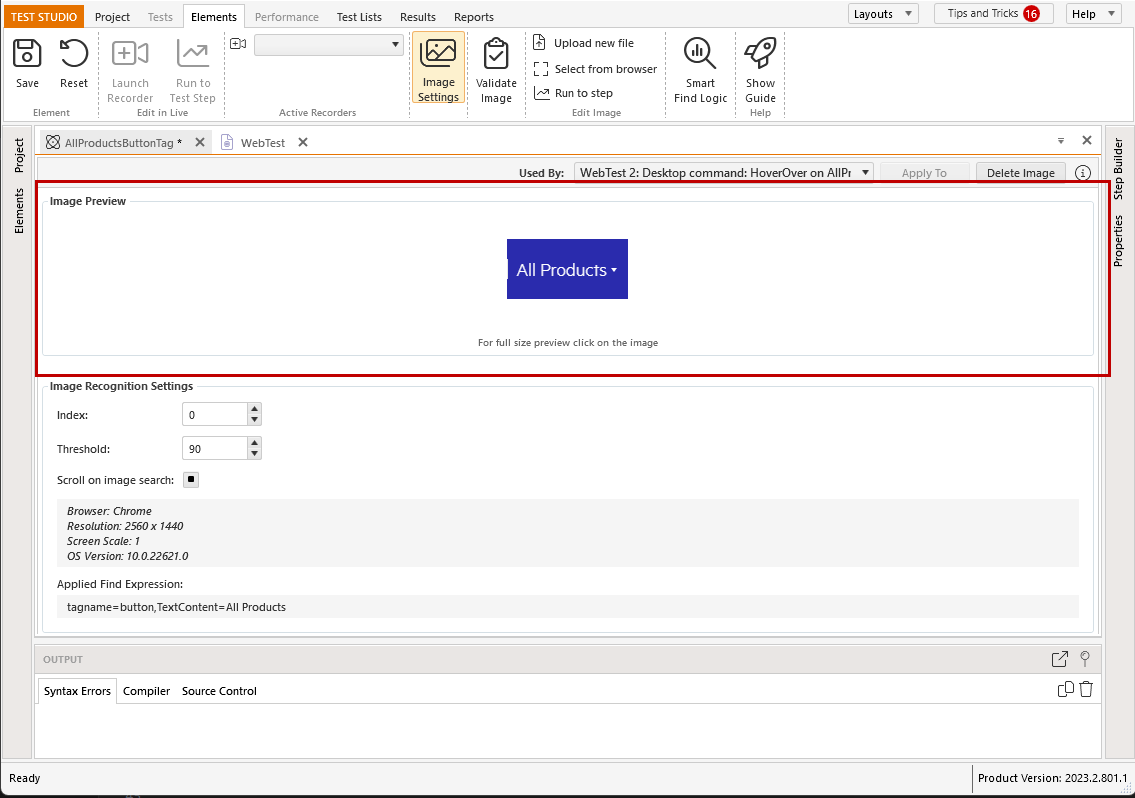
Click on the image to see it in full size. In this preview you can zoom in or out of the image.
Image Recognition Settings
The recorded image keeps details for the browser and display used to be recorded along with the corresponding element's find expression.
Scroll on image search - whether to scroll the page when using the image to locate the element. This setting can be set separately for each step, which uses the element. Its default value is 'indeterminate', and it can be also set to 'true' or 'false'.
- indeterminate - the default value will use the global setting on project or test list level;
- true/false - explicitly enabling or disabling the option will override the global project or test list setting value;
- read more for element scrolling project setting and element scrolling test list setting.
The threshold and index values in this section can be additionally adjusted depending on the scenarios to cover. The important notes to keep in mind are listed below:
Threshold - the default value is 90 and can be adjusted on project level in the Project Settings. The threshold can be lowered if the tests are failing when executed against different browser or on other display. However, setting it too low can lead to locating incorrect images. Since adjusting the optimal value for the threshold depends on the tested application and execution requirements, we recommend to perform few test runs and find out which will suit best for the current project.
Index - the index is zero based and its value is recorded depending on how many matching images are found on the current page. The number of matching images depends on the set threshold, so changing the threshold will affect the index as well.
Recording New Image
The Image Settings view provides few options to record a new image for an element.
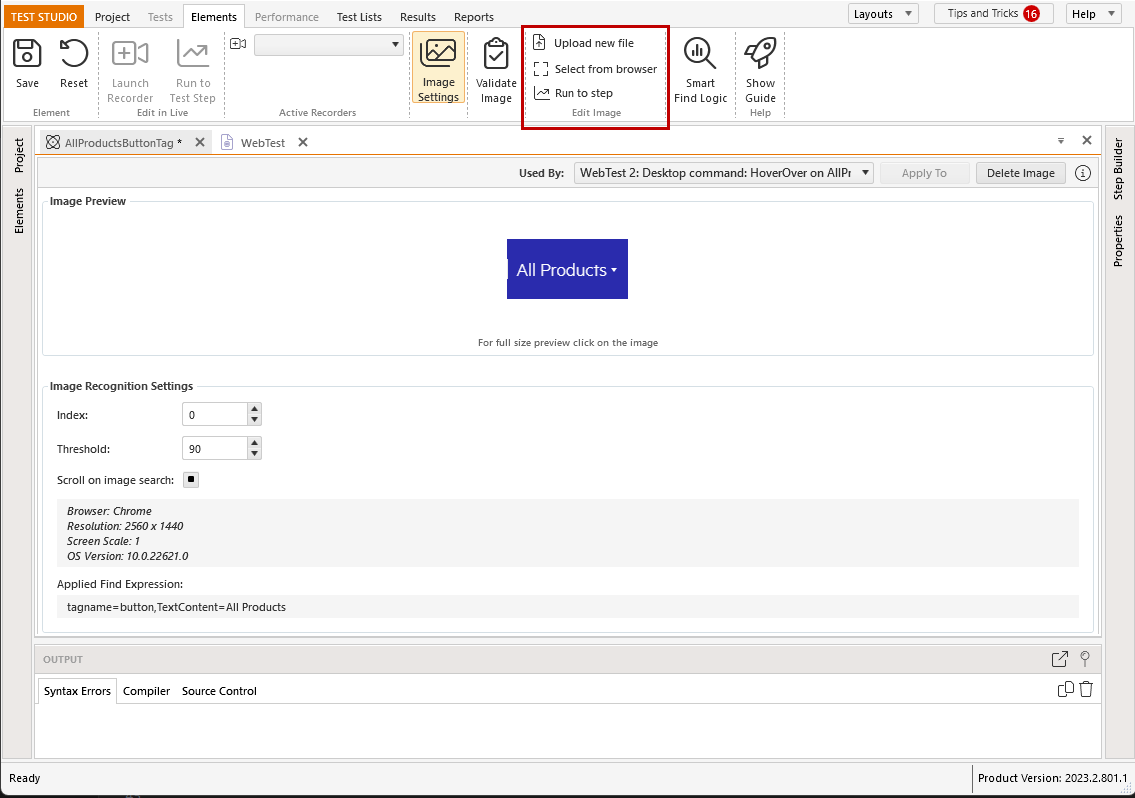
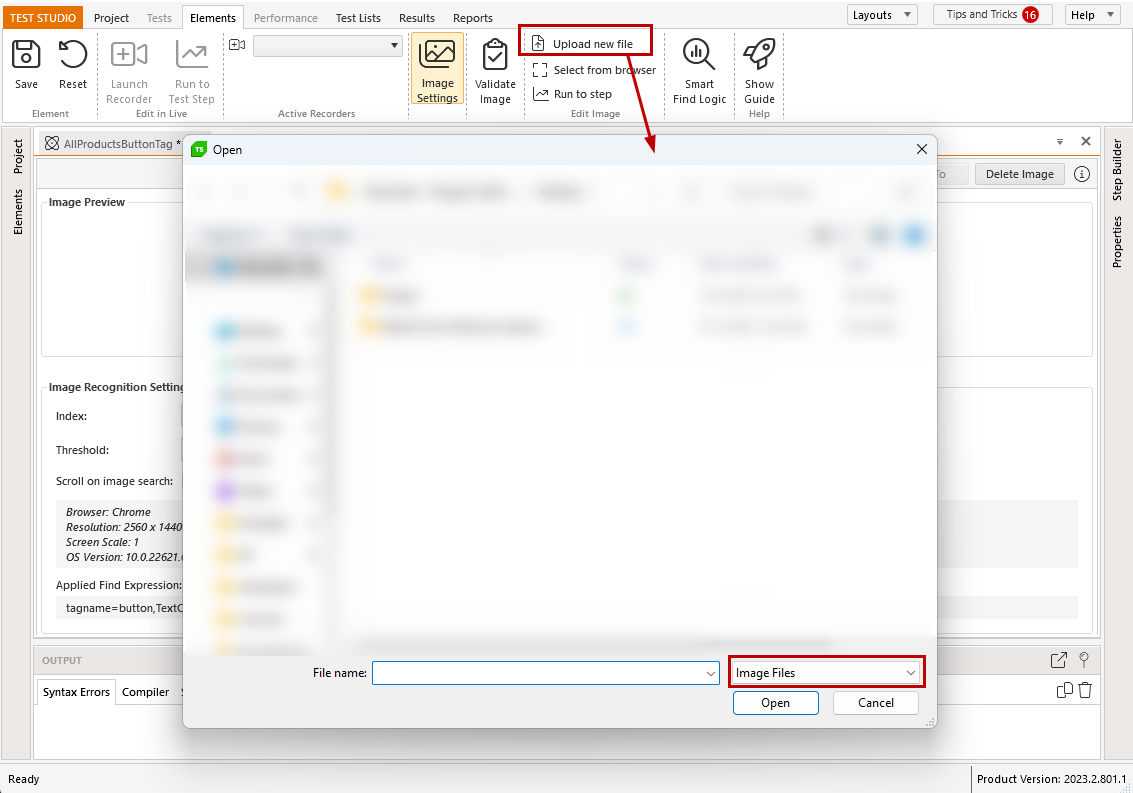
Upload New File
You can choose to change the currently recorded image by uploading a new image stored on the local disc. The allowed file types are: *.jpg, *.jpeg, *.png, *.bmp, *.gif.
Select From Browser
The option to select an image from browser will prompt to select a recording browser to perform the image recording.
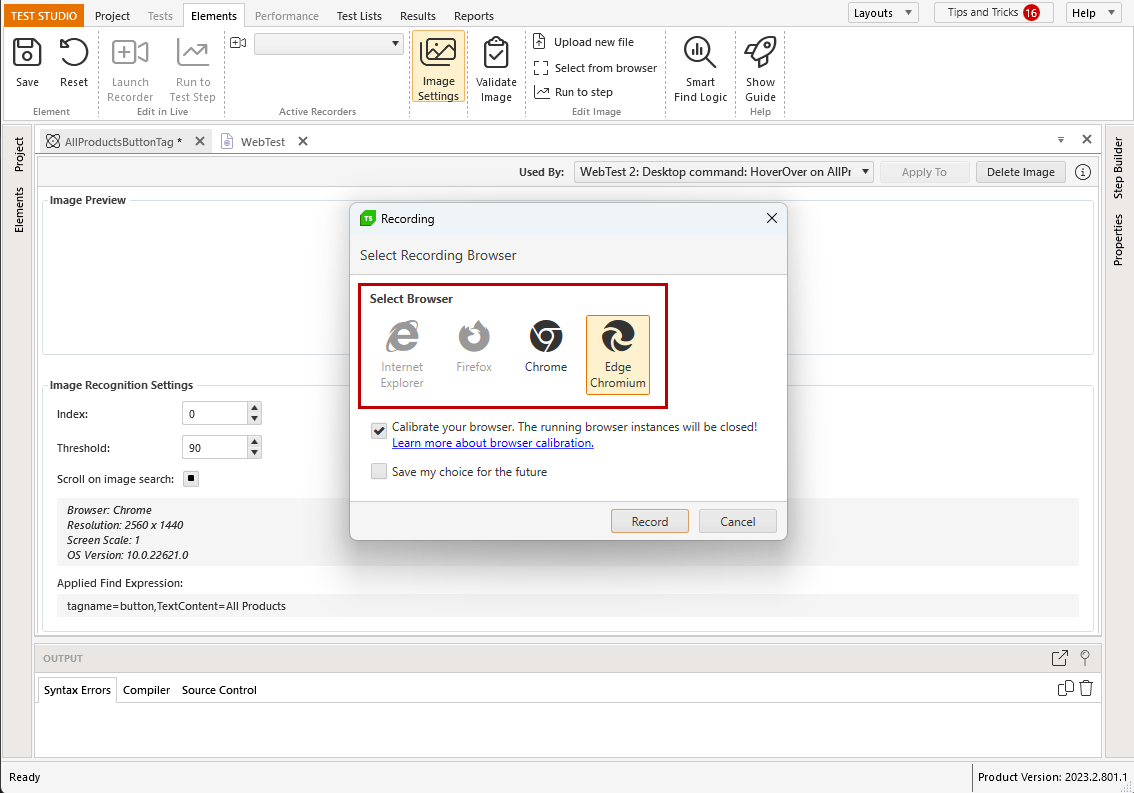
Once a browser is selected, the page, which contains the element, will be loaded in a new browser instance and the Image Recorder will be attached to it. If there is a running browser from the selected type with attached Recorder toolbar, the page, which contains the element, will be loaded in that same browser and the attached Recorder will be switched to the Image Recorder.
If there is a running browser from the same type without attached recorder, that instance will be closed and the browser will be restarted to capture new image.
Note This option is recommended for the cases, when a test was partially executed using Run->To Here from the Step Context Menu and there is an already active recording session pointing to the correct page to select new image from.
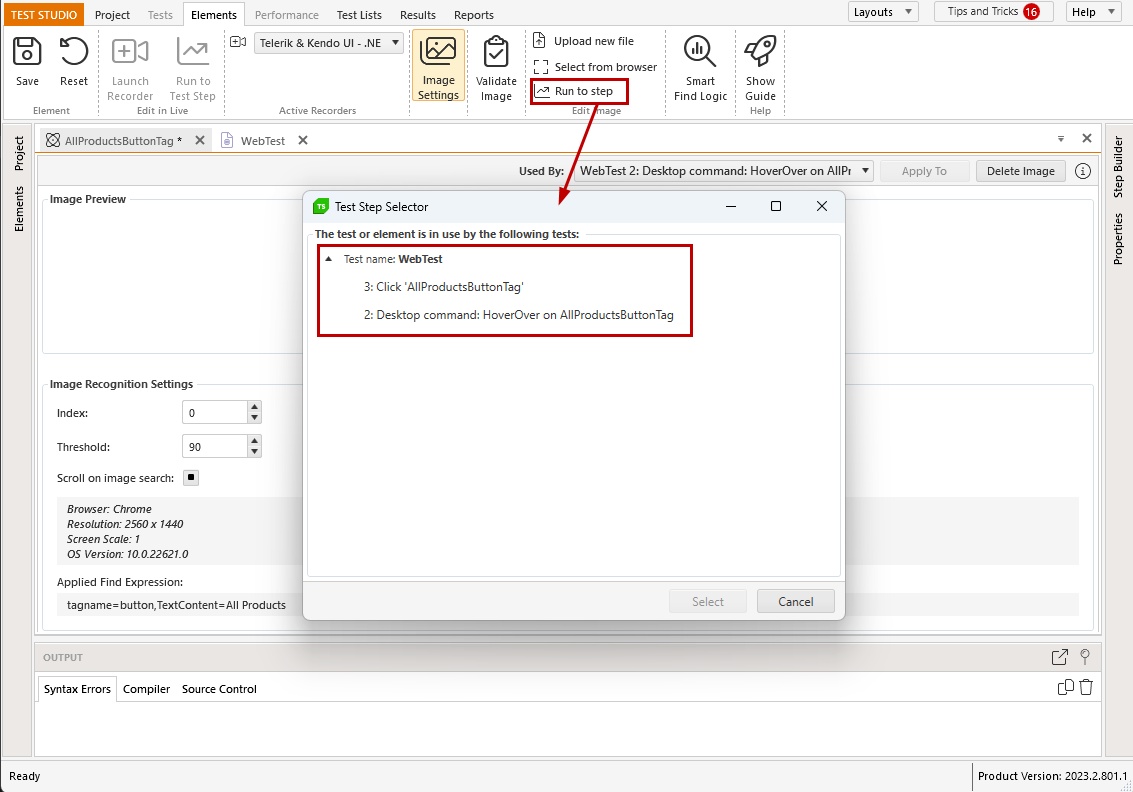
Run To Step
This option will allow you to execute a test to the certain step, which target element's image needs to be updated. Choosing this option will first prompt to choose the desired step to run the test to.
Next you need to select a recording browser.
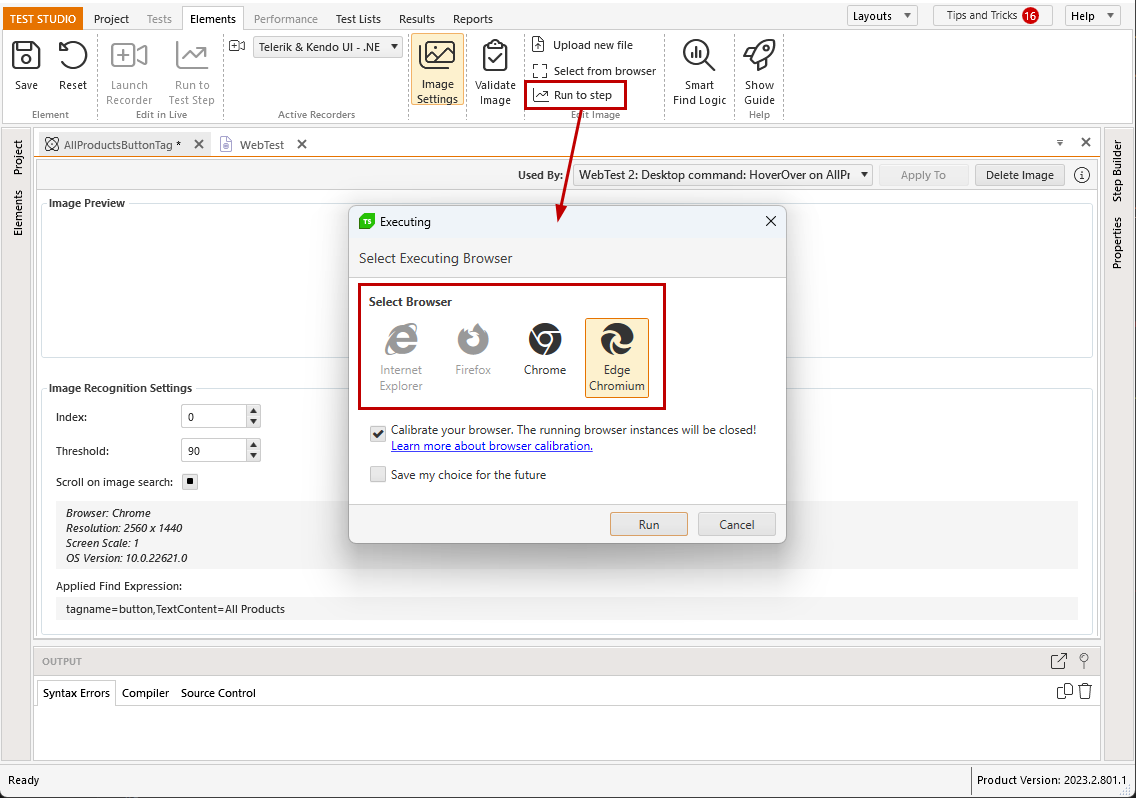
This will terminate any current sessions and will start a new instance from the selected browser type, execute the test to the selected step and attach the Image Recorder.
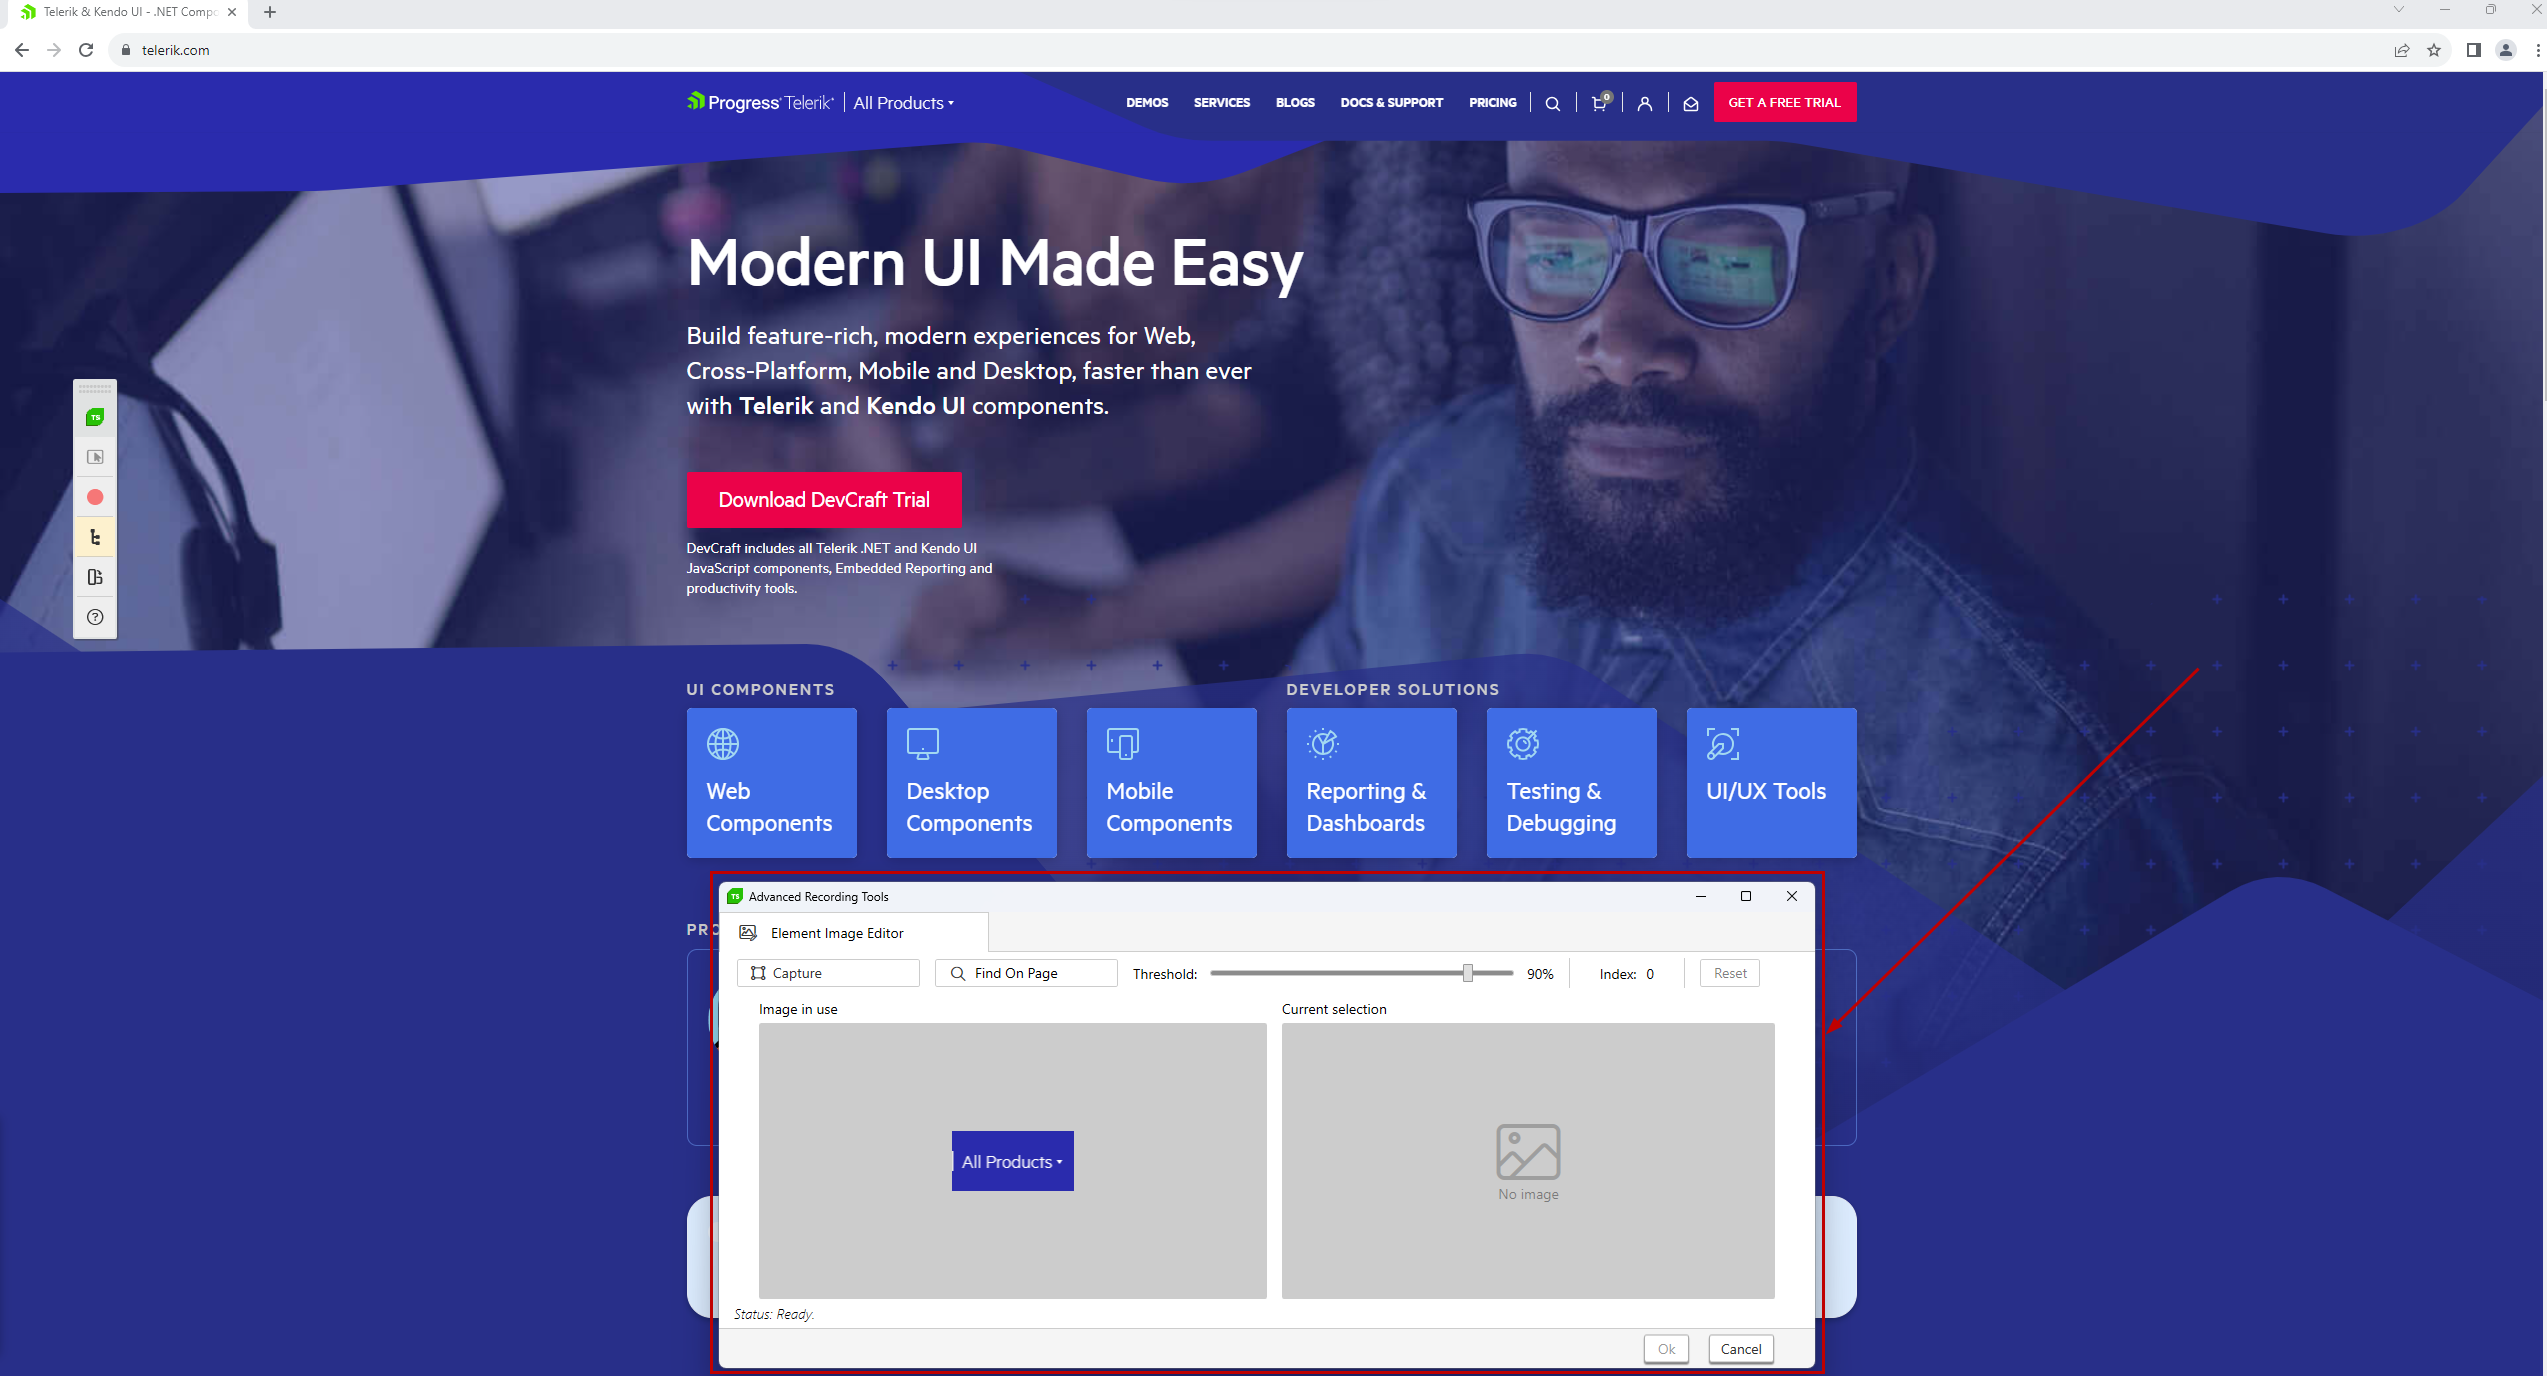
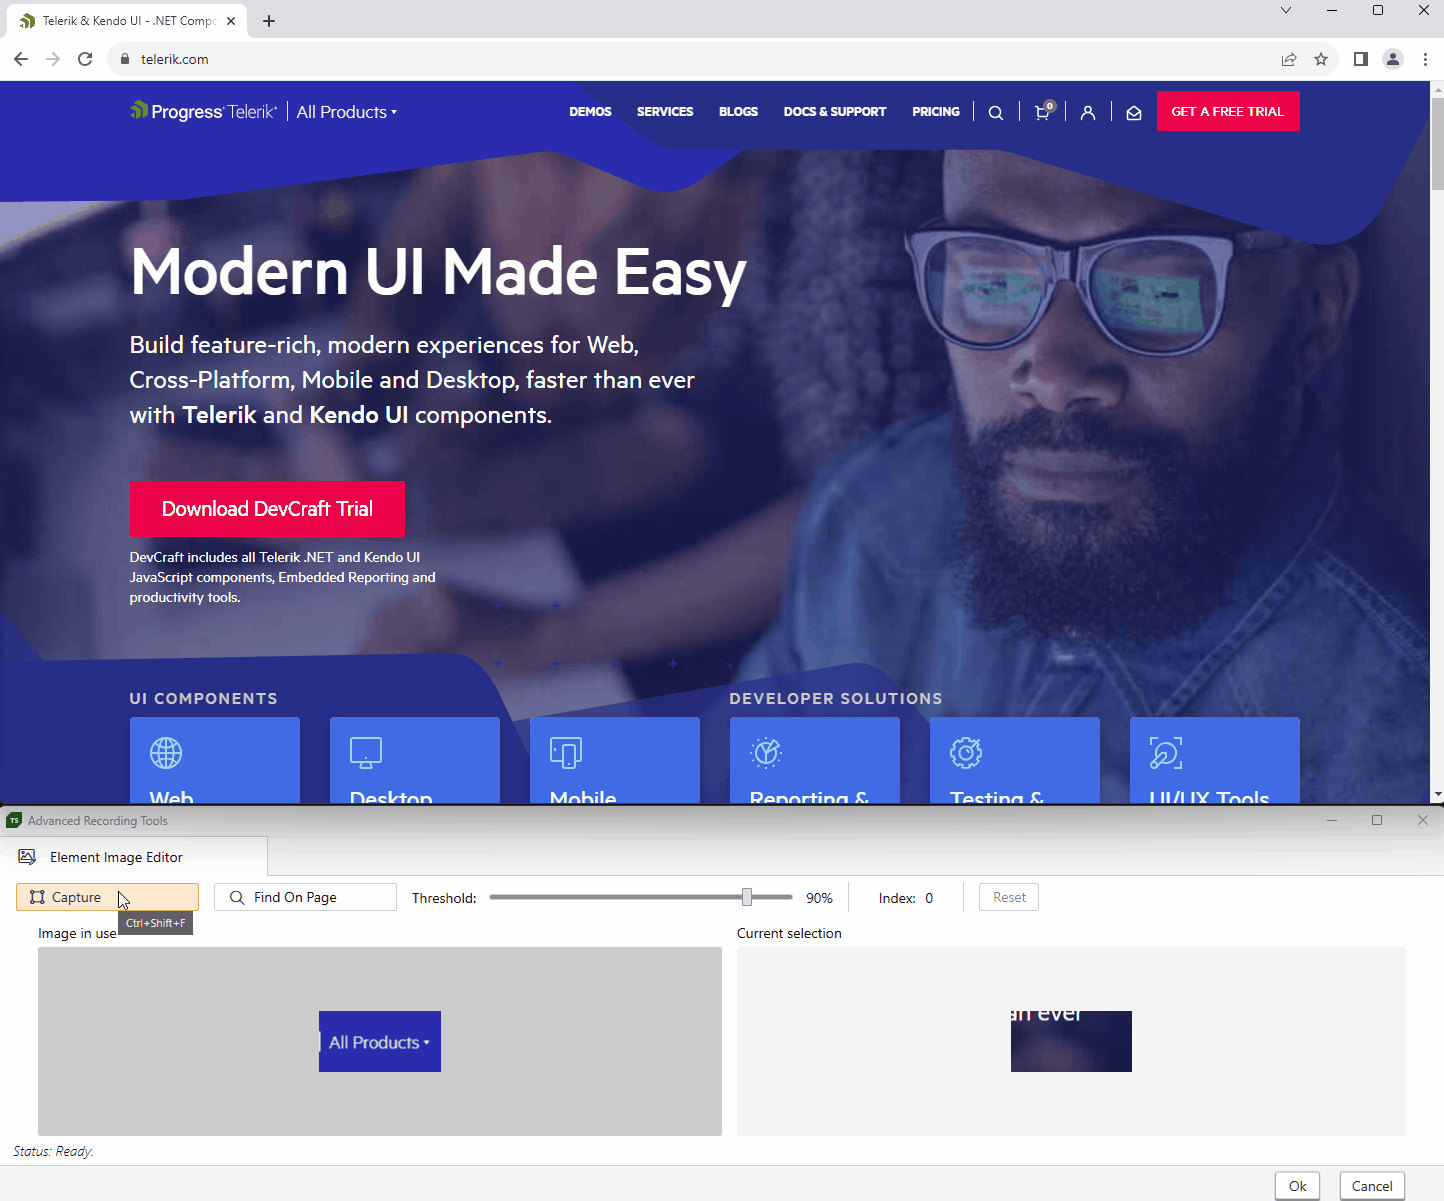
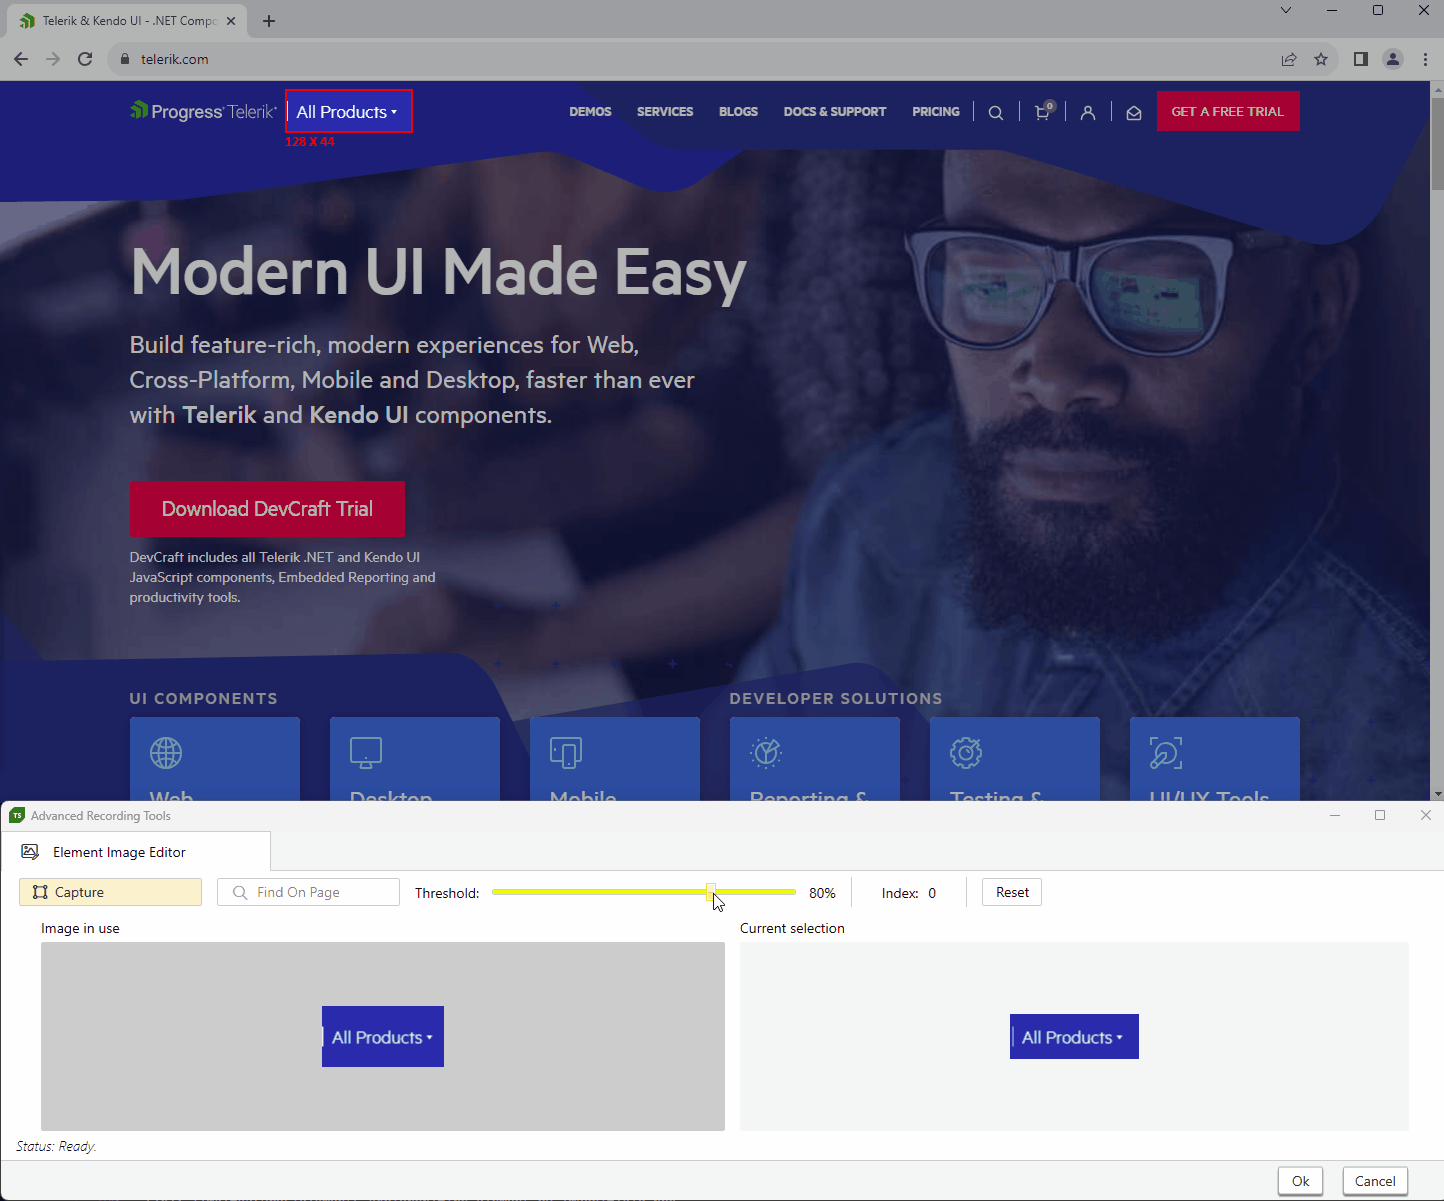
Image Recorder
Once the Image Recorder gets attached to the browser, you can continue interacting with the page to prepare it for selecting the correct image - for example, change the combobox selection, or enter/remove text from a text field. When ready, click the Capture button to enable it and select the desired image. For the cases when the mouse is needed to show the desired image (mouse hover over, for example), you can enable capturing an image with keyboard combination Ctrl+Shift+F.

Select New Image
Once enabled the page gets grayed out and you cannot interact with it, only the current element image gets highlighted. To change the selected image, move the highlighted rectangle to any other element on the page.
Resize Captured Image
The highlighted image can be resized horizontally, vertically or proportionally by dragging the rectangle sides.
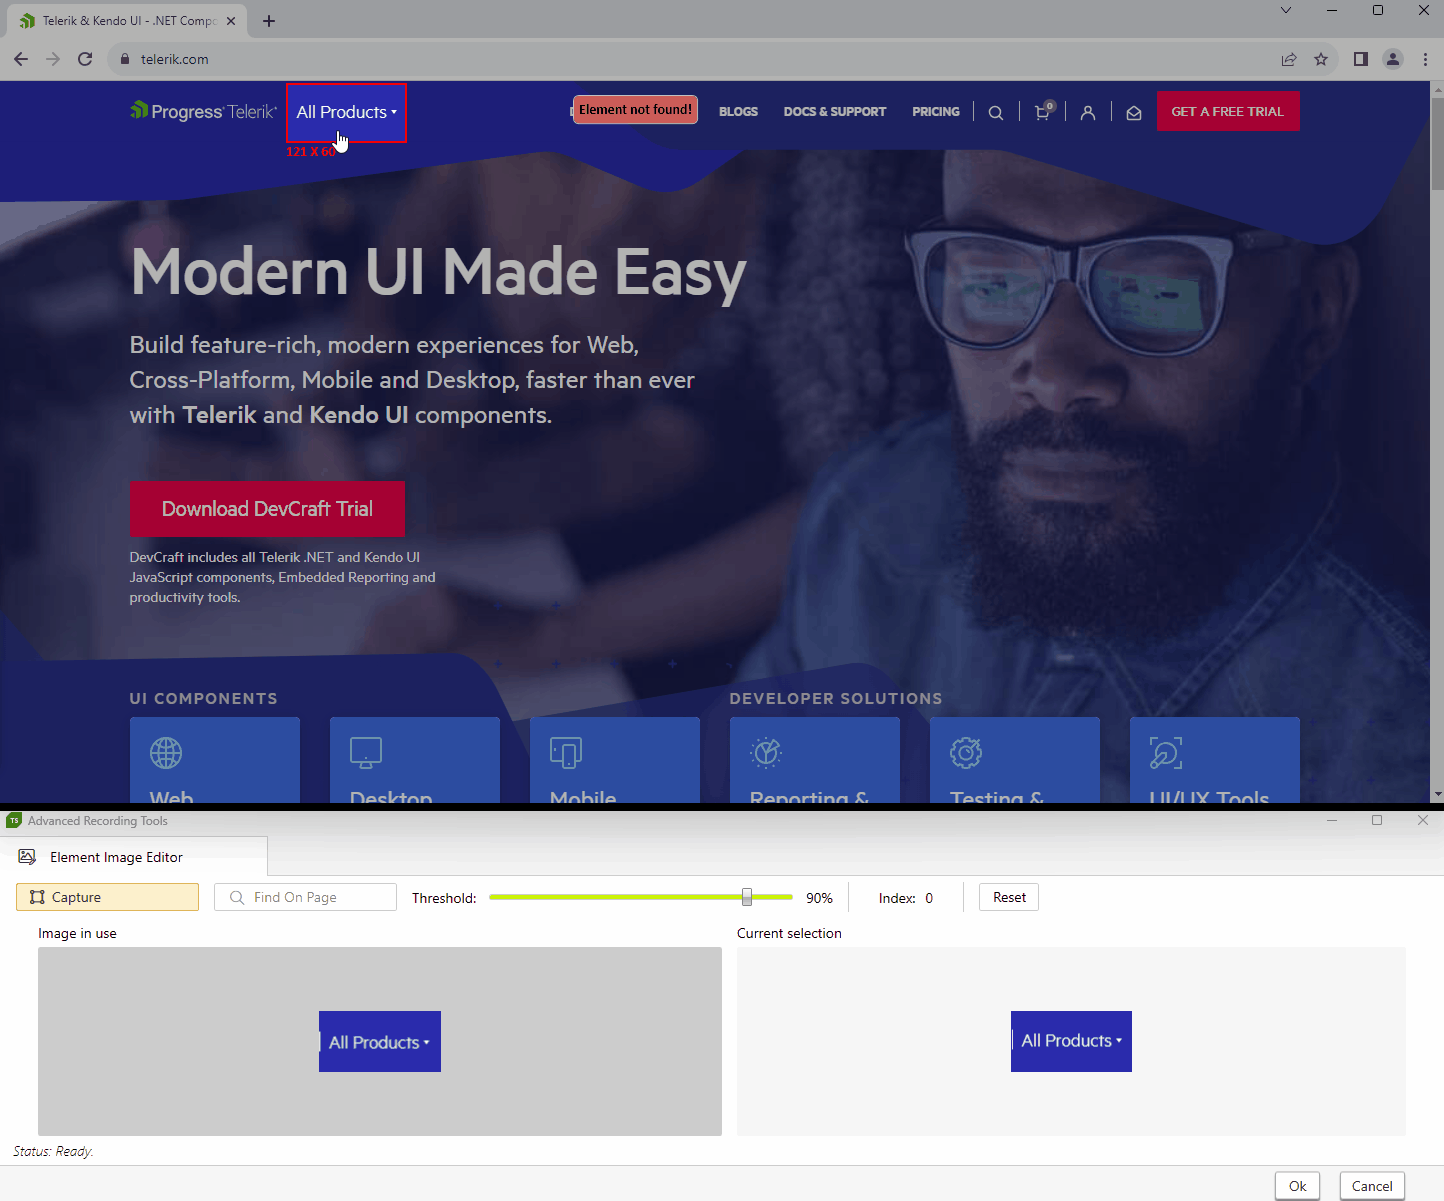
View Recorded Image and the Current Selected
While changing the selected element on the page, the Image Recorder displays the newly selected image next to the image, which is still in use and needs to be replaced.
Index and Threshold Settings
The index will be changed if the newly selected image matches multiple elements on the page. The threshold percentage can be modified during the recording session.
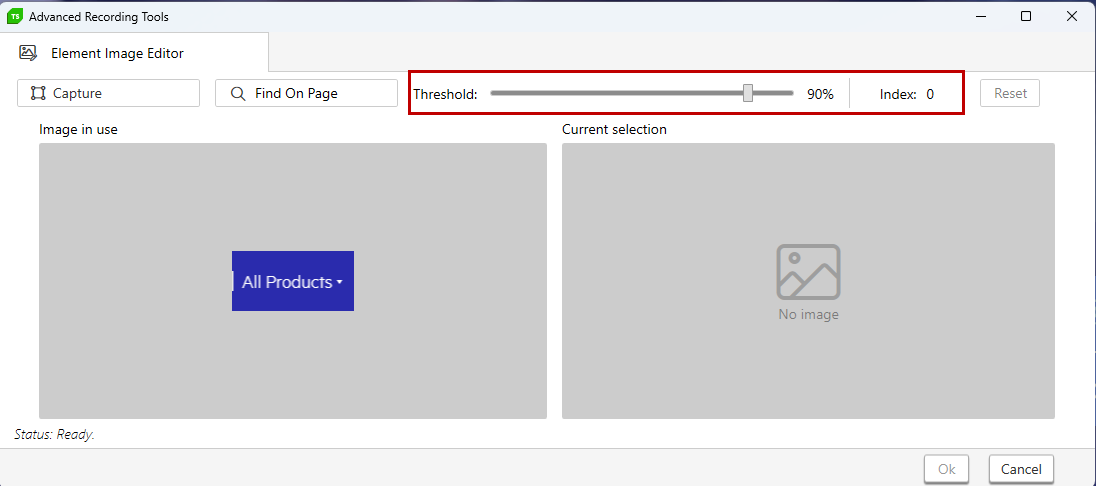
If the threshold value is set to a lower percentage, the amount of matching images will increase - the matching images will be highlighted in a red rectangle with an index number listed under. Selecting any of the highlighted images will change the image and recorded index as well.
Save or Discard Changes
Once the image selection is complete, you have few options to save or discard the current changes.
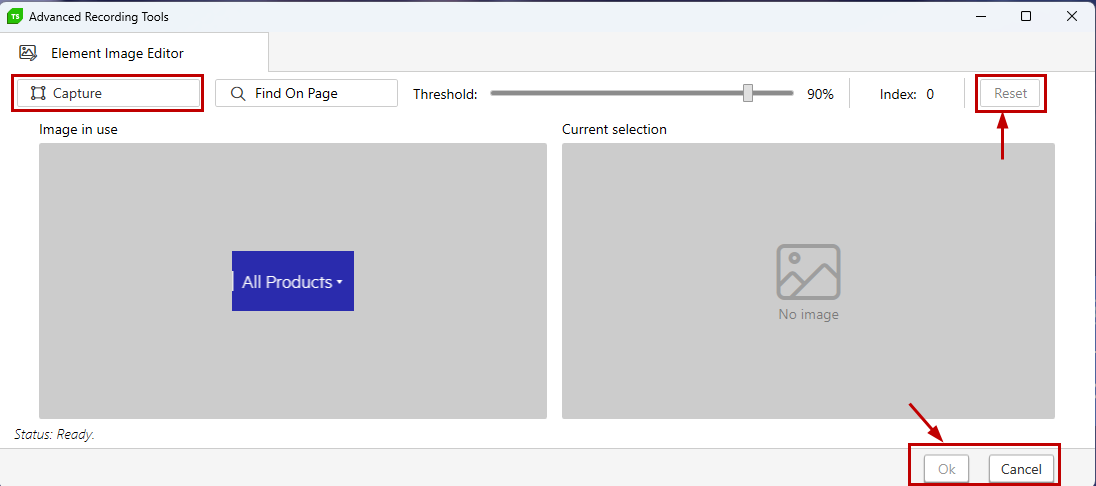
Reset - the Reset button will discard any unsaved changes applied in the current image recording session and will restore the initial image highlighted selection in the browser.
Cancel - the Cancel button will discard any changes from the current recording session and will close the browser. The same can be triggered with the Escape button from the keyboard.
OK - the Ok button will save the changes in the current recording session and will exit the browser. The same can be triggered with the Enter button from the keyboard.
Capture - the Capture button will restore the recording session in a state to interact with the page before you select the new desired image.
Known Scenarios Requiring Manual Adjustment
While recording elements with images, you may face any of the scenarios, which require some additional adjustments - find additional details for these here.