Part 4 - Hello Kendo UI
Hello Kendo UI
In this tutorial, you will work with the most complex of the Kendo UI widgets—the Grid, as well as one of Kendo UI core components—the DataSource. It is essential to understand how these two work in your application and how they work together. You are going to create a grid and wire it up to an ASP.NET Web API service while doing some heavy server lifting along the way.
Screencast
Written Summary
This tutorial builds on the Hello Services module, so make sure you download this project from GitHub beforehand. If you are interested in seeing the completed solution, download it from here.
Create Sample Application
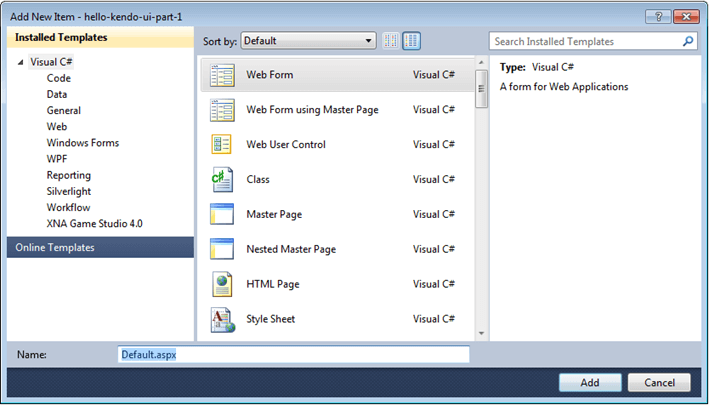
In the Hello Services project, delete the Site.Master, About.aspx and Default.aspx pages. Add a new Web Form to the project and call it Default.aspx.
Figure 1: Adding a new Web Form to the project
When the document comes up, delete all of the unnecessary DOCTYPE declaration and HTML namespacing. As explained in the Hello HTML5, none of this is necessary and really clutters up the code.
Remove <form>
The <form> tag in the page is what Web Forms uses to post any data in the page back to the server and then back again. By default, Web Forms pages post back to themselves. The server then takes this form data (any .NET controls in the page) and manipulates their values based on the methods you defined in the preceding code. There is a whole page lifecycle that goes into effect here. Since the current project is essentially building an SPA, you do not need this form.
Now that you removed the form tag, the server tag at the top of the page declaring the page language and preceding code is not necessary either. The project is using straight HTML here, so remove the runat attribute from the head, as demonstrated in the example below.
<!DOCTYPE html>

    <html>
        <head>
            <title></title>
        </head>
        <body>

        </body>
    </html>
Add Kendo UI
Add the open source Kendo UI version to your project by installing it from NuGet. This also installs jQuery. Right-click the project. Select Add library package reference > Online. Search for kendoui. Select the package and choose Install.
Important
While you are free to install and try out Kendo UI Core, make sure you have a licensed copy before using any of the Kendo UI enterprise distributions, such as Kendo UI Professional, which includes data-management and editors widgets, such as the Grid, as well as Bar Chart, Gauges, etc. Click here for more information on Kendo UI licensing.
Find more information on how to host Kendo UI Professional in your project.
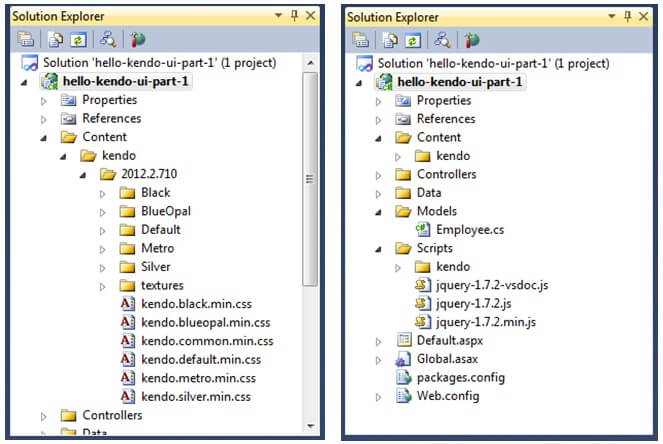
Note that you now have a Content folder that contains a kendo subfolder. You also have a Scripts folder which also has a kendo subfolder.
Figure 2: Solution Explorer
Add to Default Page
To build with Kendo UI, include its styles, jQuery and JavaScript files. Out of the Content folder and kendo/version subfolder, drag the kendo.common.min.css file to the head of the page, just below <title>. This style sheet always needs to be included. It is used in all the themes. Next, pick your favorite theme and drag that stylesheet to the head of the page. The default style—kendo.default.min.css—is used for this example.
Expand the Scripts folder. Select jQuery-1.8.2.min.js and drag it into the body of the page. Place the script files in the body of the page because it is a best practice to load scripts last as they would delay the loading of the whole page. Loading them last ensures that your application does not suffer from seemingly poor performance while waiting on a JavaScript file.
Next expand the kendo subfolder and the appropriate version subfolder and drag kendo.web.min.js out and drop it just below jQuery. Load jQuery before loading Kendo UI as Kendo UI takes a dependency on jQuery and expects it to be loaded.
Include No Type
It turns out that the Script includes do not need a type. If you do not specify a type, it is assumed to be JavaScript and parsed as such. This is safe in every browser. Go ahead and remove the type attribute off the script tags.
When you are done pruning, your code is simple and looks as demonstrated in the example below.
<!DOCTYPE html>

<html>

    <head>

        <title>Hello Kendo UI</title>
        <link href="Content/kendo/2012.2.710/kendo.common.min.css" rel="stylesheet" type="text/css" />
        <link href="Content/kendo/2012.2.710/kendo.default.min.css" rel="stylesheet" type="text/css" />

    </head>

    <body>

        <script src="Scripts/jquery-1.8.2.min.js"></script>
        <script src="Scripts/kendo/2012.2.710/kendo.web.min.js"></script>

    </body>

</html>
You now have everything it takes to get started. Since we already have an employees endpoint from the Hello Services modules, use the Grid to display them.
Initialize the Grid
Make a Grid by adding an empty div to the page with an id of employeesGrid. You are going to select this later with jQuery to turn it into a Kendo UI Grid.
<div id="employeesGrid"></div>Now turn this grid into a Kendo UI Grid using JavaScript. To do that, select the div by its ID with a jQuery selector and then call the kendoGrid function. Inside that function, create the Kendo UI DataSource for the grid and set its read endpoint to the Get method on the EmployeesController. The Get method simply specifies that the controller should respond to a GET HTTP request at the api/employees endpoint.
$(function () {
$("#employeesGrid").kendoGrid({
dataSource: new kendo.data.DataSource({
transport: {
read: "api/employees"
}
})
});
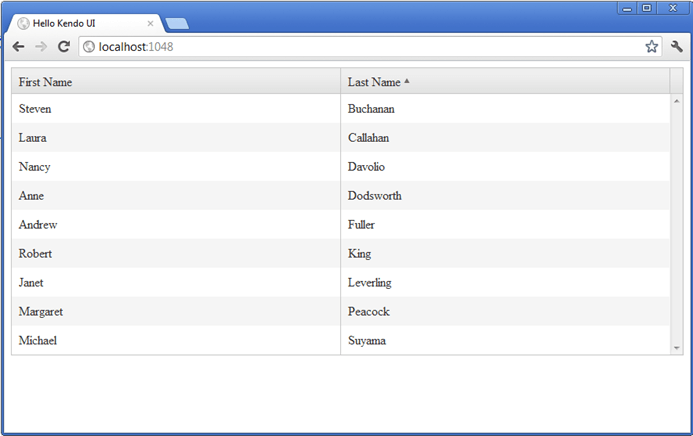
});Now the Kendo UI Grid is created.
Figure 3: A preview of the Grid

Kendo UI automatically creates columns for each of the data items and assigns the field name as the column header. Change this to make it more user-friendly. Specifically, do not display the Id and format the First Name and Last Name columns so they display headers in spaced title case. Right now they are title cased, but there is no space.
The example below demonstrates how to specify the Grid columns.
 $(function () {
    $("#employeesGrid").kendoGrid({
        columns: [
            { field: "FirstName", title: "First Name" },
            { field: "LastName", title: "Last Name" }
        ],
        dataSource: new kendo.data.DataSource({
            transport: {
                read: "api/employees"
            }
        }),
        sortable: true
    });
});
Now the Grid displays the column headers correctly and does not display the unnecessary Id column.
Figure 4: A Grid having its unnecessary columns removed
You are also able to apply a drag-and-drop grouping by setting the groupable: true flag. Multi-column sorting, aggregating, and paging can also be enabled.
Perform Grid Actions Server-Side
Assume that this grid is backed by data with thousands of rows, not just 10. In this case, you would want to do some paging on the grid. You could show possibly 10 or 20 rows per page. While you could easily enable this in the grid client-side, you must to do this paging on the server. Wire up the grid to the server so that you are able to perform paging actions on the database which boosts the performance of massive record sets.
Set Up Paging
Configure the paging functionality in the grid by setting pageable: true. Set the pageSize on the DataSource as demonstrated in the example below, where the pageSize is set to 3 since there are just 10 records to work with.
$(function () {
$("#employeesGrid").kendoGrid({
columns: [
{ field: "FirstName", title: "First Name" },
{ field: "LastName", title: "Last Name" }
],
dataSource: new kendo.data.DataSource({
transport: {
read: "api/employees"
},
pageSize: 3
}),
pageable: true
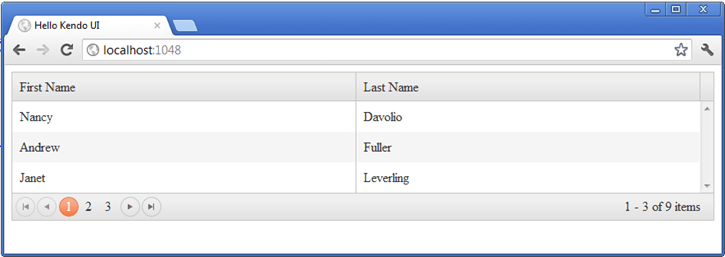
});
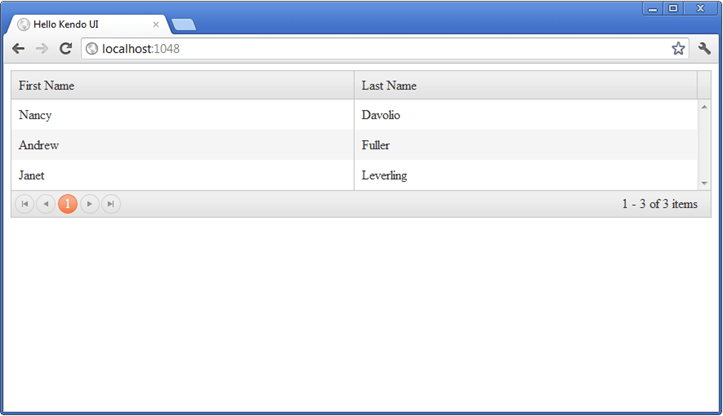
});Figure 5: A Grid that is set up for paging
Push this paging to the server. To tell Kendo UI to do this, toggle the serverPaging: true on the DataSource in the grid, as demonstrated in the example below.
 $(function () {
    $("#employeesGrid").kendoGrid({
        columns: [
            { field: "FirstName", title: "First Name" },
            { field: "LastName", title: "Last Name" }
        ],
        dataSource: new kendo.data.DataSource({
            transport: {
                read: "api/employees"
            },
            pageSize: 3,
            serverPaging: true
        }),
        pageable: true
    });
});
Figure 6: A Grid with its paging pushed to the server
The grid now displays only 1 page. The reason for this is that it is expecting the server to send it some information that is not yet specified. Open up the Developer Tools by pressing Ctrl+Shift+i in Chrome or F12 in IE. Test your application on whichever browser you are targeting for deployment and switch to it if necessary.
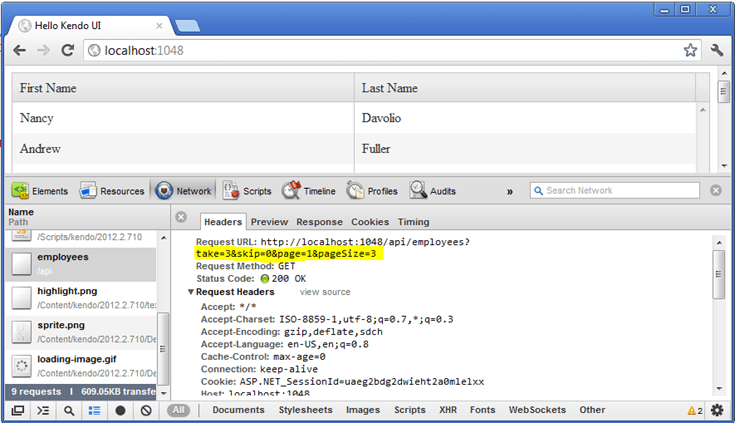
An inspection of the request in the Developer Tools reveals that Kendo UI is now sending take, skip, and pageSize parameters back to the Web API service. Handle these parameters in the method on the server.
Figure 7: The take, skip, and pageSize parameters sent back to the Web API service
Handle Request Parameters
If you recall from the Hello Services tutorial, you mapped a URL back to a method with an optional id parameter that may or may not be after employees in the URL path. But these parameters for paging are in the query string. How do we get to these parameters?
These parameters can be retrieved off of the Request object. You can create a reference to this variable at the top of your EmployeesController class for brevity. Then simply look for the parameters by name.
The take parameter tells you how many records you need to fetch, i.e. the page size.
The skip parameter tells you how many records to skip before you start fetching records.
LINQ has these functions built in and they are simple to use. Retrieve the values off of the Request parameter and then call the skip and take methods on your query to the Employees table.
The example below demonstrates how to create a Kendo UI Grid.
HttpRequest request = HttpContext.Current.Request;

public List Get() {
    // get the take and skip parameters int skip = request["skip"] == null ? 0 :
    int.Parse(request["skip"]); int take = request["take"] == null ? 10 :
    int.Parse(request["take"]);

    // select the employees from the database, skipping and taking the correct amount
    var employees = (from e in _context.Employees
                     select new Models.Employee(e)).Skip(skip).Take(take);

    return employees.ToList();
}
The server is now handling the paging. Start the application and preview it in the browser.
Figure 8: A preview of the application in the browser
There is still only 1 page of data. This is because Kendo UI is missing an essential piece of information.
Set Total Number of Pages
Pass a variable, which specifies the total number of pages, to Kendo UI from the server. To do this, modify the response. Currently, you are sending back an array of employees as the top level element in your JSON response from the server. What you need now is a top level element that has two values:
Level 1. The total count of records Level 2. The array of employees
To achieve this, create a new class in the Models folder called Response. It is going to be the generic response container for all responses coming from the server. This class will have two properties—the total count and an Array.
Now if you are a .NET developer, and the thought of using an array sends off warning bells in your head, you are on the right track. This is normal. Arrays are not type-safe and C#/VB.NET are strongly typed languages. Arrays are not often used. Instead, use a generic list which allows you to specify the type.
However, for this scenario, the Array is going to contain a collection of class objects that could be of any type. You might later want to send down customers or orders. We could jump through some hoops here with generics and interfaces to force a type-safe container, but the simplest way to accomplish this is with an Array. Remember that this object is strictly for you to interface with the JavaScript where arrays are first-class citizens.
Your Reponse model object should look like the one demonstrated in the example below.
public class Response {
    // properties public Array Data { get; set; }
    public int Count { get; set; }
    // constructor
    public Response(Array data, int count) {
        this.Data = data; this.Count = count;
    }
}
A constructor was also added so that this object can be built by passing values into it. This you from having to build the object in the method that executes the query, thus decreasing the amount of code in that block.
Now alter the Get method to return Model.Response instead of List<Model.Employee>. Also, instead of casting the returned query results to a list, cast them ToArray(); You can do this inline right off of the LINQ query. The count can be ascertained from the Data.Employee LINQ object by calling its Count() method, as demonstrated int he example below.
public Models.Response Get() {
    // get the take and skip parameters
    int skip = request["skip"] == null ? 0 : int.Parse(request["skip"]);
    int take = request["take"] == null ? 10 : int.Parse(request["take"]);

    // select the employees from the database, skipping and taking the correct amount
    var employees = (from e in _context.Employees
                     select new Models.Employee(e)).Skip(skip).Take(take).ToArray();

    return new Models.Response(employees, _context.Employees.Count());
}
If you fire up the application now, the Grid is going to be empty. This is because the collection of employees is no longer the top level element. You need to tell Kendo UI about your new response structure. Specifically, it needs to know where the repeating data is (the employees array) and where the total count of records is. This is done in the schema configuration, as demonstrated in the example below.
$(function () {
$("#employeesGrid").kendoGrid({
columns: [ { field: "FirstName", title: "First Name" }, { field: "LastName", title: "Last Name" } ],
dataSource: new kendo.data.DataSource({
transport: {
read: "api/employees"
},
schema: {
data: "Data",
total: "Count"
},
pageSize: 3,
serverPaging: true
}),
pageable: true
});
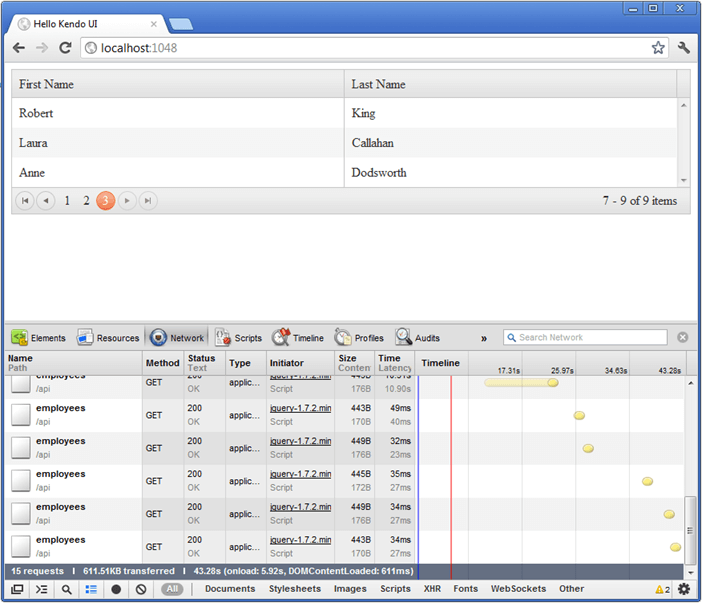
});Now you can run the application and see that paging is working. If you open the Developer Tools, you can watch each request go to the server and watch the server return only the appropriate page of data. If you watch closely, depending on your server latency, you might see the Kendo UI spinner come up indicating a server action. You can add a System.Threading.Thread.Sleep(1000); to your Get method on the EmployeesController if you want to see what your application will look like while the UI is waiting for the server to respond. Kendo UI takes care of that too.
Figure 9: A preview of your application
Further Reading
Download the full source for the project in this tutorial from here.
Build on this tutorial by gradually adding more advanced functionalities to this application and consider the information from these pages:
- Kendo UI Grid Demo
- Kendo UI DataSource Demo
- More information on ASP.NET on GitHub
- MSDN on Page Life Cycle
- Wikipedia on Single-Page Applications
Tutorials on how to build an HTML application in ASP.NET: