Selection
This article demonstrates the selection feature of the RadTileView control.
Enabling Selection
The selection feature is disabled by default. To enable it set the IsSelectionEnabled property of RadTileView to True. To select a RadTileViewItem, click on it in the UI, or set the SelectedItem property of the control.
Example 1: Enabling selection
<telerik:RadTileView IsSelectionEnabled="True">
    <telerik:RadTileViewItem Header="Item 1"/>
    <telerik:RadTileViewItem Header="Item 2"/>
    <telerik:RadTileViewItem Header="Item 3"/>
    <telerik:RadTileViewItem Header="Item 4"/>
    <telerik:RadTileViewItem Header="Item 5"/>
</telerik:RadTileView>
Figure 1: Selected tile

Selection Mode
The control supports three selection modes. They can be set via the SelectionMode property of RadTileView.
Single: In this mode the user will be able to select only one item at once. This is the default mode.
Multiple: This mode allows selection of multiple items. Clicking an item selects or deselects it depending on its current state. Also, the previously selected items will preserve their selection state.
Extended: This mode allows the user to select multiple items at once by holding down the Ctrl or Shift keys and clicking multiple items with the mouse or by using the keyboard. A second click on a selected item will unselect that item.
Example 2: Setting selection mode
<telerik:RadTileView IsSelectionEnabled="True"
                     SelectionMode="Multiple">
    <telerik:RadTileViewItem Header="Item 1"/>
    <telerik:RadTileViewItem Header="Item 2"/>
    <telerik:RadTileViewItem Header="Item 3"/>
    <telerik:RadTileViewItem Header="Item 4"/>
    <telerik:RadTileViewItem Header="Item 5"/>
</telerik:RadTileView>
Setting and Getting Selected Items Manually
The selected tile is stored in the SelectedItem property of RadTileView and also in its SelectedItems collection. You can use both to access or update the selected tiles.
Depending on the setup the SelectedItem property can contain different values. If the control is populated directly using RadTileViewItem instances, the property will contain a value of type RadTileViewItem. If the control is populated via its ItemsSource property, the SelectedItem will contain an object from the ItemsSource (the model of the selected RadTileViewItem).
Example 3: Getting and setting selection manually via the SelectedItem property
// Getting the selection
object selectedItem = this.radTileView.SelectedItem;

// Setting the selection. Selecting the first item in the Items collection of the control
this.radTileView.SelectedItem = this.radTileView.Items[0]
' Getting the selection
Dim selectedItem As Object = Me.radTileView.SelectedItem

' Setting the selection. Selecting the first item in the Items collection of the control
Me.radTileView.SelectedItem = Me.radTileView.Items(0)
Example 4: Setting selection via the SelectedItems collection property
// Getting the selection
object selectedItem = this.radTileView.SelectedItems[0];

// Setting the selection. Selecting the first item in the Items collection of the control
this.radTileView.SelectedItems.Add(this.radTileView.Items[0]);
' Getting the selection
Dim selectedItem As Object = Me.radTileView.SelectedItems(0)

' Setting the selection. Selecting the first item in the Items collection of the control
Me.radTileView.SelectedItems.Add(Me.radTileView.Items(0))
Events
The RadTileView control exposes several selection events. Please note that these events should be used instead of the standard SelectionChanged event.
PreviewTileSelectionChanged: This event fires just before the selection state of the tile gets changed. You can use the event to cancel the selection of the tile by setting the Handled property of the event arguments to True.
TileSelectionChanged: This event fires just after the selection state of the tile is changed.
PreviewTilesSelectionChanged: This event fires just before the selection operation completes. For example, if you select multiple items using the Shift key + Mouse click (in Extended selection mode), the event will get fired only once. You can use the event to cancel the selection of the tile by setting the Handled property of the event arguments to True.
TilesSelectionChanged: This event fires just after the selection operation completes. For example, if you select multiple items using the Shift key + Mouse click (in Extended selection mode), the event will get fired only once.
Binding SelectedItem
This section demonstrates how to data bind the SelectedItem property of the control.
Example 5: Defining the model and populating it with data
public class MainViewModel : ViewModelBase
{
    private TileInfo selectedItem;
    public TileInfo SelectedItem
    {
        get { return selectedItem; }
        set
        {
            if (this.selectedItem != value)
            {
                this.selectedItem = value;
                this.OnPropertyChanged("SelectedItem");
            }
        }
    }

    public ObservableCollection<TileInfo> Tiles { get; set; }

    public MainViewModel()
    {
        this.Tiles = new ObservableCollection<TileInfo>();
        for (int i = 0; i < 6; i++)
        {
            this.Tiles.Add(new TileInfo() { Header = "Tile " + i, Content = "Tile Content " + i });
        }

        this.SelectedItem = this.Tiles[0];
    }
}

public class TileInfo
{
    public string Header { get; set; }
    public string Content { get; set; }
}
Public Class MainViewModel
    Inherits ViewModelBase

    Private _selectedItem As TileInfo
    Public Property SelectedItem() As TileInfo
        Get
            Return _selectedItem
        End Get
        Set(ByVal value As TileInfo)
            If Me._selectedItem IsNot value Then
                Me._selectedItem = value
                Me.OnPropertyChanged("SelectedItem")
            End If
        End Set
    End Property

    Public Property Tiles() As ObservableCollection(Of TileInfo)

    Public Sub New()
        Me.Tiles = New ObservableCollection(Of TileInfo)()
        For i As Integer = 0 To 5
            Me.Tiles.Add(New TileInfo() With {
                .Header = "Tile " & i,
                .Content = "Tile Content " & i
            })
        Next i

        Me.SelectedItem = Me.Tiles(0)
    End Sub
End Class

Public Class TileInfo
    Public Property Header() As String
    Public Property Content() As String
End Class
Example 6: Setting the DataContext
public partial class TileViewUserControl : UserControl
{
    public TileViewUserControl()
    {
        InitializeComponent();
        this.DataContext = new MainViewModel();
    }
}
Example 7: Setting up the view and binding the SelectedItem property
<telerik:RadTileView IsSelectionEnabled="True"
                     DisplayMemberPath="Header"
                     ItemsSource="{Binding Tiles}"
                     SelectedItem="{Binding SelectedItem, Mode=TwoWay}">
    <telerik:RadTileView.ContentTemplate>
        <DataTemplate>
            <TextBlock Text="{Binding Content}" />
        </DataTemplate>
    </telerik:RadTileView.ContentTemplate>
</telerik:RadTileView>
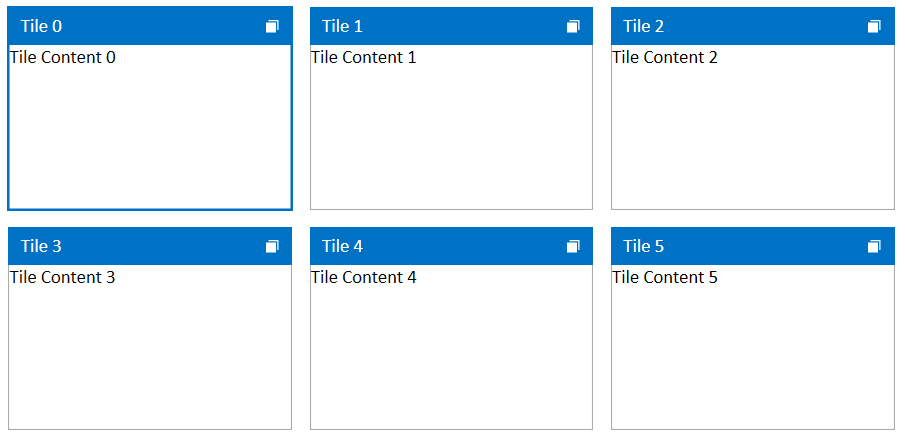
Figure 2: Data binding example
You can find more information about the ViewModeBase class used in Example 5 in the ViewModelBase Class article.