Getting Started with WPF TileView
Assembly References
To use the RadTileView in your projects you have to add references to the following assemblies:
- Telerik.Windows.Controls
- Telerik.Windows.Controls.Navigation
- Telerik.Windows.Data
You can find the required assemblies for each control from the suite in the Controls Dependencies help article.
Adding Telerik Assemblies Using NuGet
To use RadTileView when working with NuGet packages, install the Telerik.Windows.Controls.Navigation.for.Wpf.Xaml package. The package name may vary slightly based on the Telerik dlls set - Xaml or NoXaml
Read more about NuGet installation in the Installing UI for WPF from NuGet Package article.
Adding the RadTileView to the page
Example 1
<UserControl x:Class="RadTileViewHelpExamples.MainPage"
    xmlns="http://schemas.microsoft.com/winfx/2006/xaml/presentation"
    xmlns:x="http://schemas.microsoft.com/winfx/2006/xaml"
    xmlns:telerik="http://schemas.telerik.com/2008/xaml/presentation">
    <Grid x:Name="LayoutRoot">
        <telerik:RadTileView>
            <telerik:RadTileViewItem Header="Item1">
                <TextBlock Text="Item1 Content"/>
            </telerik:RadTileViewItem>
            <telerik:RadTileViewItem Header="Item2">
                <TextBlock Text="Item2 Content"/>
            </telerik:RadTileViewItem>
            <telerik:RadTileViewItem Header="Item3" >
                <TextBlock Text="Item3 Content"/>
            </telerik:RadTileViewItem>
        </telerik:RadTileView>
    </Grid>
</UserControl>
As you can see from the image below the items are in restored state by default.
Setting maximized item
To set an item in maximized state you can use the TileState property and set its value to Maximized.
Example 2
<telerik:RadTileView>
    <telerik:RadTileViewItem TileState="Maximized" Header="Item1">
        <TextBlock Text="Item1 Content"/>
    </telerik:RadTileViewItem>
    <telerik:RadTileViewItem Header="Item2">
        <TextBlock Text="Item2 Content"/>
    </telerik:RadTileViewItem>
    <telerik:RadTileViewItem Header="Item3" >
        <TextBlock Text="Item3 Content"/>
    </telerik:RadTileViewItem>
</telerik:RadTileView>
As you can see from the image below Item1 is now in maximized state.
Setting minimized position
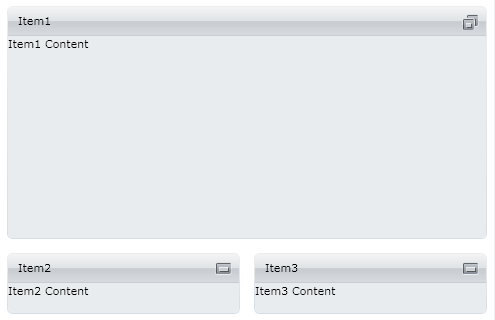
To set the minimized area positions use the MinimizedItemsPosition property. It is an enumeration with the following values:
- Left
- Top
- Right
- Bottom
Example 3
<telerik:RadTileView MinimizedItemsPosition="Bottom">
    <telerik:RadTileViewItem TileState="Maximized" Header="Item1">
        <TextBlock Text="Item1 Content"/>
    </telerik:RadTileViewItem>
    <telerik:RadTileViewItem Header="Item2">
        <TextBlock Text="Item2 Content"/>
    </telerik:RadTileViewItem>
    <telerik:RadTileViewItem Header="Item3" >
        <TextBlock Text="Item3 Content"/>
    </telerik:RadTileViewItem>
</telerik:RadTileView>
Figure 1

Setting a Theme
The controls from our suite support different themes. You can see how to apply a theme different than the default one in the Setting a Theme help article.
Changing the theme using implicit styles will affect all controls that have styles defined in the merged resource dictionaries. This is applicable only for the controls in the scope in which the resources are merged.
To change the theme, you can follow the steps below:
Choose between the themes and add reference to the corresponding theme assembly (ex: Telerik.Windows.Themes.Windows8.dll). You can see the different themes applied in the Theming examples from our WPF Controls Examples application.
-
Merge the ResourceDictionaries with the namespace required for the controls that you are using from the theme assembly. For the RadTileView, you will need to merge the following resources:
- Telerik.Windows.Controls
- Telerik.Windows.Controls.Navigation
Example 4 demonstrates how to merge the ResourceDictionaries so that they are applied globally for the entire application.
Example 4: Merge the ResourceDictionaries
<Application.Resources>
    <ResourceDictionary>
        <ResourceDictionary.MergedDictionaries>
            <ResourceDictionary Source="/Telerik.Windows.Themes.Windows8;component/Themes/System.Windows.xaml"/>
            <ResourceDictionary Source="/Telerik.Windows.Themes.Windows8;component/Themes/Telerik.Windows.Controls.xaml"/>
            <ResourceDictionary Source="/Telerik.Windows.Themes.Windows8;component/Themes/Telerik.Windows.Controls.Navigation.xaml"/>
        </ResourceDictionary.MergedDictionaries>
    </ResourceDictionary>
</Application.Resources>
Alternatively, you can use the theme of the control via the StyleManager.
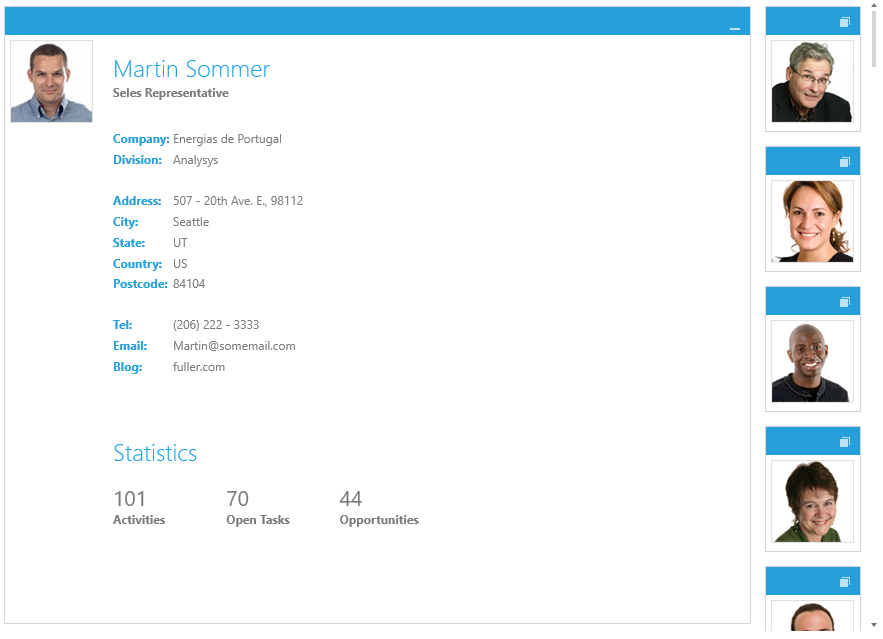
Figure 2 shows a RadTileView with the Windows8 theme applied.
Figure 2: RadTileView with the Windows8 theme

Telerik UI for WPF Learning Resources
- Telerik UI for WPF TileView Component
- Getting Started with Telerik UI for WPF Components
- Telerik UI for WPF Installation
- Telerik UI for WPF and WinForms Integration
- Telerik UI for WPF Visual Studio Templates
- Setting a Theme with Telerik UI for WPF
- Telerik UI for WPF Virtual Classroom (Training Courses for Registered Users)
- Telerik UI for WPF License Agreement