Installation Approaches for Telerik Reporting
Telerik Reporting provides options for installing the product by using the Control Panel, by the MSI installer file, or NuGet. The NuGet packages add the Reporting assemblies to the project, but do not provide design time support.
After installing the product, you will need to download and activate/update your Telerik Reporting License Key.
Using the Control Panel
You can install Telerik Reporting by downloading the Control Panel. For the complete instructions, refer to the Progress Control Panel online documentation.
The Progress Control Panel will automatically download and store your license key in your home directory. This makes it available for all projects you develop on your local machine. For details, check the article Setting Up Telerik Reporting License Key.
Using the MSI File
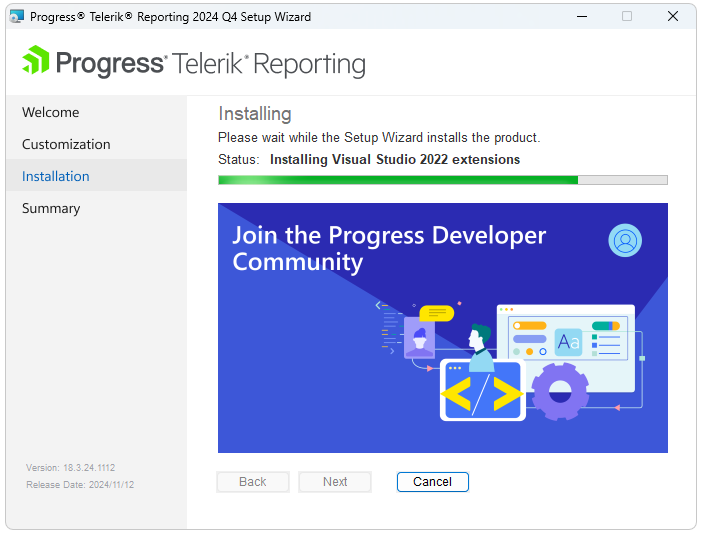
You can install Telerik Reporting by using the .msi file for automatic product installation. The file installs Telerik Reporting on your computer in a Program Files/Progress folder, automatically creates the necessary virtual folders and projects, and provides all required files for developing with Telerik Reporting.
When you download the Telerik Reporting, the wizard for the MSI installation will by default install the product in the C:\Program Files (x86)\Progress\Telerik Reporting 2025 Q4 folder for 32-bit machines, or in the C:\Program Files\Progress\Telerik Reporting 2025 Q4 folder for 64-bit machines.
Using the MSI installer is the recommended way for installing Telerik Reporting. The MSI installer will automatically register the Telerik Reporting assemblies needed for Visual Studio Telerik Report Designer in the machine GAC, configure the Project and Item Templates in all Visual Studio instances, and create and populate the AdventureWorks sample database used by the sample projects.
Specifics
During the MSI installation process, consider the following:
- Prior to R3 2017, the default installation paths were
C:\Program Files\Telerik\andC:\Program Files (x86)\Telerik\respectively. - The latest package that is available for download has all updates/HOTFIXES applied already and you don't need to update it further.
- The MSI installation will not overwrite previous Telerik Reporting installations unless the current installation is of the same version. The installer will keep your existing installation. The new files will be placed in a separate folder and the new installation will not damage the common installer files.
- The Downloads page lists previously downloaded products. For any missing products or product versions, contact the Sales team through the support ticketing system by submitting a General Feedback thread.
- To access the latest Telerik Reporting internal builds, after you log into your Telerik account, navigate to Latest Internal Build under Downloads. For internal builds from earlier releases, select the respective Telerik Reporting version.
MSI Installation
To install Telerik Reporting through the MSI automatic installer file:
- Log into your Telerik account. Click the Downloads tab to view the available products and select Telerik Reporting.
- From the next page, download the MSI installation and the documentation files and download the automatic installation MSI file. The source code is available for download only for commercial license holders.
-
When the download completes, run
Telerik_Reporting_[suiteversion].msi. In the dialog that appears after you execute the MSI file, confirm that you have read and accepted the License Agreement.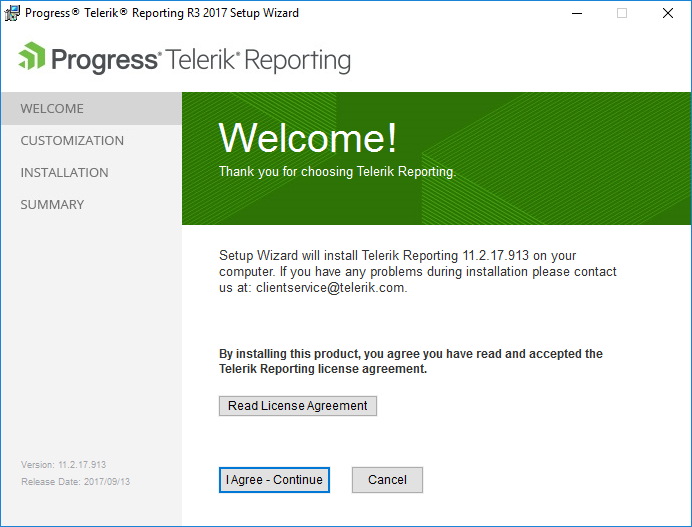
-
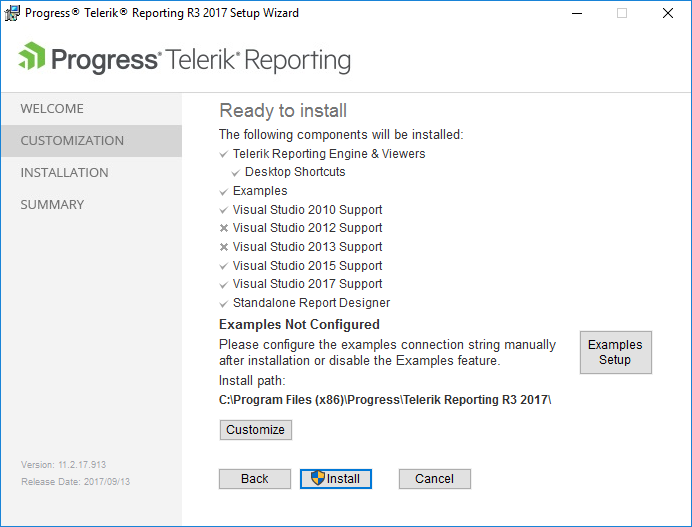
In the dialog that opens, select the features you require.
- If Telerik Reporting does not locate a local SQL server instance on your machine or if your SQL browser service is stopped, the examples from the Examples dialog option will be installed but the configuration files for the application will not have valid connection strings. However, you can still access the working demos on the Telerik Reporting Demos page.
- To set up the examples and the used connection string, select Examples Setup. All local SQL Server 2005+ instances are supported.
- The examples use the MS SQL Server AdventureWorks database. Unless already available on your machine, the AdventureWorks database will also be deployed locally.
- Alternatively, you can install AdventureWorks by manually executing the SQL script from the installer. To use this option, navigate to [InstallDir]/Examples/Data/AdventureWorks OLTP. For the script to run correctly, uncomment the
SET @data_path = 'C:\Program Files\Microsoft SQL Server\90\Tools\Samples\AdventureWorks OLTP\';statement and specify the correct path to the CSV data files which are in the same folder as the SQL script file.
-
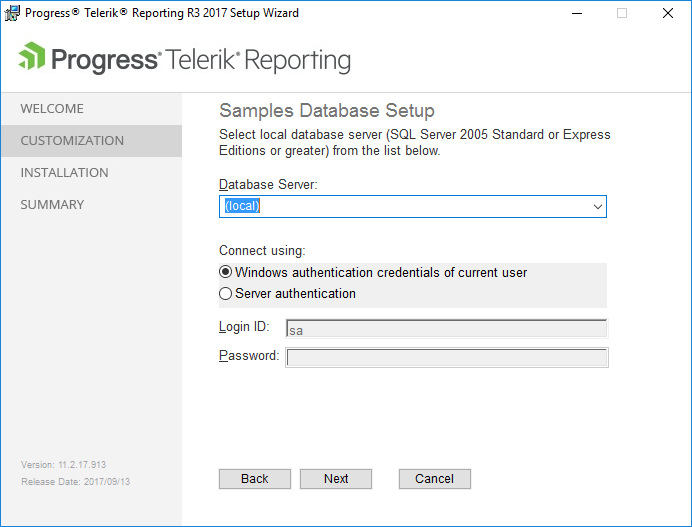
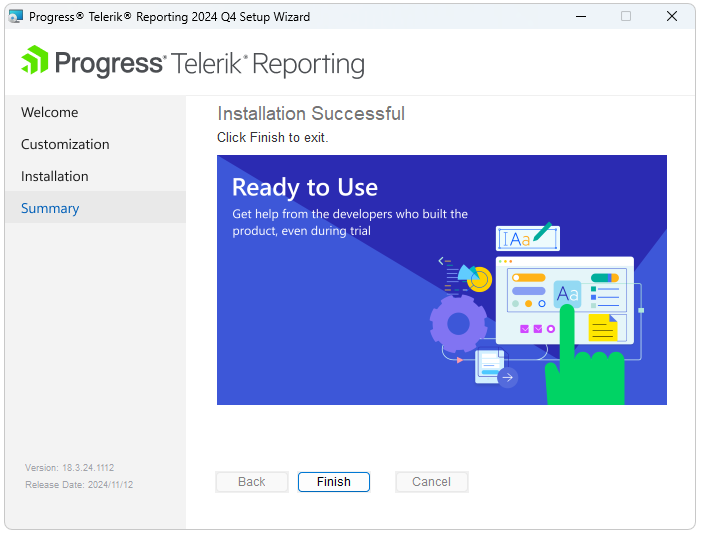
(If Examples Setup was selected) In the Setup Wizard dialog, select your Database Server and the authentication for the connection. The Wizard detects all running instances and lists them in the input field.
To enable the Wizard to detect all running SQL Server instances, run the SQL Server Browser Service.
Using NuGet Packages
You can add Telerik Reporting to a project by installing NuGet packages hosted on the Telerik NuGet server: https://nuget.telerik.com/v3/index.json.
- The
.nupkgfile contains the libraries for .NET Core projects, the Reporting Engine, and the implementation of the Reporting REST WebAPI-based service where you can use the packages with the standard .NET 4.6.1 framework. - The Telerik Reporting NuGet packages do not include design-time support.
Installing the Telerik Reporting NuGet packages involves three steps:
- Generating an API key required for the NuGet authentication.
- Adding the Telerik NuGet server to Visual Studio.
- Installing the Telerik Reporting NuGet packages.
Step 1: Generating an API Key
As the Telerik NuGet server requires authentication, the first step is to obtain an API key that you will use instead of a password. Using an API key instead of a password is a more secure approach, especially when working with .NET CLI or the NuGet.Config file.
- Go to the API Keys page in your Telerik account.
-
Click Generate New Key +.

In the Key Note field, add a note that describes the API key.
- Click Generate Key.
- Select Copy and Close. Once you close the window, you can no longer copy the generated key. For security reasons, the API Keys page displays only a portion of the key.
- Store the generated NuGet API key as you will need it in the next steps. Whenever you need to authenticate your system with the Telerik NuGet server, use
api-keyas the username and your generated API key as the password.
API keys expire after two years. Telerik will send you an email when a key is about to expire, but we recommend that you set your own calendar reminder with information about where you used that key: file paths, project links, AzDO and GitHub Action variable names, and so on.
Step 2: Adding the Telerik NuGet Package Source to Visual Studio
To configure the Telerik NuGet feed in Visual Studio:
- Open Visual Studio.
- Go to Tools > NuGet Package Manager > Package Manager Settings.
- Select Package Sources, and then click the + button.
- In the Source field, enter
https://nuget.telerik.com/v3/index.json. If you use a locally available NuGet package downloaded from your account, add the path to the local package instead of the URL. - Click Update and then OK.
You have successfully added the Telerik NuGet feed as a Package source.
For more information on how to add a NuGet feed, refer to the official Microsoft documentation.
Step 3: Installing Telerik Reporting
After you have successfully added the Telerik NuGet feed as a package source, you need to authenticate your local NuGet instance and install Telerik Reporting:
- Create a new Reporting project or open an existing one.
- Go to Tools > NuGet Package Manager > Manage NuGet Packages for Solution.... Select the Telerik NuGet Package source from the drop-down list on the left.
- Select the Browse tab to see the available packages.
- In the authentication window, enter
api-keyin the User name field and the generated API key in the Password field. - Select the desired Telerik Reporting NuGet package and click Install.