Getting Started with WinUI HubTile
This tutorial will walk you through the creation of a RadHubTile.
Assembly References
In order to use the RadHubTile elements in your projects, you have to add references to the following assembly:
Telerik.WinUI.Controls.dllTelerik.Licensing.Runtime.dll
Defining the RadHubTile
Example 1 demonstrates how a RadHubTile can be defined.
Example 1: Defining a RadHubTile
<Grid xmlns:telerik="using:Telerik.UI.Xaml.Controls.Primitives">
    <telerik:RadHubTile Title="Title" Message="Message" BackContent="Back content"
                           Notification="Notification" UpdateInterval="0:0:2" ImageSource="ms-appx:///Images/MyPicture1.png">
    </telerik:RadHubTile>
</Grid>
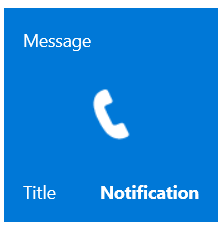
Example 1 assumes that there is a "MyPicture1.png" image inside an Images folder in the project.
Figure 1: RadHubTile
Different Types of Tiles
There are several different types of tiles, which can be used for different scenarios. Check them all out in the HubTiles section.
HubTileService
The HubTileService allows you to group multiple tiles and freeze/unfreeze them. Learn more in the HubTileService article.
Telerik UI for WinUI Learning Resources
- Telerik UI for WinUI HubTile Component
- Getting Started with Telerik UI for WinUI Components
- Telerik UI for WinUI Installation
- Telerik UI for WinUI Examples
- Telerik UI for WinUI Accessibility
- Telerik UI for WinUI License Agreement