Install using NuGet Packages
This article explains how to install the Telerik UI for WinForms suite using NuGet packages. Before installing, you need to Generate an API Key. There are two methods available for obtaining the NuGet packages:
Generate an API Key
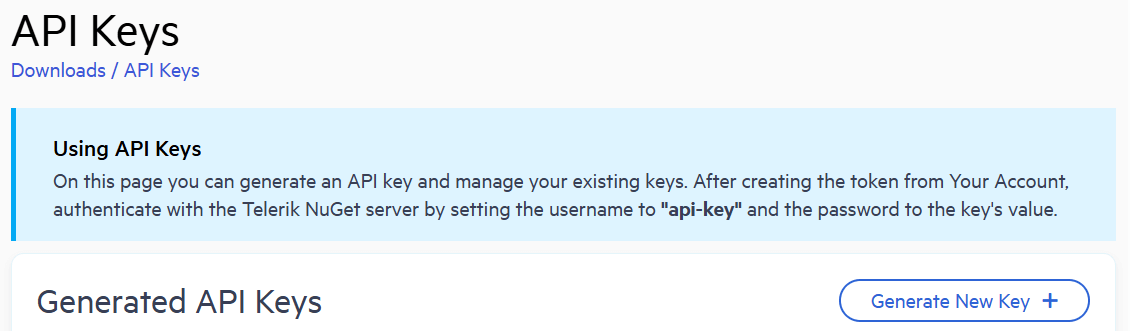
As the Telerik NuGet server requires authentication, the first step is to obtain an API key that you will use instead of a password. Using an API key instead of a password is a more secure approach, especially when working with .NET CLI or the NuGet.Config file.
- Go to the API Keys page in your Telerik account.
-
Click Generate New Key +.
In the Key Note field, add a note that describes the API key.
Click Generate Key.
Select Copy and Close. Once you close the window, you can no longer copy the generated key. For security reasons, the API Keys page displays only a portion of the key.
Store the generated NuGet API key as you will need it in the next steps. Whenever you need to authenticate your system with the Telerik NuGet server, use
api-keyas the username and your generated API key as the password.
API keys expire after two years. Telerik will send you an email when a key is about to expire, but we recommend that you set your own calendar reminder with information about where you used that key: file paths, project links, AzDO and GitHub Action variable names, and so on.
Download from the Telerik NuGet server
This method allows you to install Telerik UI for WinForms packages directly from the official Telerik NuGet server. To use this approach, you need to configure Visual Studio to connect to the Telerik NuGet server (https://nuget.telerik.com/v3/index.json) as a package source.
The NuGet v2 server at https://nuget.telerik.com/nuget was sunset in November 2024. The new v3 protocol offers faster package searches and restores, improved security, and more reliable infrastructure. To redirect your feed to the NuGet v3 protocol, all you have to do is to change your NuGet package source URL to https://nuget.telerik.com/v3/index.json.
-
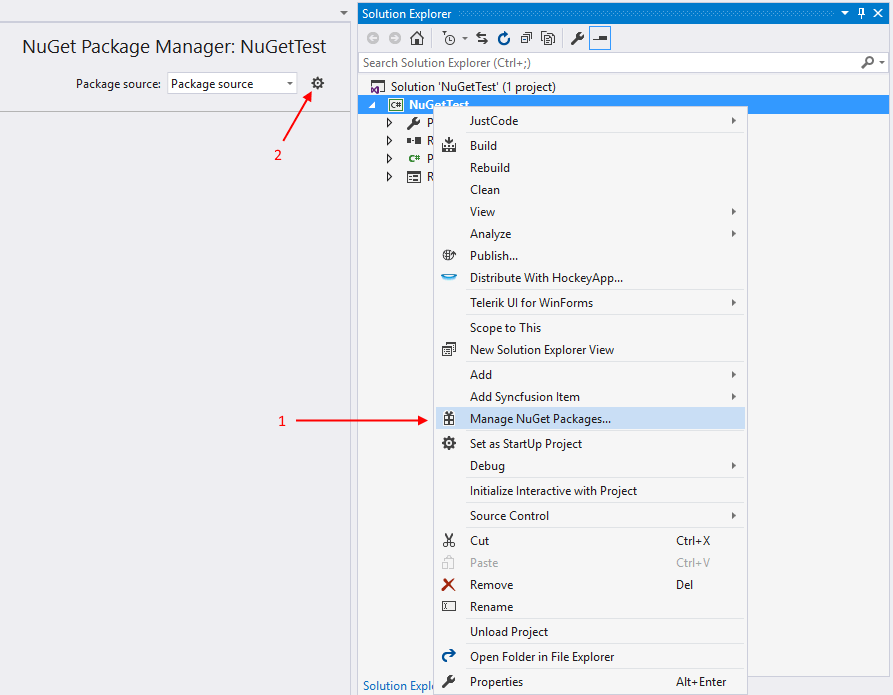
First open the Options window. Right-click on the project, from the menu choose Manage NuGet Packages...:
-
Configure the package source. Click the Settings (gear) icon, then select Package Sources. Add a new package source with the following details:
- Name: Telerik NuGet Feed (or any descriptive name)
-
Source:
https://nuget.telerik.com/v3/index.json
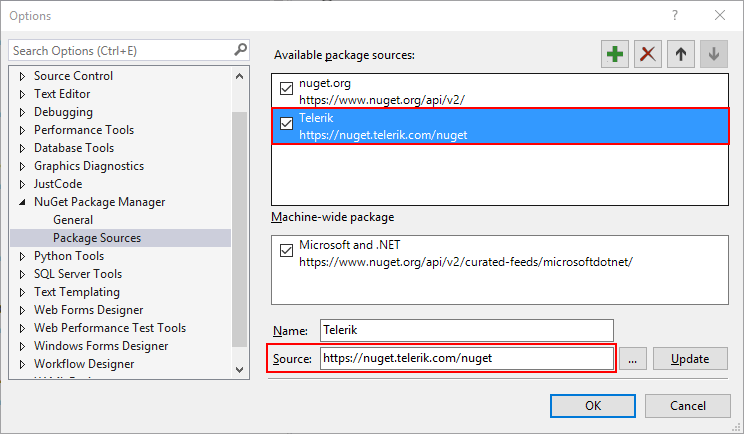
Click Update and then OK to save the configuration. You have successfully added the Telerik NuGet feed as a Package source!
-
Authenticate with the Telerik NuGet server. When you select the Telerik NuGet Feed as the package source, Visual Studio will prompt you to authenticate. Enter the following credentials:
-
Username:
api-key - Password: Your generated NuGet API key from your Telerik account

To generate an API key, see Generate an API Key. The API key is specific to your licensed account and provides access to the packages you are entitled to use.
-
Username:
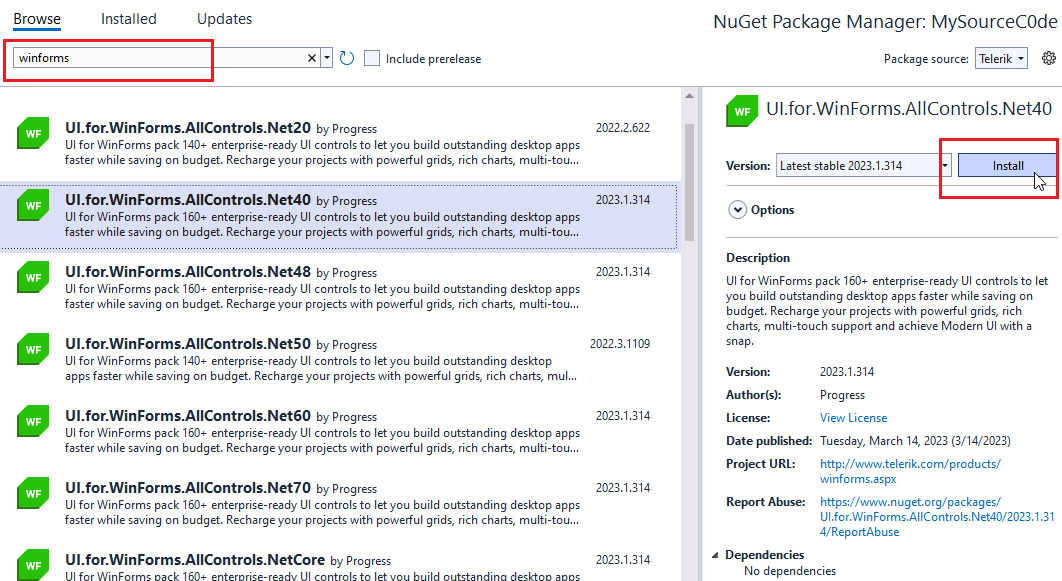
In the Package Manager, browse the Telerik NuGet feed for UI.for.WinForms.AllControls package. You will see all Telerik packages available to your licensed account.
-
Select the target framework version. Choose the package version that matches your project's target framework (.NET Framework 4.8, .NET 6.0, .NET 8.0, .NET 9.0 or later) and click Install:
Reset Stored Credentials
If you have previously stored credentials for the Telerik NuGet server, you need to update them with a new API key. Or if you encounter some authentication issues, follow these steps to reset the stored credentials:
Remove any saved credentials from the Windows Credential Manager. Look for entries named
nuget.telerik.comorVSCredentials_nuget.telerik.comentries.Remove the Telerik NuGet package source from Visual Studio.
-
Clear .NET CLI configuration (if applicable). If you have configured the Telerik package source using the .NET CLI, remove it by running these commands:
Verify that no credentials are stored in
%AppData%\NuGet\NuGet.Config. If you find any Telerik-related entries, remove them manually.Try to reset the Visual Studio user data by forcing NuGet to ask for authentication.
Close and restart Visual Studio to ensure all cached credentials are cleared.
If you are using the Telerik NuGet feed in a .NET Core application, use a NuGet API key in the NuGet.Config file.
Manually Download NuGet Packages
-
First you need to log in using your licensed account. This way you will be able to download the packages:
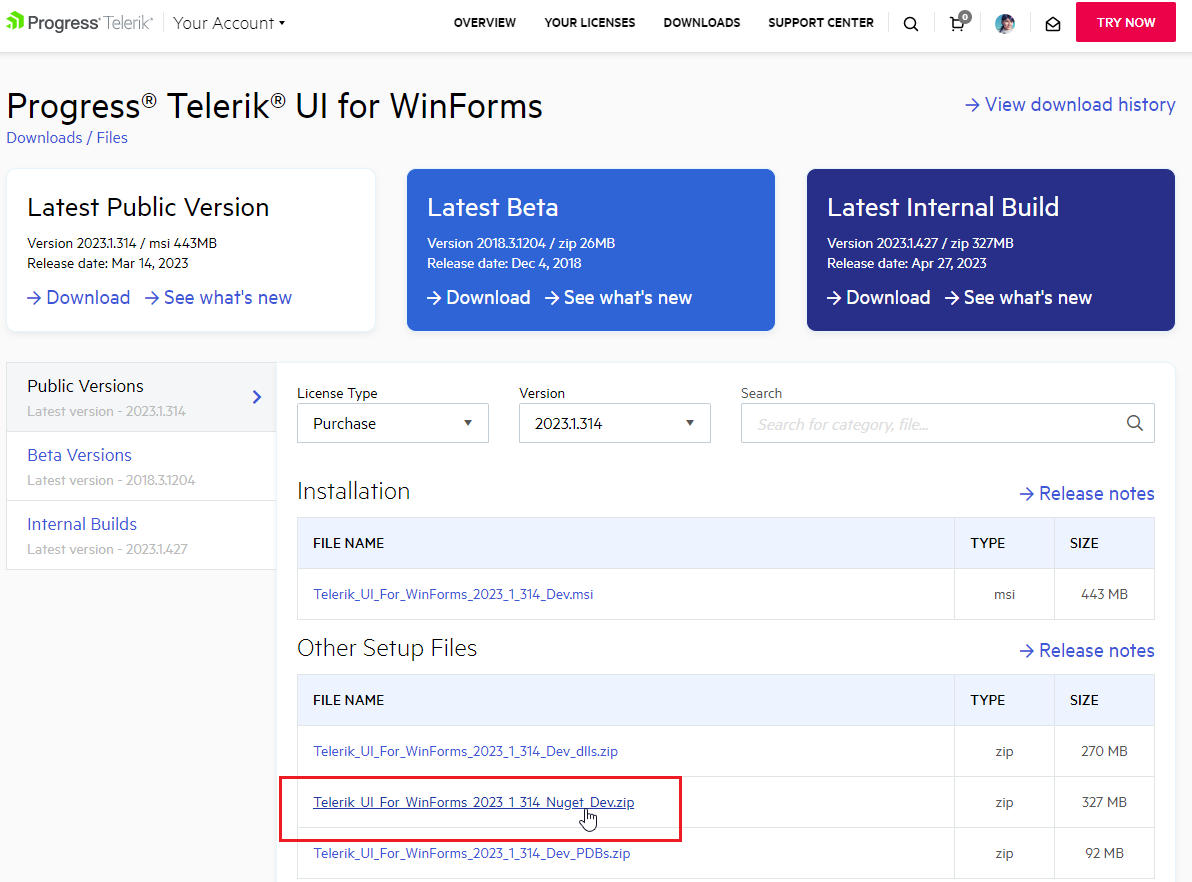
The following article shows where you can find the downloads section Download Product Files
-
Then you need to add packages to Visual Studio. Open the NuGet manager and then click the options button:
-
Add new package source. The Source should point to the folder with the NuGets:

-
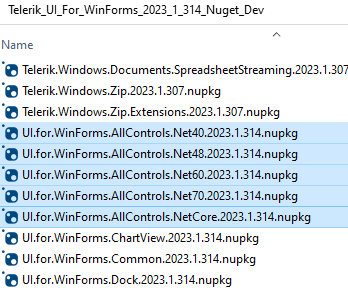
The final step is to select and install the desired packages. Please note that there are several versions, corresponding to the target framework used in the project, one for .NET 4.0, one for 4.8, one for .NET 6.0 or newer.