Getting Started with WinForms TaskbarButton
This tutorial will help you to quickly get started using the control.
Adding Telerik Assemblies Using NuGet
To use RadTaskbarButton when working with NuGet packages, install the Telerik.UI.for.WinForms.AllControls package. The package target framework version may vary.
Read more about NuGet installation in the Install using NuGet Packages article.
With the 2025 Q1 release, the Telerik UI for WinForms has a new licensing mechanism. You can learn more about it here.
Adding Assembly References Manually
When dragging and dropping a control from the Visual Studio (VS) Toolbox onto the Form Designer, VS automatically adds the necessary assemblies. However, if you're adding the control programmatically, you'll need to manually reference the following assemblies:
- Telerik.Licensing.Runtime
- Telerik.WinControls
- Telerik.WinControls.UI
- TelerikCommon
The Telerik UI for WinForms assemblies can be install by using one of the available installation approaches.
Defining the RadTaskbarButton
Before proceeding further with this article, it is recommended to get familiar with the Windows Taskbar's structure and how the different parts are being organized: Structure.
Let's consider that you already have an existing Windows Forms application. Otherwise, create a new project using one of the Visual Studio Templates. By default, when the application is running, the following button is shown in the Taskbar:
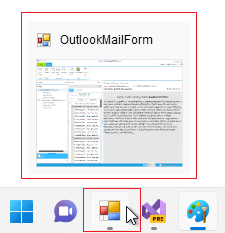
This article demonstrates how to customize this visual representation.
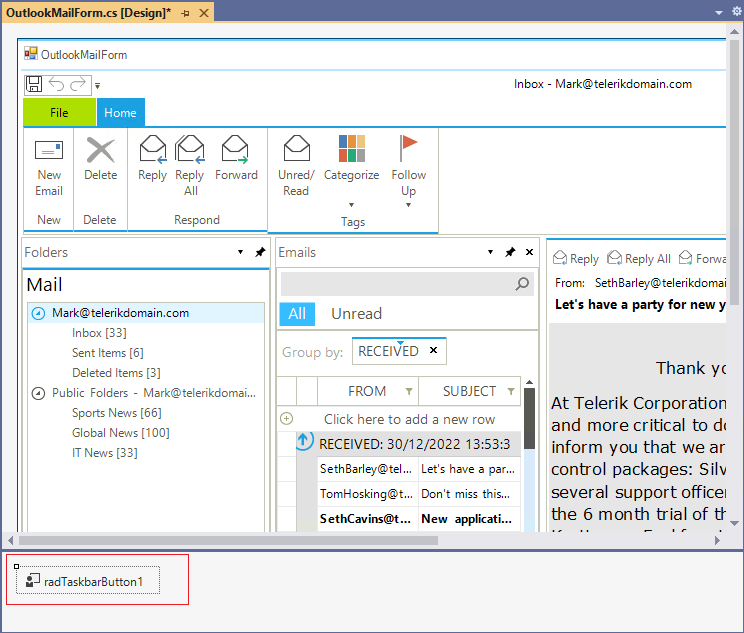
1. Drag the RadTaskbarButton component from the Visual Studio Toolbox and drop it onto the form:
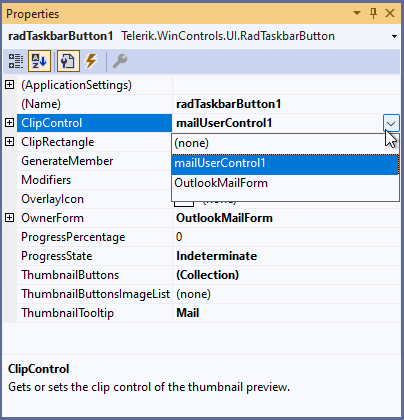
2. Select the RadTaskbarButton component and in the Visual Studio Properties section select which control on the form (or the form itself) will be the ClipControl, specify the ProgressState and set the ThumbnailTooltip.
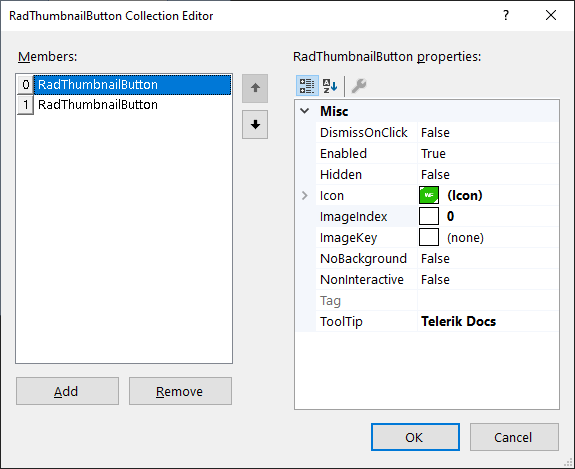
3. Clicking the ThumbnailButtons opens the RadThumbnailButton Collection Editor from where you can add two RadThumbnailButtons:
4. Save the changes and run the application:
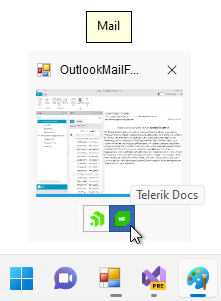
5. Setting the OverlayIcon in the Visual Studio Properties allows you to put an icon to the taskbar button:
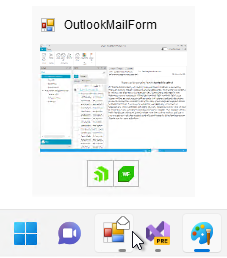
RadTaskbarButton does not provide any UI element. It just offers convenient API for specifying the content displayed for your application on the Windows Taskbar. The exact visualization depends on the Windows version.
See Also
Telerik UI for WinForms Learning Resources
- Telerik UI for WinForms TaskbarButton Component
- Getting Started with Telerik UI for WinForms Components
- Telerik UI for WinForms Setup
- Telerik UI for WinForms Application Modernization
- Telerik UI for WinForms Visual Studio Templates
- Deploy Telerik UI for WinForms Applications
- Telerik UI for WinForms Virtual Classroom(Training Courses for Registered Users)
- Telerik UI for WinForms License Agreement)