Getting Started with WinForms SplitContainer
This tutorial will help you to quickly get started using the control.
Adding Telerik Assemblies Using NuGet
To use RadSplitContainer when working with NuGet packages, install the Telerik.UI.for.WinForms.AllControls package. The package target framework version may vary.
Read more about NuGet installation in the Install using NuGet Packages article.
With the 2025 Q1 release, the Telerik UI for WinForms has a new licensing mechanism. You can learn more about it here.
Adding Assembly References Manually
When dragging and dropping a control from the Visual Studio (VS) Toolbox onto the Form Designer, VS automatically adds the necessary assemblies. However, if you're adding the control programmatically, you'll need to manually reference the following assemblies:
- Telerik.Licensing.Runtime
- Telerik.WinControls
- Telerik.WinControls.UI
- TelerikCommon
The Telerik UI for WinForms assemblies can be install by using one of the available installation approaches.
Defining the RadSplitContainer
In this example we will position several RadControls in a specific layout using the RadSplitContainer:
1. Drop a RadSplitContainer on your form.
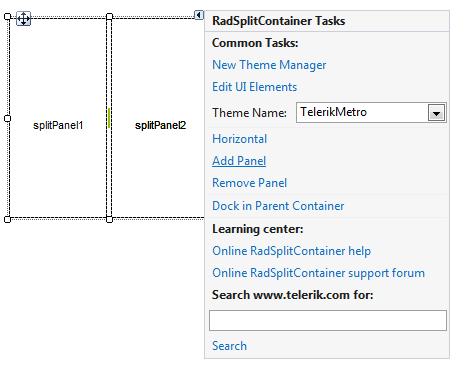
2. Click its Smart Tag to open the Action Menu. Notice that there is an option for the orientation of the SplitPanels in the RadSplitContainer. While it is set to 'Horizontal' click twice on the Add Panel option. This will add two SplitPanels aligned horizontally in the RadSplitContainer.

3. Now we want to have two SplitPanels aligned vertically in the place that is taken by the SplitPanel2. To do so, drag a new RadSplitContainer instance on the SplitPanel2 and set its Dock property to Fill.
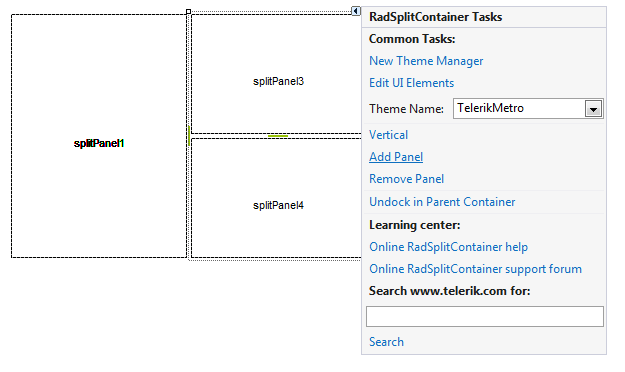
4. Click on the Smart Tag of the second RadSplitContainer to open its Action Menu. Click on the 'Horizontal' option to change it to 'Vertical'. Now click twice on the Add Panel option. Since the alignment is set to 'Vertical' the new SplitPanels will be aligned vertically.

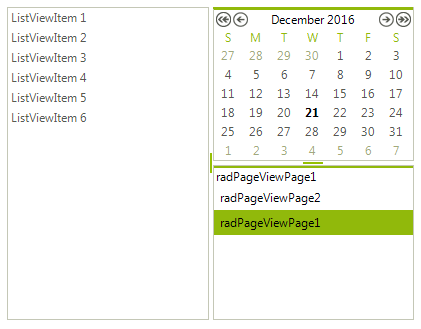
5. Drag and drop the desired controls on the SplitPanels and set their Dock property to Fill. Set the Dock property of the main RadSplitContainer to Fill as well. The result is shown on the screenshot below:

See Also
Telerik UI for WinForms Learning Resources
- Telerik UI for WinForms SplitContainer Component
- Getting Started with Telerik UI for WinForms Components
- Telerik UI for WinForms Setup
- Telerik UI for WinForms Application Modernization
- Telerik UI for WinForms Visual Studio Templates
- Deploy Telerik UI for WinForms Applications
- Telerik UI for WinForms Virtual Classroom(Training Courses for Registered Users)
- Telerik UI for WinForms License Agreement)