Getting Started with WinForms CheckedListBox
You can add RadCheckedListBox either at design time or at run time:
Adding Telerik Assemblies Using NuGet
To use RadCheckedListBox when working with NuGet packages, install the Telerik.UI.for.WinForms.AllControls package. The package target framework version may vary.
Read more about NuGet installation in the Install using NuGet Packages article.
With the 2025 Q1 release, the Telerik UI for WinForms has a new licensing mechanism. You can learn more about it here.
Adding Assembly References Manually
When dragging and dropping a control from the Visual Studio (VS) Toolbox onto the Form Designer, VS automatically adds the necessary assemblies. However, if you're adding the control programmatically, you'll need to manually reference the following assemblies:
- Telerik.Licensing.Runtime
- Telerik.WinControls
- Telerik.WinControls.UI
- TelerikCommon
The Telerik UI for WinForms assemblies can be install by using one of the available installation approaches.
Defining the RadCheckedListBox
You can add RadCheckedListBox either at design time or at run time:
Design Time
- To add a RadCheckedListBox to your form, drag a RadCheckedListBox from the toolbox onto the surface of the form designer.
- In the Properties section in Visual Studio open the Items property.
- Add several items by clicking the
Addbutton. - Click
F5to start the application.
Run Time
To programmatically add a RadCheckedListBox to a form, create a new instance of a RadCheckedListBox, and add it to the form Controls collection.
Adding a RadCheckedListBox at runtime
RadCheckedListBox checkedListBox = new RadCheckedListBox();
this.Controls.Add(checkedListBox);
checkedListBox.Items.Add("Coffee");
checkedListBox.Items.Add("Tea");
Dim checkedListBox As New RadCheckedListBox()
Me.Controls.Add(checkedListBox)
checkedListBox.Items.Add("Coffee")
checkedListBox.Items.Add("Tea")
The bellow example demonstrates the main capabilities of RadCheckedListBox.
1. Drop a RadSplitContainer on your form and set its Dock property to Fill .
2. Add two panels to the split container. For example by using the smart tag.
3. Add RadLabel, RadCheckedListBox and a RadButton to each of the panels. At this point the form should look like this: 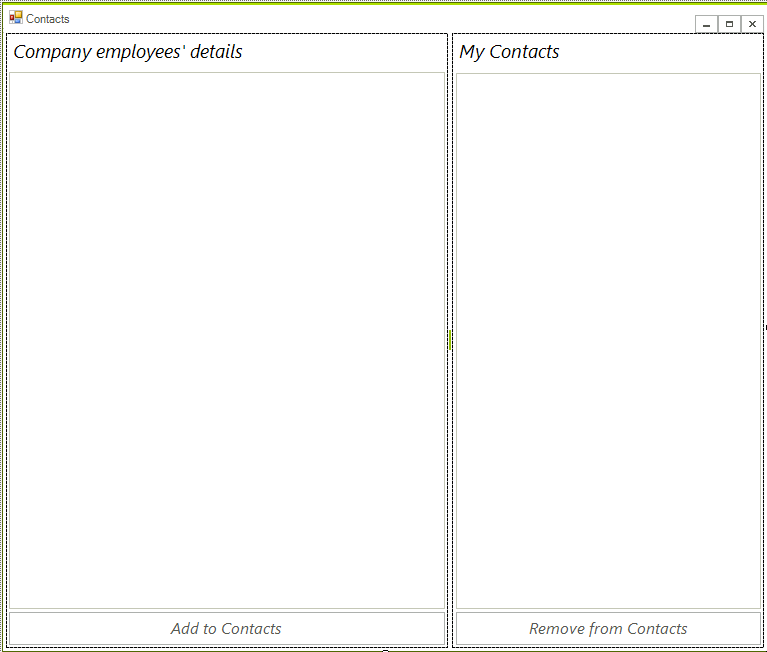
4. Now you are ready to bind the control. Open the code behind and add the following:
this.radCheckedListBox1.DataSource = this.CreatePhoneBookEntries();
this.radCheckedListBox1.VisualItemFormatting += radCheckedListBox1_VisualItemFormatting;
ListViewDetailColumn nameColumn = new ListViewDetailColumn("Name");
nameColumn.Width = 150;
this.radCheckedListBox2.Columns.Add(nameColumn);
ListViewDetailColumn phoneColumn = new ListViewDetailColumn("Phone");
phoneColumn.Width = 100;
this.radCheckedListBox2.Columns.Add(phoneColumn);
this.radButtonAddToContacts.Click += radButtonAddToContacts_Click;
this.radButtonRemoveFromContacts.Click += radButtonRemoveFromContacts_Click;
Me.RadCheckedListBox1.DataSource = Me.CreatePhoneBookEntries()
AddHandler Me.RadCheckedListBox1.VisualItemFormatting, AddressOf radCheckedListBox1_VisualItemFormatting
Dim nameColumn As New ListViewDetailColumn("Name")
nameColumn.Width = 150
Me.RadCheckedListBox2.Columns.Add(nameColumn)
Dim phoneColumn As New ListViewDetailColumn("Phone")
phoneColumn.Width = 100
Me.RadCheckedListBox2.Columns.Add(phoneColumn)
AddHandler Me.radButtonAddToContacts.Click, AddressOf radButtonAddToContacts_Click
AddHandler Me.radButtonRemoveFromContacts.Click, AddressOf radButtonRemoveFromContacts_Click
5. The example uses the following sample business object:
public class PhonebookEntry
{
    public string FirstName { get; set; }
    public string LastName { get; set; }
    public string PhoneNumber { get; set; }
    public string Address { get; set; }
    public Image Image { get; set; }
}
Public Class PhonebookEntry
    Public Property FirstName() As String
        Get
            Return m_FirstName
        End Get
        Set(value As String)
            m_FirstName = value
        End Set
    End Property
    Private m_FirstName As String
    Public Property LastName() As String
        Get
            Return m_LastName
        End Get
        Set(value As String)
            m_LastName = value
        End Set
    End Property
    Private m_LastName As String
    Public Property PhoneNumber() As String
        Get
            Return m_PhoneNumber
        End Get
        Set(value As String)
            m_PhoneNumber = value
        End Set
    End Property
    Private m_PhoneNumber As String
    Public Property Address() As String
        Get
            Return m_Address
        End Get
        Set(value As String)
            m_Address = value
        End Set
    End Property
    Private m_Address As String
    Public Property Image() As Image
        Get
            Return m_Image
        End Get
        Set(value As Image)
            m_Image = value
        End Set
    End Property
    Private m_Image As Image
End Class
6. Now you can create a collection of PhonebookEntry business objects:
private IEnumerable<PhonebookEntry> CreatePhoneBookEntries()
{
    List<PhonebookEntry> entries = new List<PhonebookEntry>()
    {
        new PhonebookEntry() { FirstName = "Anne", LastName = "Dodsworth", PhoneNumber = "(71) 555-4444", Address = "7 Houndstooth Rd.", Image = Resources.anne},
        new PhonebookEntry() { FirstName = "Laura", LastName = "Callahan", PhoneNumber = "(206) 555-1189", Address = "4726 - 11th Ave. N.E.", Image = Resources.laura },
        new PhonebookEntry() { FirstName = "Robert", LastName = "King", PhoneNumber = "(71) 555-5598", Address = "Edgeham Hollow Winchester Way", Image = Resources.robert },
        new PhonebookEntry() { FirstName = "Michael", LastName = "Suyama", PhoneNumber = "(71) 555-7773", Address = "Coventry House Miner Rd.", Image = Resources.michael},
        new PhonebookEntry() { FirstName = "Steven", LastName = "Buchanan", PhoneNumber = "(71) 555-4848", Address = "14 Garrett Hill", Image = Resources.steven },
        new PhonebookEntry() { FirstName = "Margaret", LastName = "Peacock", PhoneNumber = "(206) 555-8122", Address = "4110 Old Redmond Rd.", Image = Resources.margaret1 },
        new PhonebookEntry() { FirstName = "Janet", LastName = "Leverling", PhoneNumber = "(206) 555-3412", Address = "722 Moss Bay Blvd.", Image = Resources.janet1 },
        new PhonebookEntry() { FirstName = "Andrew", LastName = "Fuller", PhoneNumber = "(206) 555-9482", Address = "908 W. Capital Way", Image = Resources.andrew1 },
        new PhonebookEntry() { FirstName = "Nancy", LastName = "Davolio", PhoneNumber = "(206) 555-9857", Address = "507 - 20th Ave. E. Apt. 2A", Image = Resources.nancy1 }
    };
    return entries;
}
Private Function CreatePhoneBookEntries() As IEnumerable(Of PhonebookEntry)
    Dim entries As New List(Of PhonebookEntry)() From { _
        New PhonebookEntry() With { _
            .FirstName = "Anne", _
            .LastName = "Dodsworth", _
            .PhoneNumber = "(71) 555-4444", _
            .Address = "7 Houndstooth Rd.", _
            .Image = My.Resources.anne _
        }, _
        New PhonebookEntry() With { _
            .FirstName = "Laura", _
            .LastName = "Callahan", _
            .PhoneNumber = "(206) 555-1189", _
            .Address = "4726 - 11th Ave. N.E.", _
            .Image = My.Resources.laura _
        }, _
        New PhonebookEntry() With { _
            .FirstName = "Robert", _
            .LastName = "King", _
            .PhoneNumber = "(71) 555-5598", _
            .Address = "Edgeham Hollow Winchester Way", _
            .Image = My.Resources.robert _
        }, _
        New PhonebookEntry() With { _
            .FirstName = "Michael", _
            .LastName = "Suyama", _
            .PhoneNumber = "(71) 555-7773", _
            .Address = "Coventry House Miner Rd.", _
            .Image = My.Resources.michael _
        }, _
        New PhonebookEntry() With { _
            .FirstName = "Steven", _
            .LastName = "Buchanan", _
            .PhoneNumber = "(71) 555-4848", _
            .Address = "14 Garrett Hill", _
            .Image = My.Resources.steven _
        }, _
        New PhonebookEntry() With { _
            .FirstName = "Margaret", _
            .LastName = "Peacock", _
            .PhoneNumber = "(206) 555-8122", _
            .Address = "4110 Old Redmond Rd.", _
            .Image = My.Resources.Margaret _
        }, _
        New PhonebookEntry() With { _
            .FirstName = "Janet", _
            .LastName = "Leverling", _
            .PhoneNumber = "(206) 555-3412", _
            .Address = "722 Moss Bay Blvd.", _
            .Image = My.Resources.Janet _
        }, _
        New PhonebookEntry() With { _
            .FirstName = "Andrew", _
            .LastName = "Fuller", _
            .PhoneNumber = "(206) 555-9482", _
            .Address = "908 W. Capital Way", _
            .Image = My.Resources.Andrew _
        }, _
        New PhonebookEntry() With { _
            .FirstName = "Nancy", _
            .LastName = "Davolio", _
            .PhoneNumber = "(206) 555-9857", _
            .Address = "507 - 20th Ave. E. Apt. 2A", _
            .Image = My.Resources.nancy _
        } _
    }
    Return entries
End Function
7. The next step is to create click event handlers for the buttons:
void radButtonAddToContacts_Click(object sender, EventArgs e)
{
    foreach (ListViewDataItem item in this.radCheckedListBox1.CheckedItems)
    {
        ListViewDataItem contactItem = new ListViewDataItem();
        this.radCheckedListBox2.Items.Add(contactItem);
        //here you can add logic to avoid duplicating contacts
        PhonebookEntry entry = item.Value as PhonebookEntry;
        contactItem["Name"] = entry.FirstName + " " + entry.LastName;
        contactItem["Phone"] = entry.PhoneNumber;
    }
}
void radButtonRemoveFromContacts_Click(object sender, EventArgs e)
{
    while (this.radCheckedListBox2.CheckedItems.Count > 0)
    {
        this.radCheckedListBox2.Items.Remove(this.radCheckedListBox2.CheckedItems[0]);
    }
}
Private Sub radButtonAddToContacts_Click(sender As Object, e As EventArgs)
    For Each item As ListViewDataItem In Me.RadCheckedListBox1.CheckedItems
        Dim contactItem As New ListViewDataItem()
        Me.RadCheckedListBox2.Items.Add(contactItem)
        'here you can add logic to avoid duplicating contacts
        Dim entry As PhonebookEntry = TryCast(item.Value, PhonebookEntry)
        contactItem("Name") = entry.FirstName & " " & entry.LastName
        contactItem("Phone") = entry.PhoneNumber
    Next
End Sub
Private Sub radButtonRemoveFromContacts_Click(sender As Object, e As EventArgs)
    While Me.RadCheckedListBox2.CheckedItems.Count > 0
        Me.RadCheckedListBox2.Items.Remove(Me.RadCheckedListBox2.CheckedItems(0))
    End While
End Sub
8. The final step is to use the VisualItemFormatting event to style the items in the first RadCheckedListBox. Please note that the checkbox position is changed.
BaseListViewVisualItem item = e.VisualItem;
PhonebookEntry entry = item.Data.Value as PhonebookEntry;
item.Image = entry.Image.GetThumbnailImage(80, 80, null, IntPtr.Zero);
item.Text = "<html>" +
       "<span style=\"font-size:14pt;font-family:Segoe UI;\">" + entry.FirstName + " " + entry.LastName + "</span>" +
       "<br><br><span style=\"font-size:10.5pt;\"><b>Address:</b> <i>" + entry.Address + "</i>" +
       "<br><b>Phone:</b> <i>" + entry.PhoneNumber + "</i></span>";
if (item.Children.Count > 0)
{
    ListViewItemCheckbox checkBoxItem = item.Children[0] as ListViewItemCheckbox;
    checkBoxItem.Margin = new Padding(2);
}
Dim item As BaseListViewVisualItem = e.VisualItem
Dim entry As PhonebookEntry = TryCast(item.Data.Value, PhonebookEntry)
item.Image = entry.Image.GetThumbnailImage(80, 80, Nothing, IntPtr.Zero)
item.Text = "<html><span style=""font-size:14pt;font-family:Segoe UI;"">" & entry.FirstName & " " & entry.LastName & "</span><br><br><span style=""font-size:10.5pt;""><b>Address:</b> <i>" & entry.Address & "</i><br><b>Phone:</b> <i>" & entry.PhoneNumber + "</i></span>"
If item.Children.Count > 0 Then
    Dim checkBoxItem As ListViewItemCheckbox = TryCast(item.Children(0), ListViewItemCheckbox)
    checkBoxItem.Margin = New Padding(2)
End If

Telerik UI for WinForms Learning Resources
- Telerik UI for WinForms CheckedListBox Component
- Getting Started with Telerik UI for WinForms Components
- Telerik UI for WinForms Setup
- Telerik UI for WinForms Application Modernization
- Telerik UI for WinForms Visual Studio Templates
- Deploy Telerik UI for WinForms Applications
- Telerik UI for WinForms Virtual Classroom(Training Courses for Registered Users)
- Telerik UI for WinForms License Agreement)