Upgrade Existing MongoDB to Version 4.0
MongoDB is a third party database used by Test Studio to store the project data required for scheduling tests on remote machines. We strive to keep this working out of the box, though there are upgrades of the Mongo, which affect the database used by Test Studio.
If you upgrade an existing MongoDB installation with version lower than 3.6 to MongoDB with version 4.0 or higher you may experience problems with starting MongoDB service and this not being able to use Test Studio Scheduling feature. The Test Studio Executive Dashboard Reporting feature works seamlessly with MongoDB versions 4.0 and above.
The behavior is caused by the changes in the MongoDB versions and the compatibility between these. Although, the issue is not related to Test Studio, the Test Studio Scheduling components get affected and it is recommended to upgrade the MongoDB to version 4.0+.
Any existing database, created with MongoDB version, previous to v3.6, is not compatible with later version. You'll need to back it up, and restore it later, so that you don't lose any data from previous interactions with Test Studio. This article describes the back up, reinstall and restore procedures, necessary for keeping your data operational.
MongoDB Back up -> Restore from 3.x to 4.x
What we found working quite well for us is to back up your existing database and then restore it.
1. Back up the Database
Start a Command Prompt as Administrator and change the directory to the bin/ folder in the 3.x MongoDB installation directory. Run the following command:
mongodump --db TSStorageData
The result is a dump/ folder where the command is run, which contains the dump of the TSStorageData database.
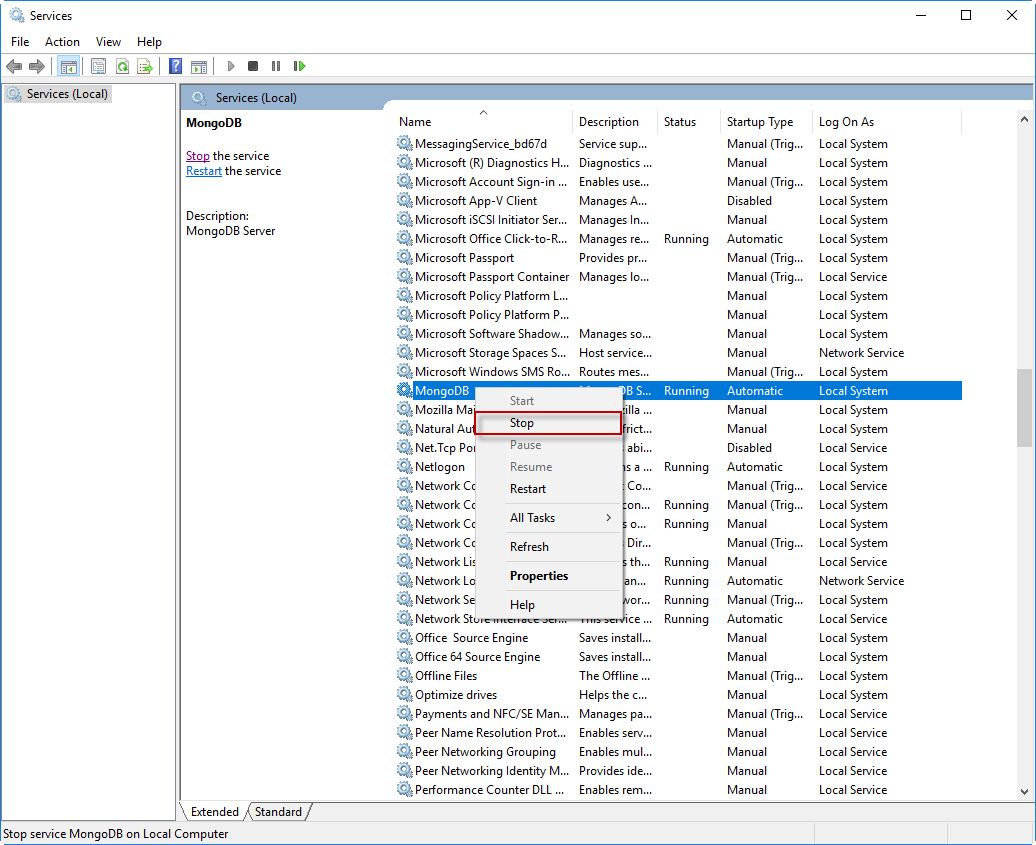
2. Stop the MongoDB Service
Open the Windows services and manually stop the MongoDB service.
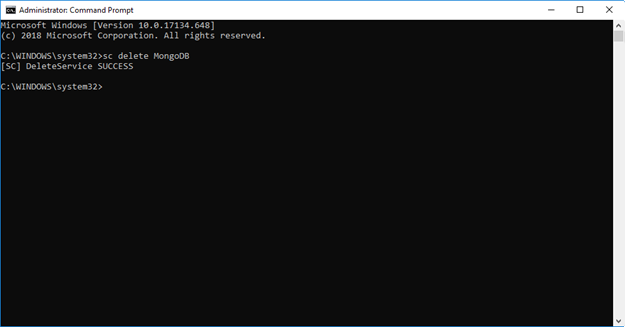
3. Delete the MongoDB Windows Service
Start a Command Prompt as Administrator and type the following command:
sc delete MongoDB
4. Uninstall MongoDB
Use the Windows Control Panel to uninstall the MongoDB from the computer.
5. Delete Leftover MongoDB Files
The working directory of MongoDB does not get deleted in the case of removing the installation. Thus, you need to delete this manually. By default the folder is located on the C drive and is named mongo - so, clear the content of folder C:\mongo.
6. Install Latest Official MongoDB
Download the latest official version of the *.msi MongoDB installation file from the official MongoDB page and follow the wizard to install it.
7. Start the MongoDB Service
The MongoDB service can now be started. The most convenient way to start it is through the Configure Test Studio Services wizard. Be sure to change the mongod.exe path to the new installation of MongoDB 4.x in the MongoDB tab, then click on Apply. The service will start with the new configuration.
8. Restore the Database
Once the installation of MongoDB 4.x is finished and the service is running, you can restore the - database. Copy the dump folder, created in point 1., from the MongoDB 3.x bin folder to the bin in installation folder of the 4.x MongoDB server. Start a Command Prompt as Administrator and change the directory to the bin folder under the 4.x MongoDB installation, run the following command:
Mongorestore dump/