Get Started with Data Driven Testing
This testing approach is useful for scenarios with certain actions and verifications, which need to be repeated multiple times.
What Test Scenario Can Be Data Driven?
The easiest answer is that each scenario can be data driven. Test Studio allows you to use data source values for both input fields and verifications. For example, if you need to perform the same actions against an application, but by using multiple different users, you can data drive the login input information.
To demonstrate the capabilities of data driven testing, we will use a test scenario, which navigates to the Telerik page, enters different product names in the Search field, and checks the outcome of the results. If you use the common, non data driven testing approach, you will end up with a test that needs three test steps for each individual product that you enter in the search field.

With data driven testing, the three steps related to the search action are reused and you save time and efforts.
How To Data Drive the Test?
Let's start by adding a new web test to your project.
Record the Steps to Data Drive
Open a browser and navigate to the Telerik page to start the recording session. Record the following actions:
Click the Search icon in the top navigation bar.
Enter 'Test Studio' in the Search field.
Click the Search button.
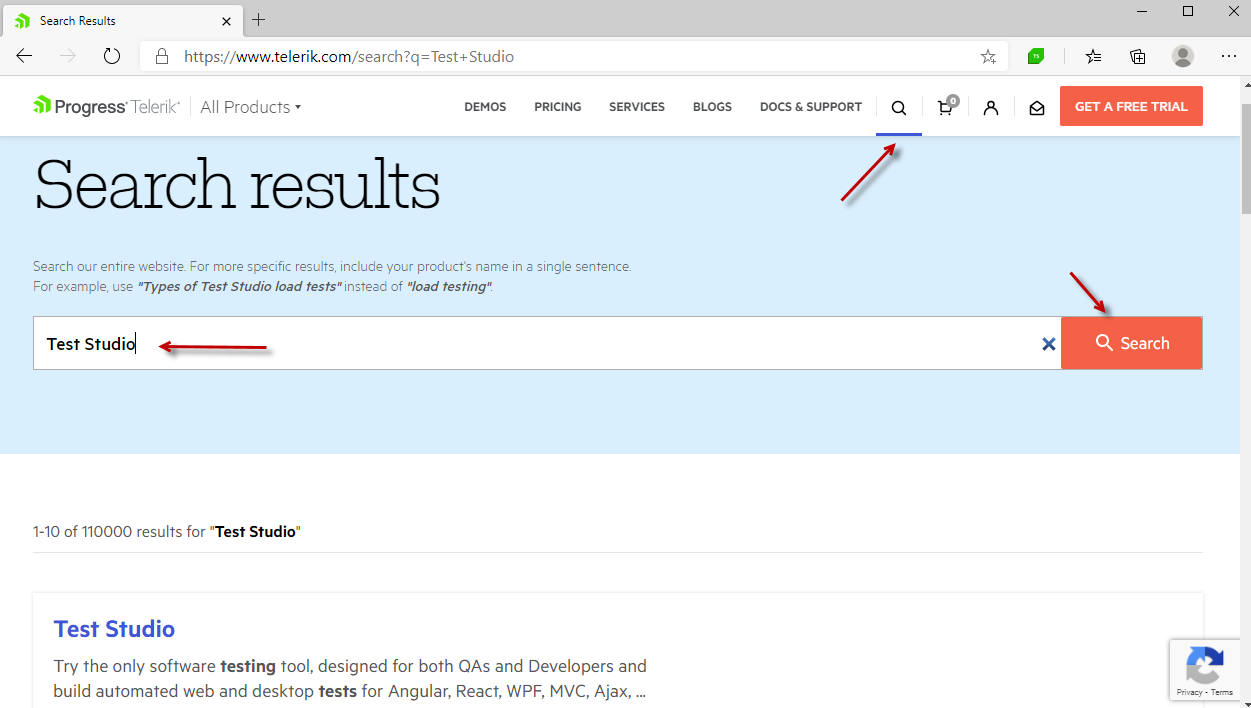
To ensure that the search is performed correctly, we recommend to add a step that waits until the first item in the results list contains the searched product name.
Tip
For more details on wait steps, see here how to record one
For more details on steps using the text from an image, see here how to record such step.
Once all necessary steps are added to the test, close the browser to finish the recording session.
Prepare the Data Source
-
Click the
Local Datatab located at the bottom of the test pane to switch to the built-in data table.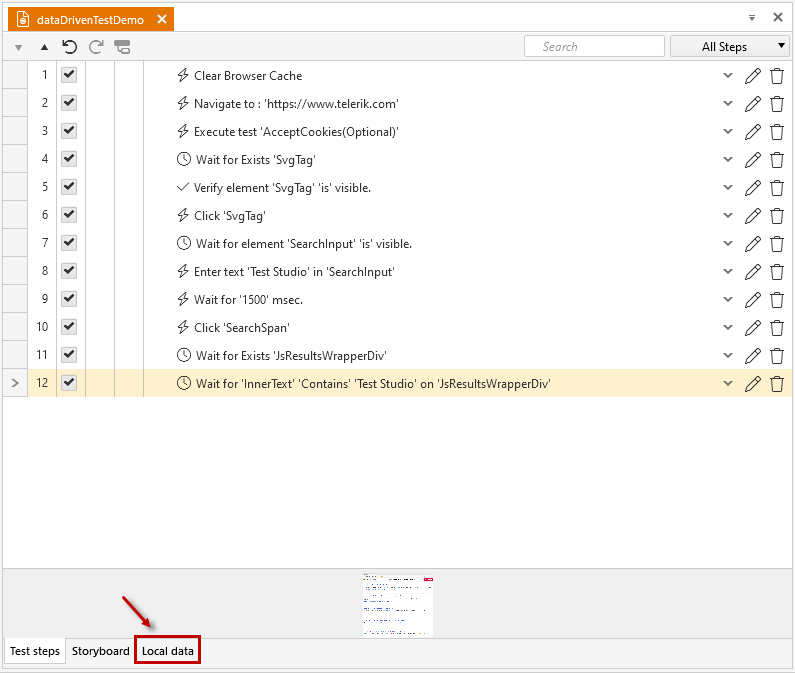
-
In the
Local Datatab, specify the number of columns and rows and create a table. For the current scenario we need a single column and three rows.
-
Rename the column to correspond to the data that it contains -
productNamefor this scenario.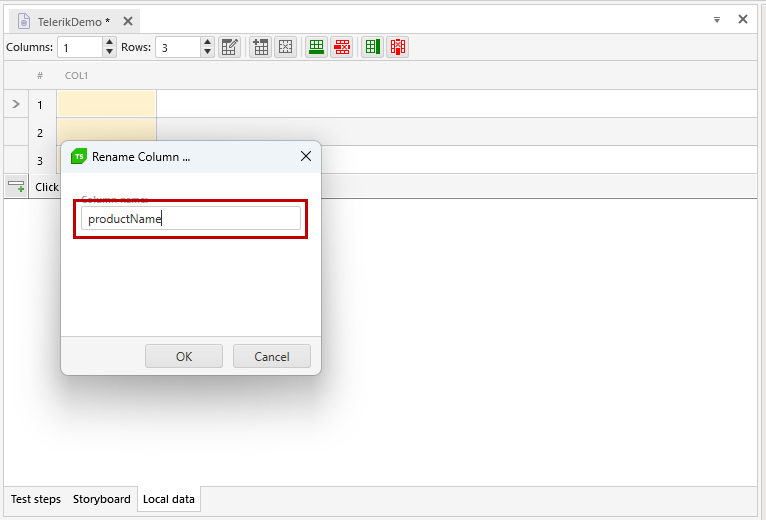
-
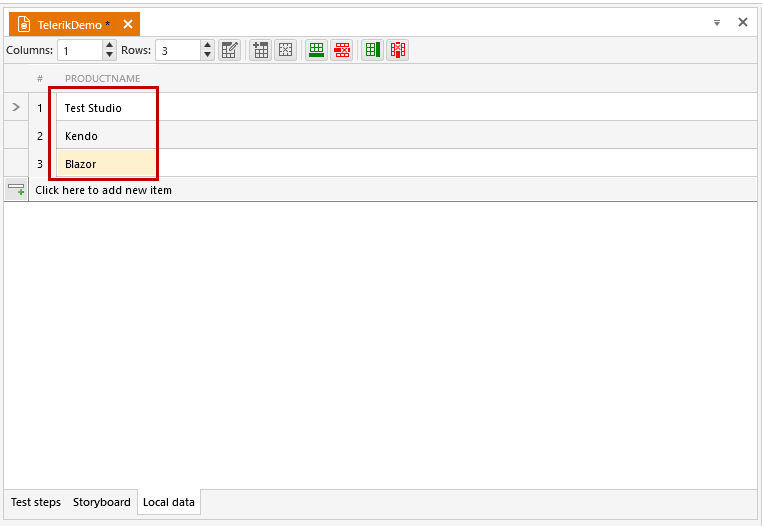
Enter the names of the different products on each row.
Tip
For more information, see how to modify the built-in data table.
Bind the Data to the Test Steps
Now that the data is in the built-in table, you can bind the values to the test steps:
-
Switch back to the steps view by clicking the
Test stepstab at the bottom of the test pane.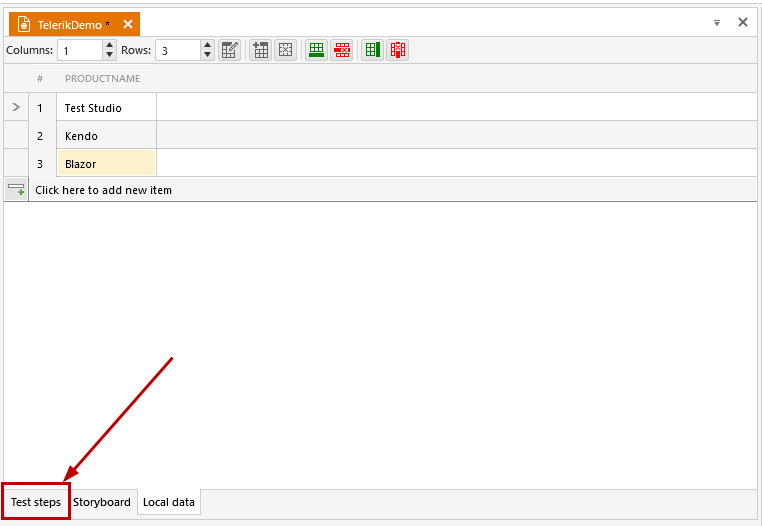
-
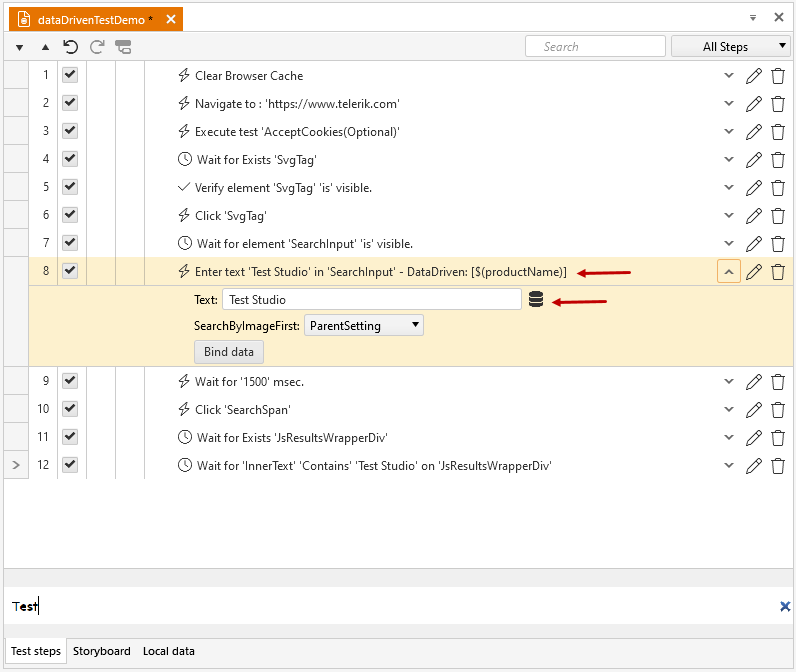
Select the Enter text step (number 8. for the current scenario) and expand it with double-click.

-
Use the
Data Bindbutton to open theData bindingdialog. It lists all step's fields which you can use for binding.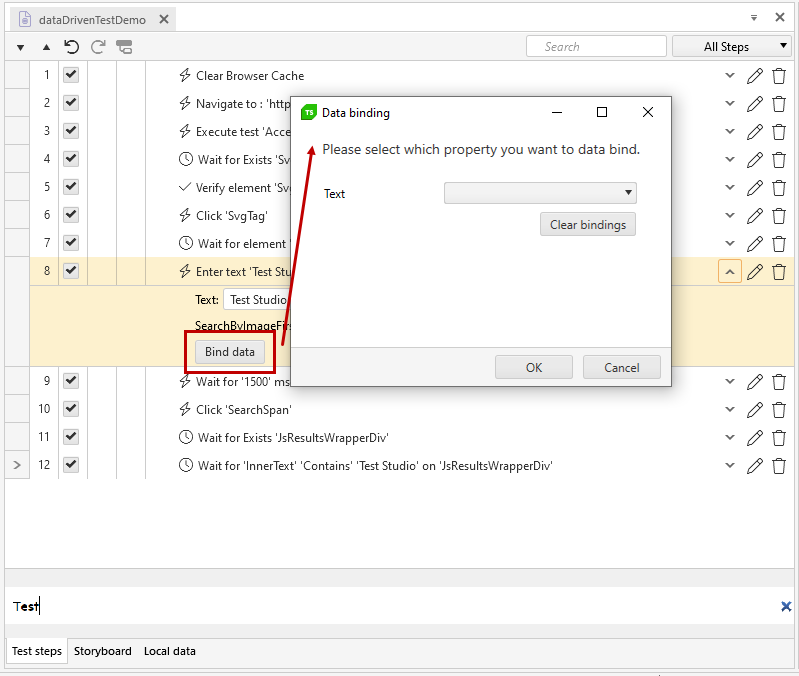
-
The Enter text step allows only its
Textfield to be data driven so this is the only one listed in theBinding dialog. Click on the drop-down next to theTextfield and expand the data source columns list. In this scenario the data consists of a single column - theproductName, so select this one.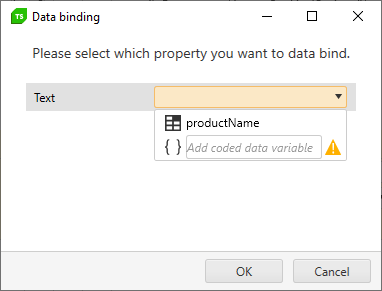
Tip
See How to bind a step to a data source column for more details. -
Confirm the binding with the
OKbutton.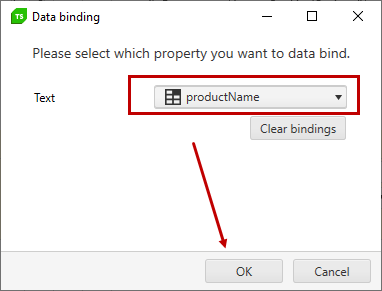
-
The step gets updated and hints that is bound to some data.
-
Repeat the same sequence of actions for the Wait step. This step verifies that the search action is completed successfully. The field to bind in the Wait step properties is
ExpectedString.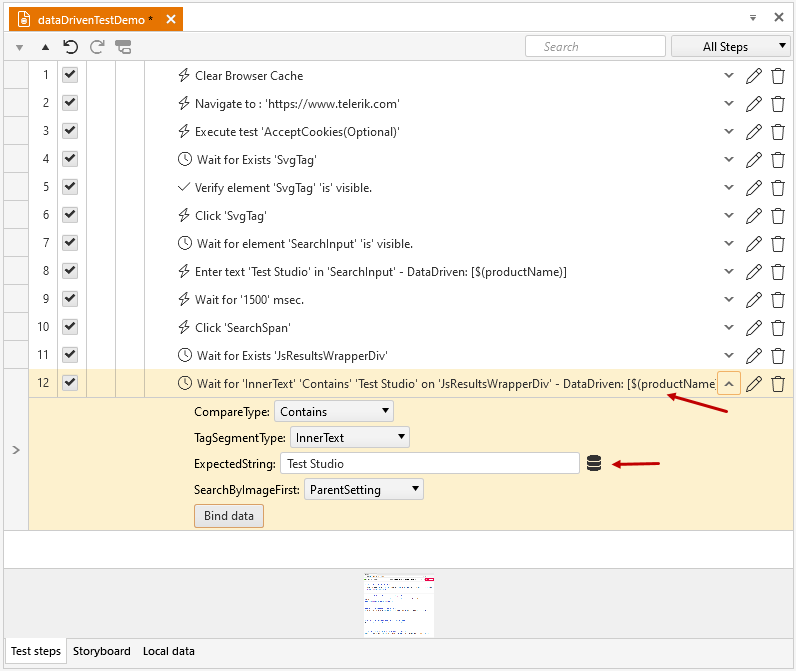
Execute the Data Driven Test and Review the Results
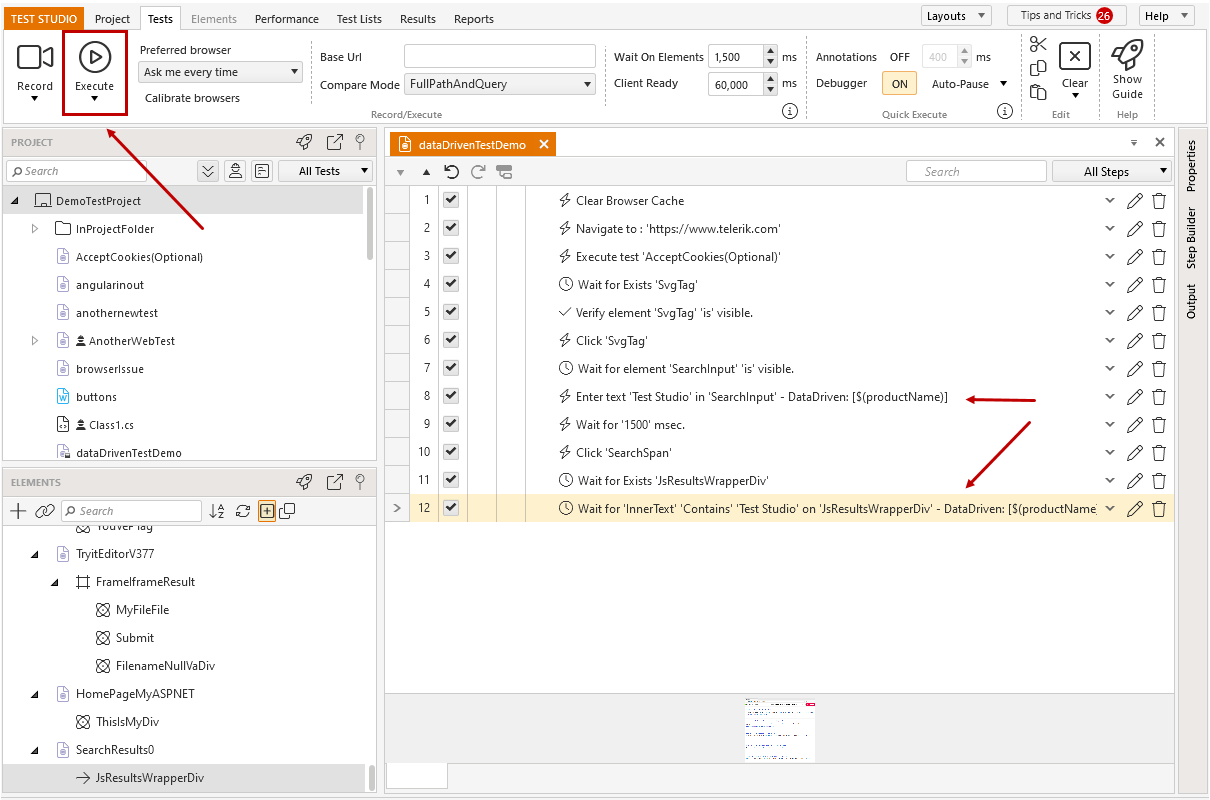
Now that the test is configured to take data from the built-in data table, you can see the two data-bound steps and the column they are connected to. To run the test, hit the Execute button and choose a browser for the execution.
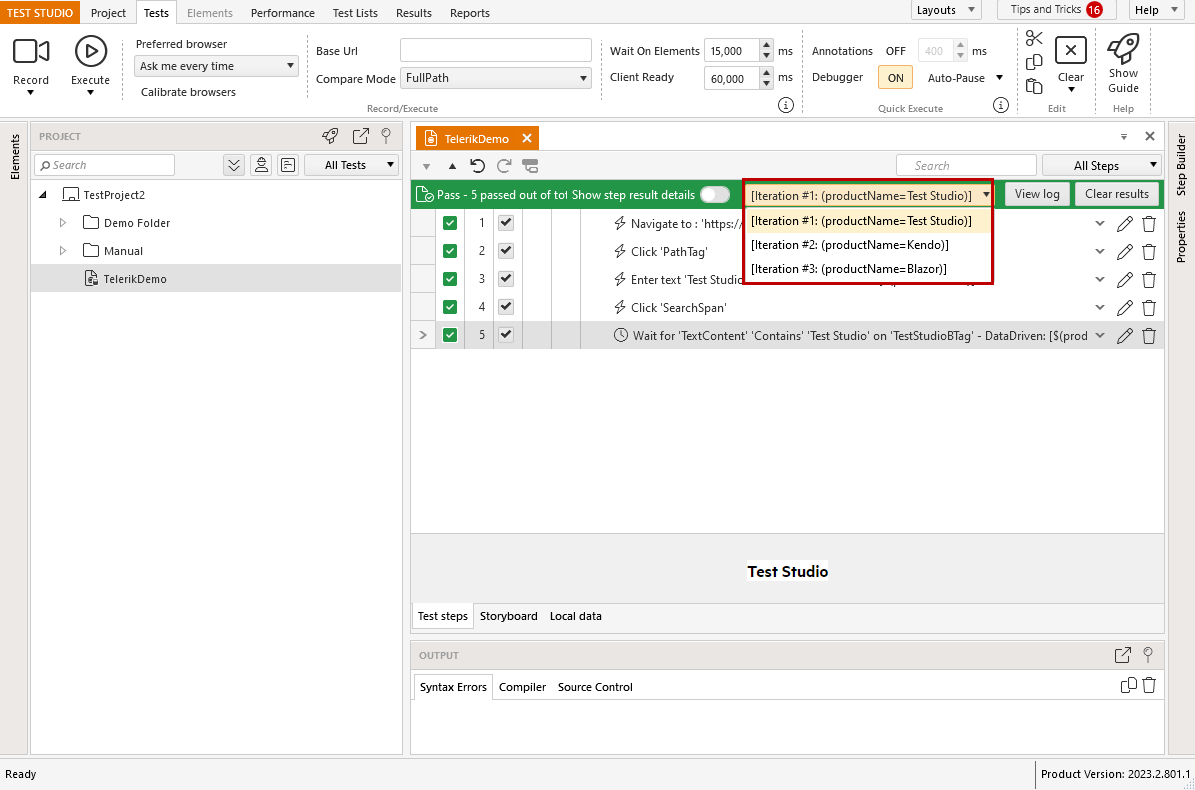
Observing the test run, you will see that the 5 steps recorded in the test will be executed three times in a row. The difference in each of these iterations will be the product name entered in the Search field. This name corresponds to the products listed in the data table.
Once the test run finishes, you will see the quick execution results populated in the Test Pane. The results for each iteration are listed separately, and you can switch between them from the Iterations drop-down.
Tip
For more information, see how to read the results of a data driven test.
Other data driven scenarios
- Data drive a test using external data source
- Test as steps used with data driven testing
- Data drive the find expression of an element in Test Studio
- Use data source columns in coded steps