Configuring the Report Server for .NET Single Sign-On Functionality using Microsoft Entra ID for Linux/Container
With the current version of the Report Server for .NET product - 2025 Q1 (19.0.25.211), there is a known problem with the licensing in containers, see "An error occurred while checking the licenseResult: The value cannot be an empty string. (Parameter 'path')." for details. The Report Server for .NET will remain functional in the Docker container, however, the above error message will be shown in the terminal.
Microsoft Entra ID is a cloud-based identity and access management service that can be used for authentication in the Telerik Report Server for .NET.
In this article, we will explain how to set up and enable the Microsoft Entra ID authentication for the users of the Telerik Report Server for .NET. Besides the enhanced authentication security, this approach also improves the user experience, because the users who are already registered in Microsoft Entra will be able to log into Report Server Manager UI without entering their login credentials each time.
Prerequisites
- Telerik Report Server installation with at least one administrator account.
- An Azure account with Microsoft Entra ID support.
In case you are unfamiliar with the process of using Microsoft Entra ID, we recommend checking out the Set up Microsoft Entra ID article.
Steps
1. Create a Microsoft Entra ID Tenant
- Navigate to the Microsoft Azure Home page.
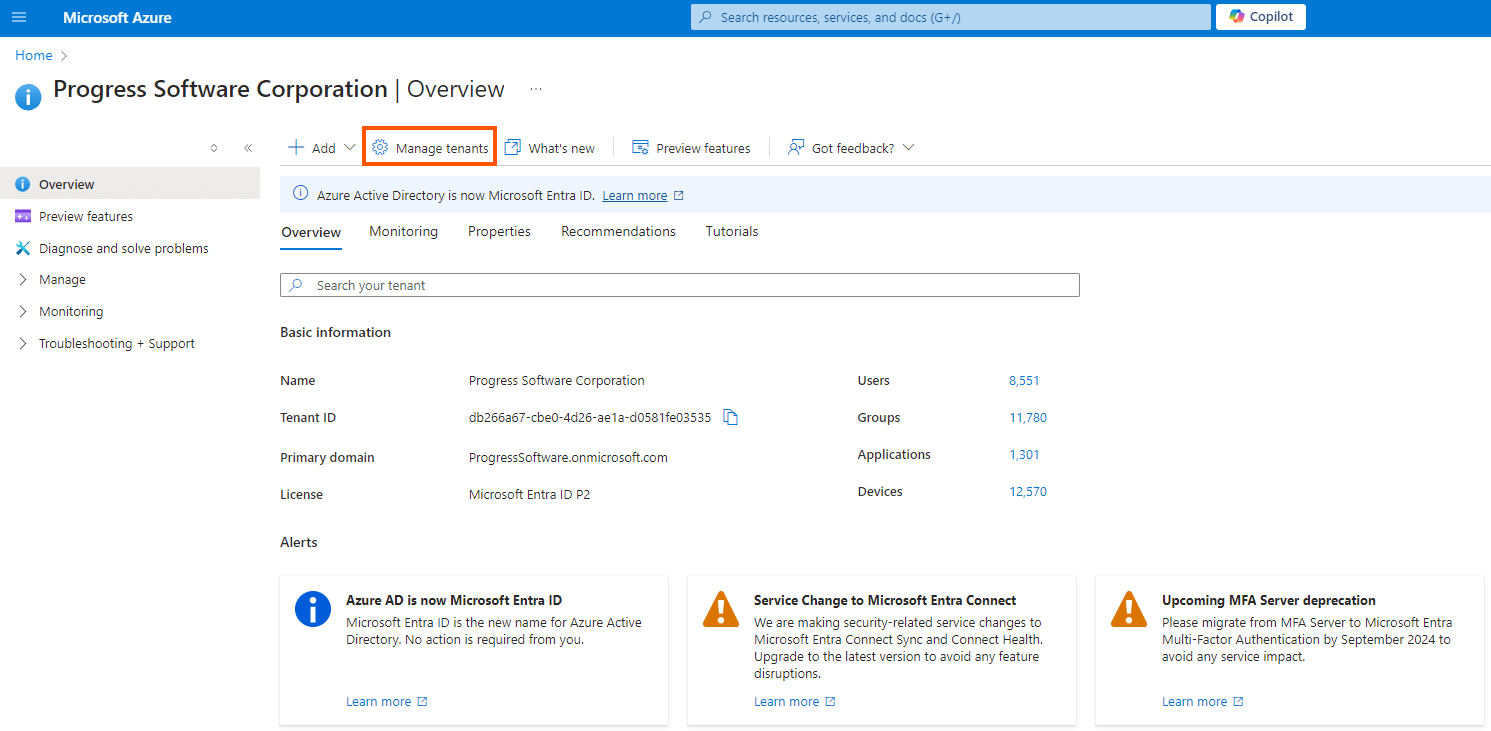
- From the menu in the top left corner of the page, select Microsoft Entra ID.
-
In the displayed Overview page, click Manage Tenants:
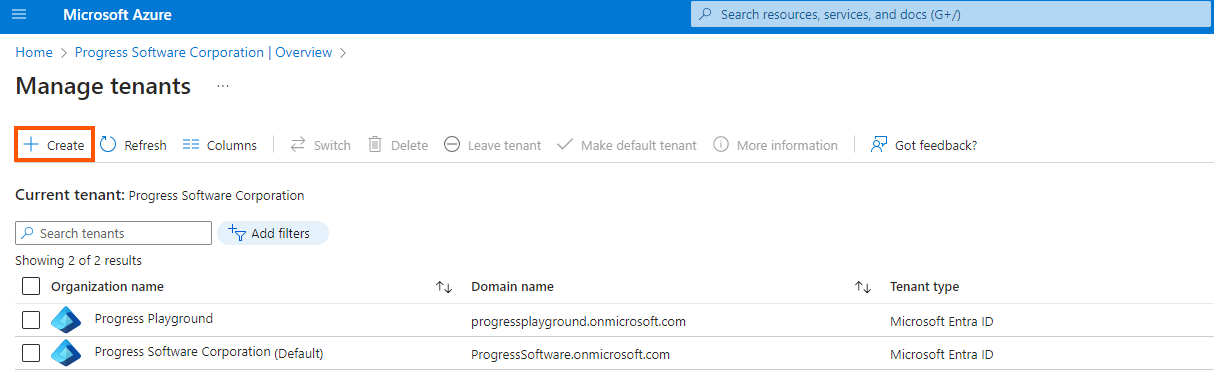
-
Click the Create button on the Manage Tenants page:
-
On the Create a tenant page, choose
Microsoft Entra IDas the tenant type (it should be selected by default):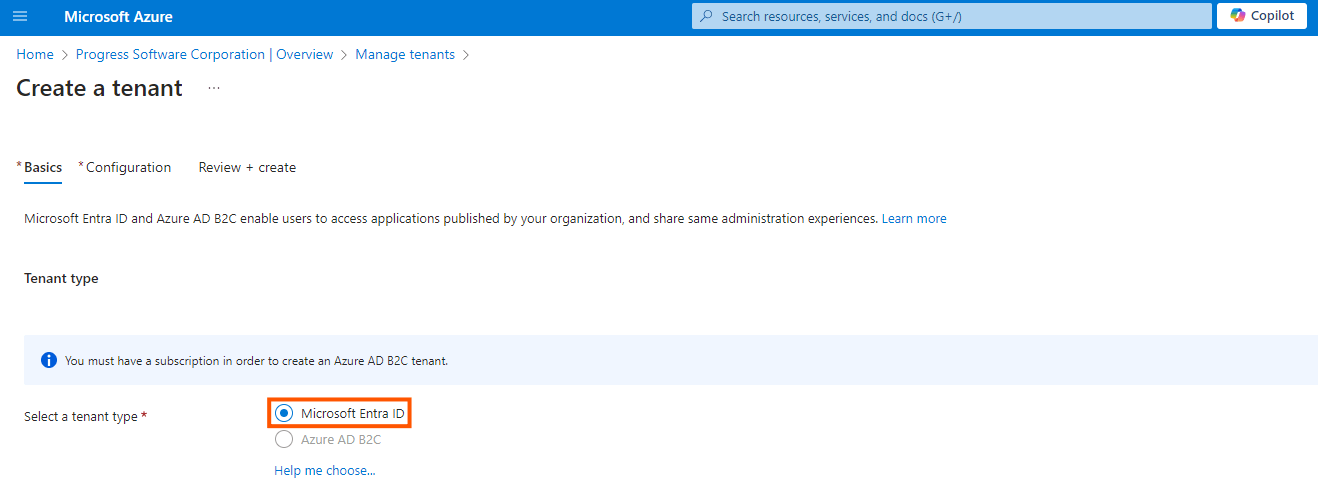
-
Click Next: Configuration > and type Organization name (for example,
Report Server Tenant) and Initial Domain Name (e.g.ReportServerNetDomain):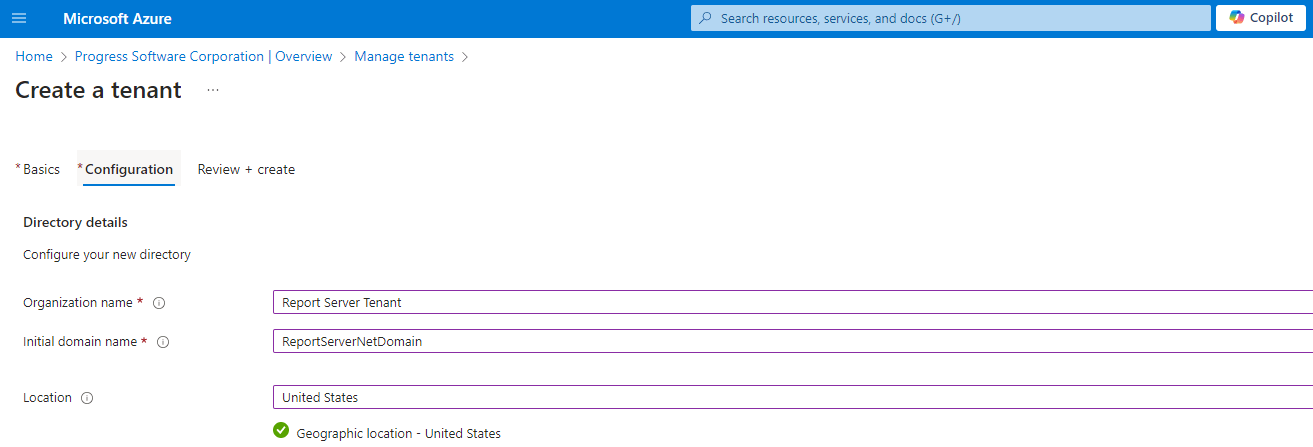
-
Click Next: Review + create > and if the configuration is correct, a green message notifying that the validation has passed will be displayed:
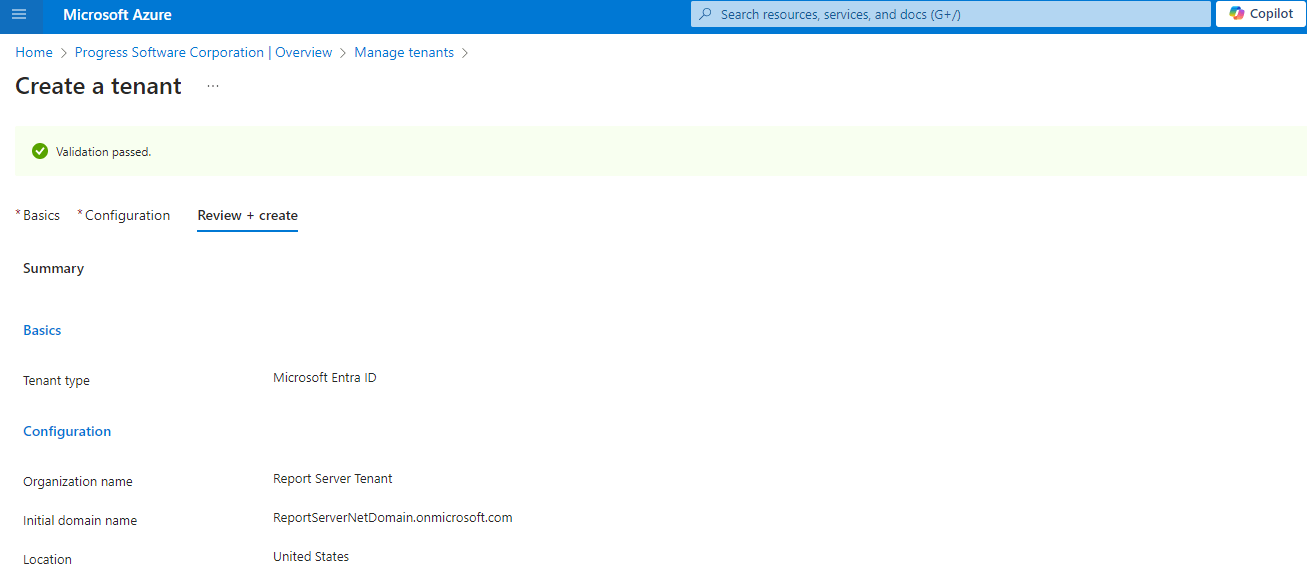
Click Create and then fill in the Captcha (it will take a minute or two to complete the process once it has been submitted).
2. Registering the Telerik Report Server for .NET Application
-
If the steps from the previous section were completed successfully, the following green message should appear above the Captcha:
Tenant creation was successful. Click here to navigate to your new tenant: Report Server Tenant.The text
Report Server Tenantis your organization name and there will be a link to the Report Server Tenant Overview page.If you are not on the Report Server Tenant Overview page, go to the top left
Menu>>Microsoft Entra ID>> clickAdd>>App Registration. -
Register the application by choosing
Add>App registration.Add Report Server Application, for example, as a name, leave the rest options to be the default, and click
Register.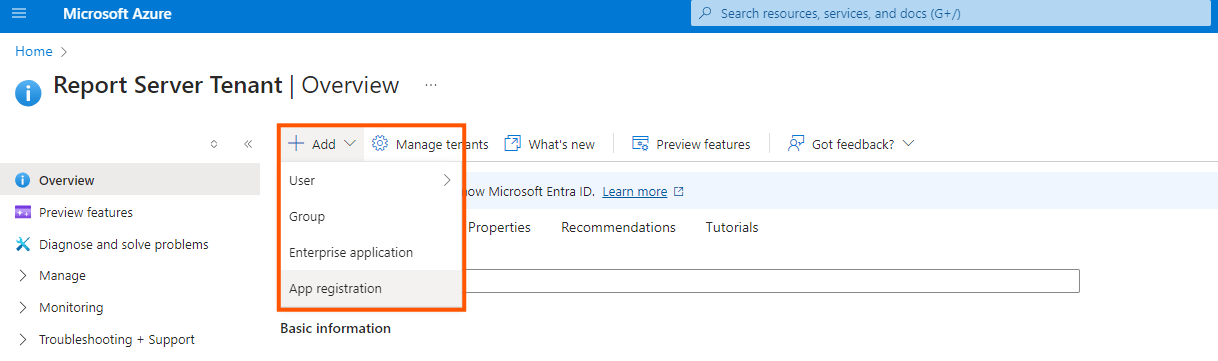
Expand the Manage dropdown in the menu on the left and choose Authentication.
-
Click
Add Platform>>Web>> Tick theID Tokenscheckbox, then click Configure.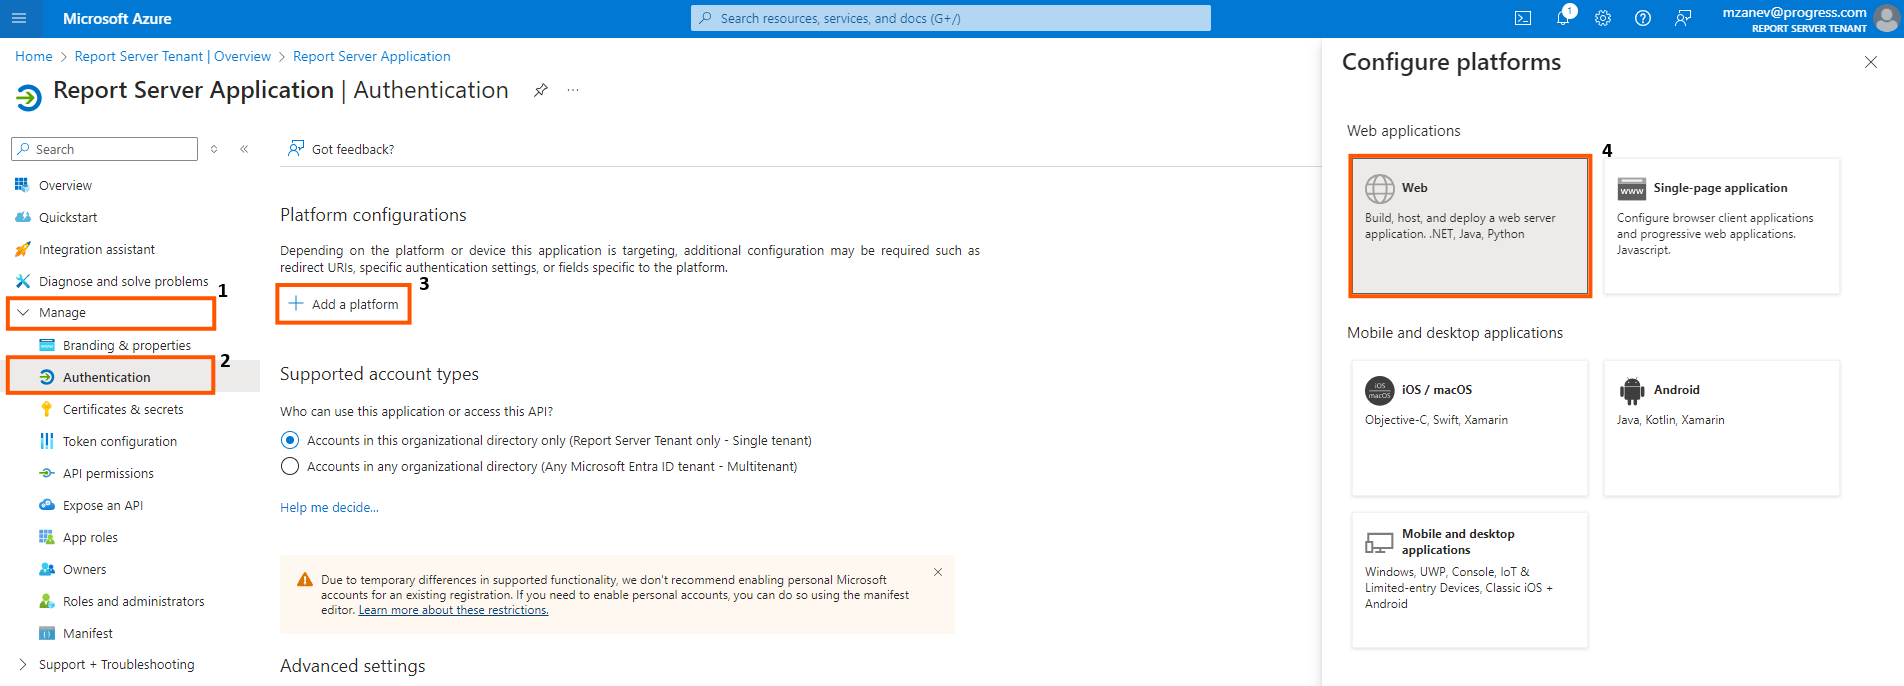
-
Add a Redirect URL, for example,
http://localhost:82/signin-oidc.
Click Certificates & secrets in the expanded Manage dropdown in the menu on the left.
-
On the Certificates & secrets page, Click the New client secret button.

Once the secret is created, copy and save the secret value as it will be used in the Report Server later. Note that you can do this only at this step. The failure would require another secret to be created, saved, and used.
3. EntraID Setup on a local Telerik Report Server for .NET installation on Linux
- Download the archive
Telerik_ReportServer_Net_NonWindows_{Report Server version}.zipfrom your Telerik account. - Unzip the archive. The content gets deployed in two folders
ReportServerandReportServiceAgent. - Open the
Powershelland navigate to the subfolderReportServer. - Run the command
docker build -t telerik-report-server:local .in Powershell to build the Report Server Manager image. Mind the dot.at the end of the command. - Navigate to the subfolder
ReportServiceAgent. - Run the command
docker build -t telerik-report-server-agent:local .in Powershell to build the Report Server ServiceAgent image. Mind the dot.at the end of the command. - Navigate to the subfolder
ReportServer\docker-configs. -
(optional, recommended) Change the password
P1@ceStr0ngP@ssw0rdH3r3for the SA database user with your own strong password in the filesdocker-compose.ymlandmssql_storage.env:- Open the file
docker-compose.ymlin a text editor like Notepad++ and change the password on line 31. The tabulation is essential and should be preserved:
- SA_PASSWORD=P1@ceStr0ngP@ssw0rdH3r3- Open the file
mssql_storage.envin a text editor like Notepad++ and change the password with your own password you used above:
reportServer__storage__parameters__0__value=Data Source=storage;Initial Catalog=reportserver;Password=P1@ceStr0ngP@ssw0rdH3r3;User Id=sa;Encrypt=false - Open the file
-
(optional, recommended) Set the client secret via an environment variable:
- Open the file
docker-compose.ymlin a text editor like Notepad++ and after line 7, inside theenvironmentelement, add the following line:
- ExternalLogin__EntraId__ClientSecret=yoursecretvalue - Open the file
Run the command
docker image pull mcr.microsoft.com/mssql/server:2019-latest.- (optional, use it only if it was not used before) Initialize a swarm to make the Docker Engine hosting the RS.NET a manager in the newly created single-node swarm by running the command
docker swarm init. - Run the command
docker stack deploy -c docker-compose.yml report-server. - Navigate to
localhost:82in the browser to open the Report Server Manager for .NET to begin configuring the application. - After setting up the storage configuration and creating an administrator user, the Configure Encryption page will be displayed. Download the Main and Backup encryption keys as we will need to use them soon.
- Navigate to the
\ReportServer\docker-configssubfolder again and open thedocker-compose.ymlfile in a text editor of choice. Note that the text editor application may require administrator privileges to save the file after edit. -
Inside the
environmentelement, add an entry for each encryption key, for example:RS_NET_MainPrivateKey - Environment variable holding the main private key for the encryption. RS_NET_BackupPrivateKey - Environment variable holding the main backup key for the encryption.
services:
  # template configuration of Report Server.
  telerik-report-server:
     environment:
     - Telemetry__IsDisabled=true
     - RS_NET_MainPrivateKey=PASTE_THE_MAIN_ENCRYPTION_KEY_HERE
     - RS_NET_BackupPrivateKey=PASTE_THE_BACKUP_ENCRYPTION_KEY_HERE
Run the command
docker stack deploy -c docker-compose.yml report-serverto re-deploy with the updateddocker-compose.yml.- Open the Report Server Manager(by default - http://localhost:82), and then open the Configuration page.
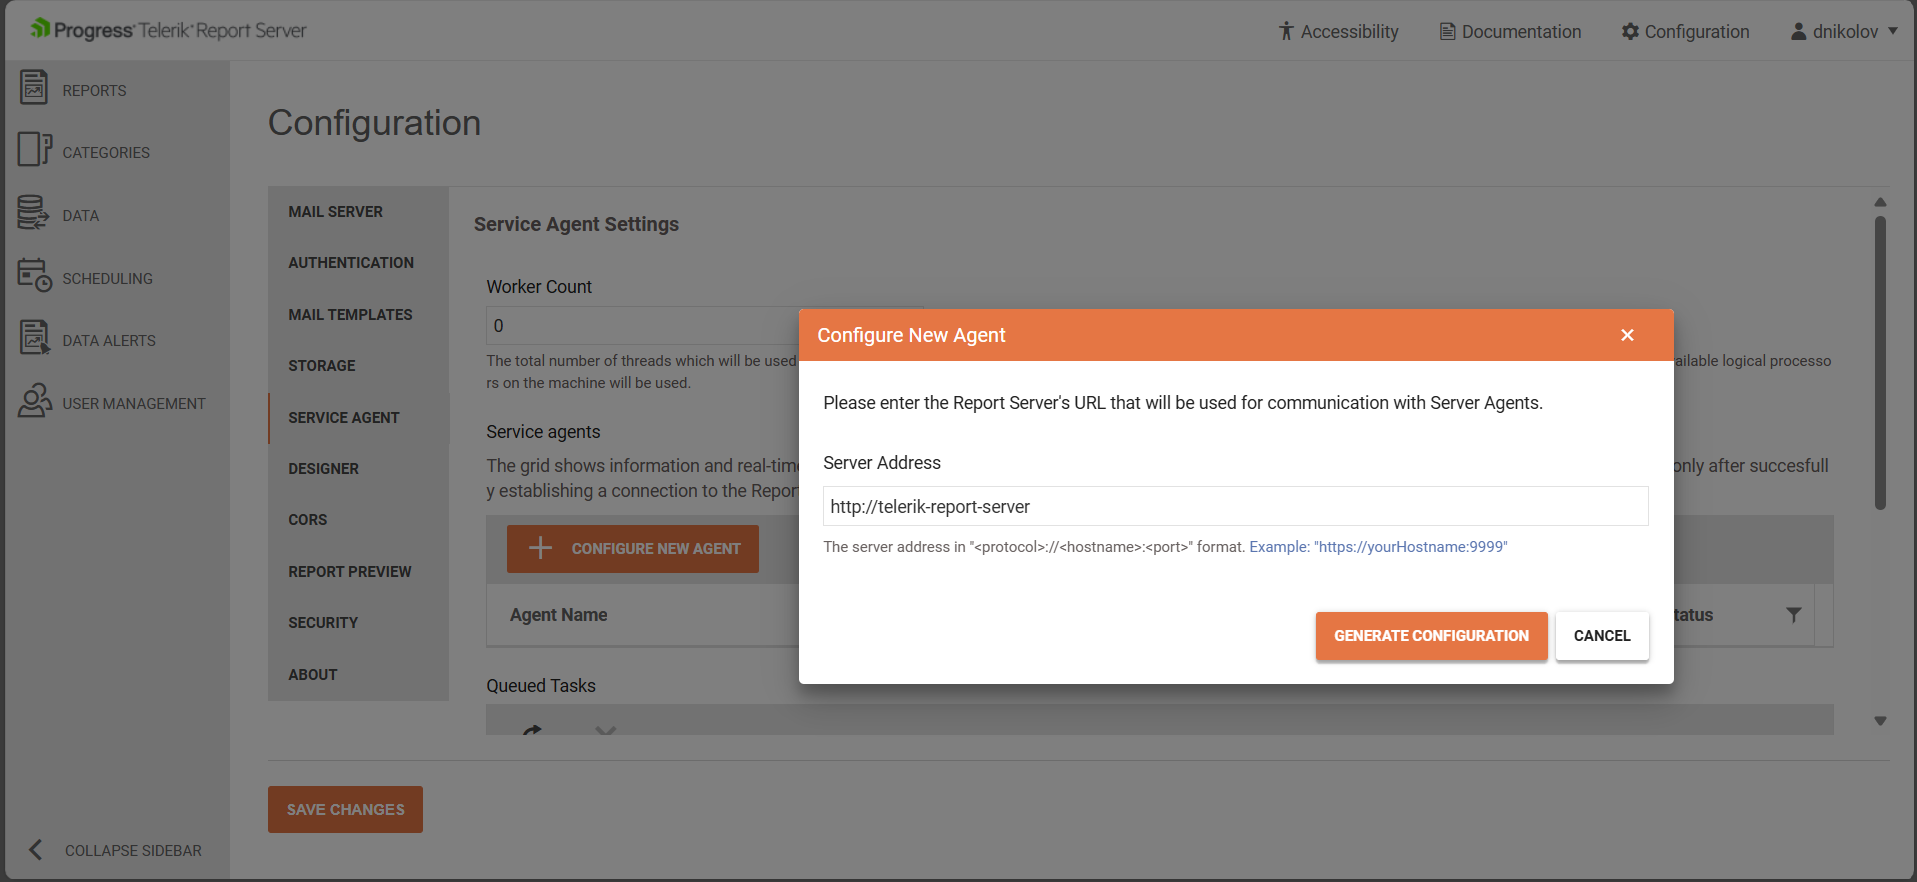
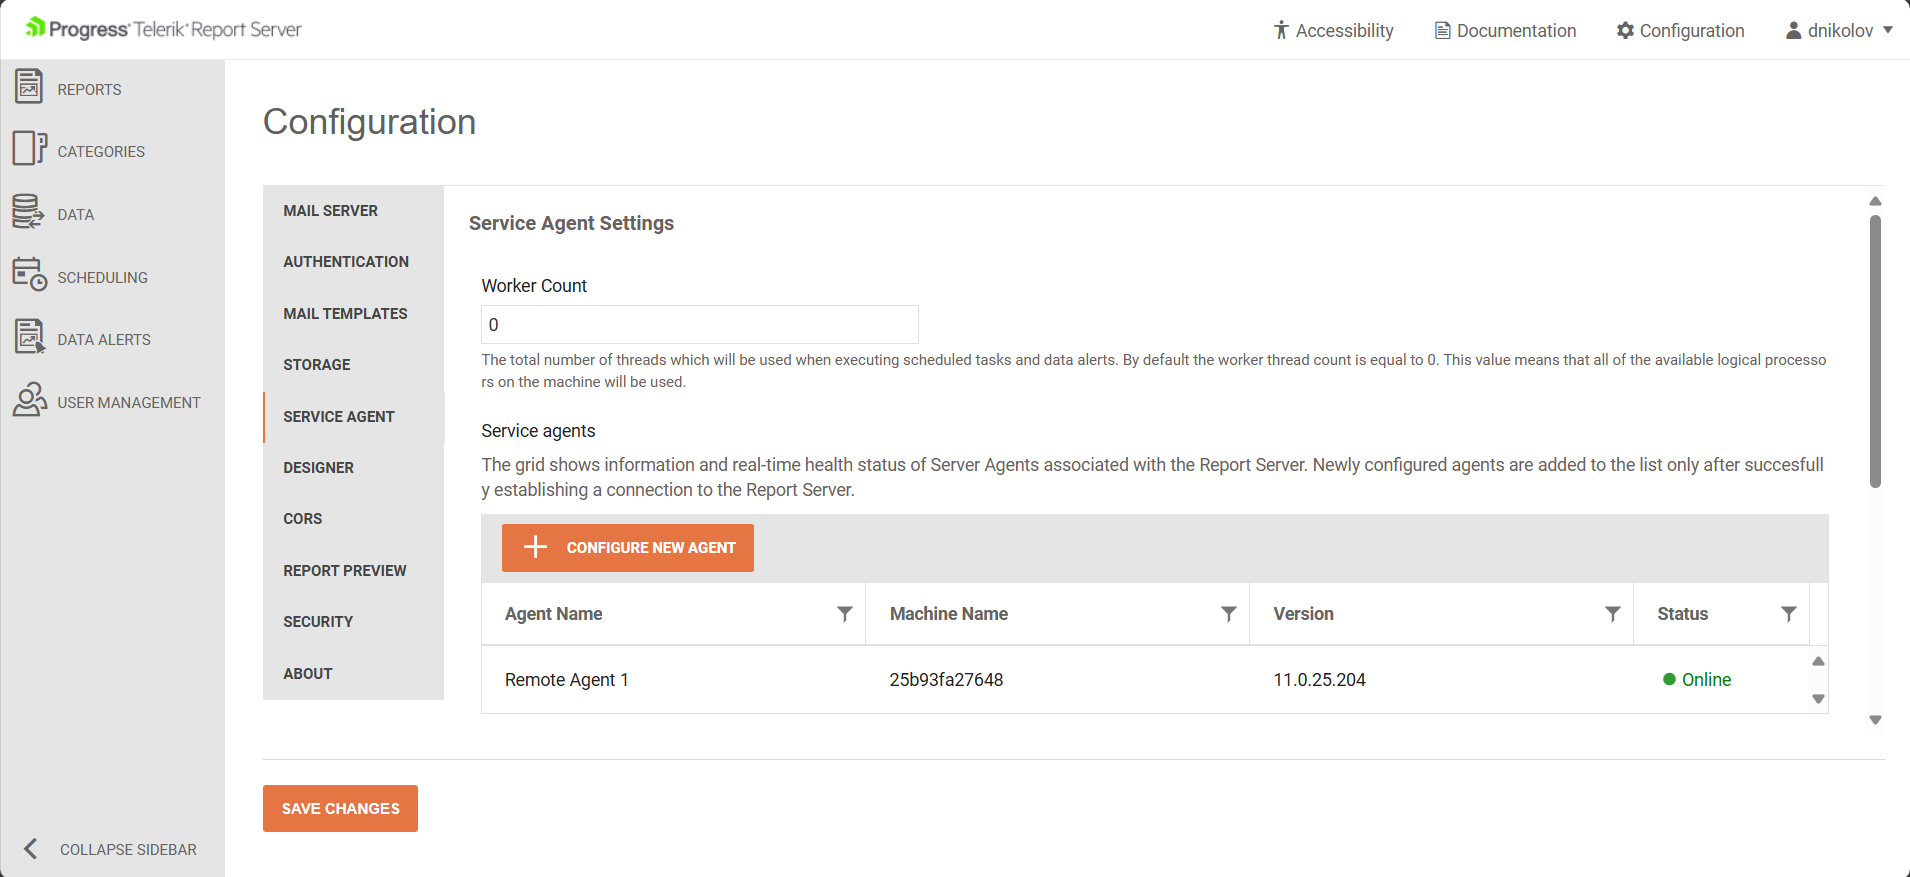
- Click on the SERVER AGENT tab and start the creation of a new Service Agent by pressing the CONFIGURE NEW AGENT button.
-
In the pop-up window with title Configure New Agent, enter the Report Server base URL or http://telerik-report-server. This should automatically route to the Report Server Manager application.
-
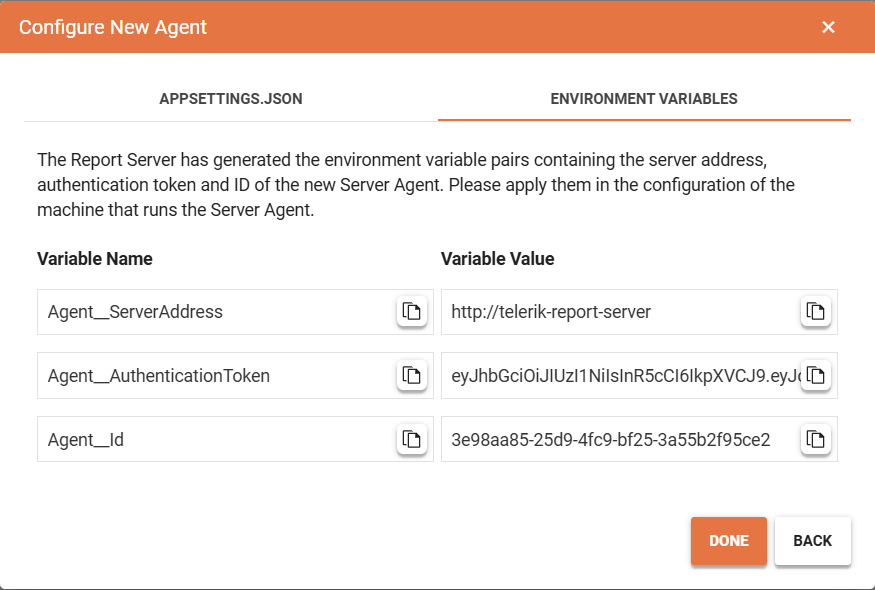
Press the GENERATE CONFIGURATION pop-up and copy the tokens from the ENVIRONMENT VARIABLES tab:
-
Open the
\ReportServer\docker-configs\docker-compose.ymlfile in a text editor again, and uncomment the section with thetelerik-report-server-agentelement. This section should be present by default in the file and it looks as follows:telerik-report-server-agent: environment: - Agent__ServerAddress=http://telerik-report-server - Agent__AuthenticationToken=PASTE_THE_AGENT_AUTH_TOKEN_HERE - Agent__Id=PASTE_THE_AGENT_ID_HERE image: telerik-report-server-agent:local restart: always command: dockerize -wait tcp://telerik-report-server:80 -timeout 1200s Run the command
docker stack deploy -c docker-compose.yml report-serverto re-deploy with the updateddocker-compose.yml.-
Open the Configuration page with the Service Agents again, now there should be one agent visible in the Server Agents table in the middle of the page:
4. Enabling Microsoft Entra ID Authentication in the Telerik Report Server for .NET
- Open the Telerik Report Server for .NET in the browser. The default URL is
http://localhost:82/. -
Navigate to the Configuration page and select the Authentication tab.
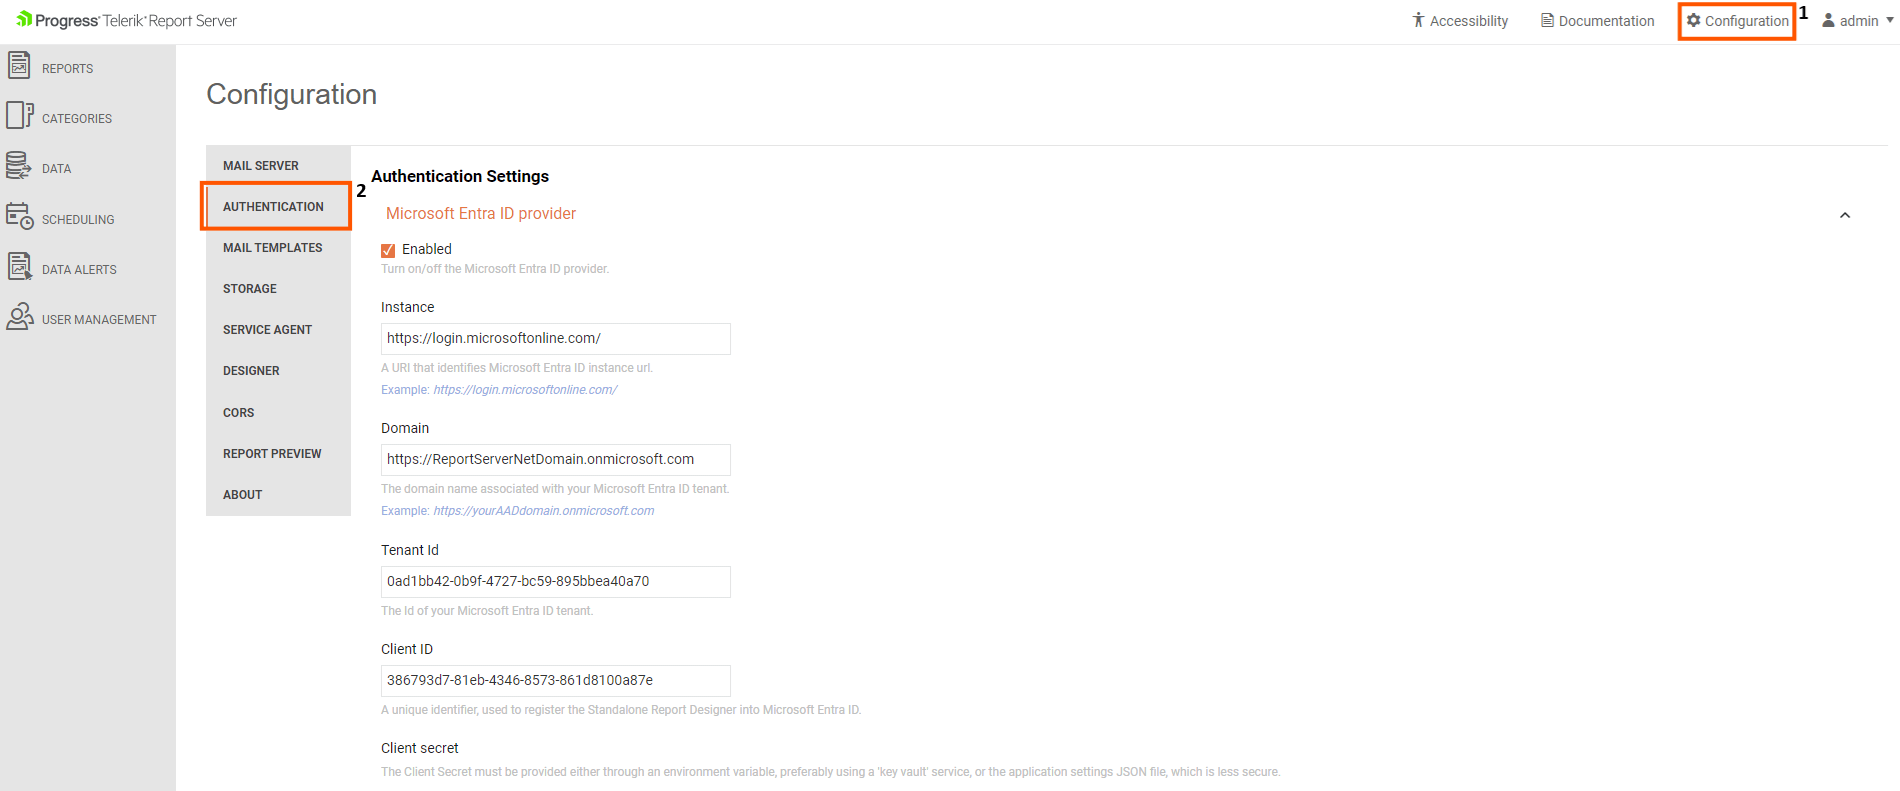
Enable the
Microsoft Entra ID Provider.- In the Instance field, use the URL -
https://login.microsoftonline.com/. - In the Domain field, use the one from step 5 in the Create a Microsoft Entra ID Tenant section and add it as a URL, for example -
https://ReportServerNetDomain.onmicrosoft.com/. -
Open the Microsoft Azure Portal to get the
Tenant ID:- From the menu in the top left corner of the page, select Microsoft Entra ID.
- The
Tenant IDcan be copied from the Basic Information table in the center of the page.
-
Open the Microsoft Azure Portal to get the
Client ID:- From the menu in the top left corner of the page, select Microsoft Entra ID.
- Expand the
Managedropdown >>App Registrations>>All Applications. - Click the application name e.g.
Report Server Application(defined in the previous section). -
Copy the Application (client) ID and add it to the Report Server in the Client ID field.
-id-location.png)
Click the
Save Changesbutton in the Report Server for .NET's Configuration page (a message that a manual restart of the service is required will appear on the screen).- The restart can be performed from the IIS Manager >> Application Pools >> Right-click the Telerik Report Server for .NET site and choose
Recycle.
Once the service is manually restarted, log in with a user that has an administrator role and go to
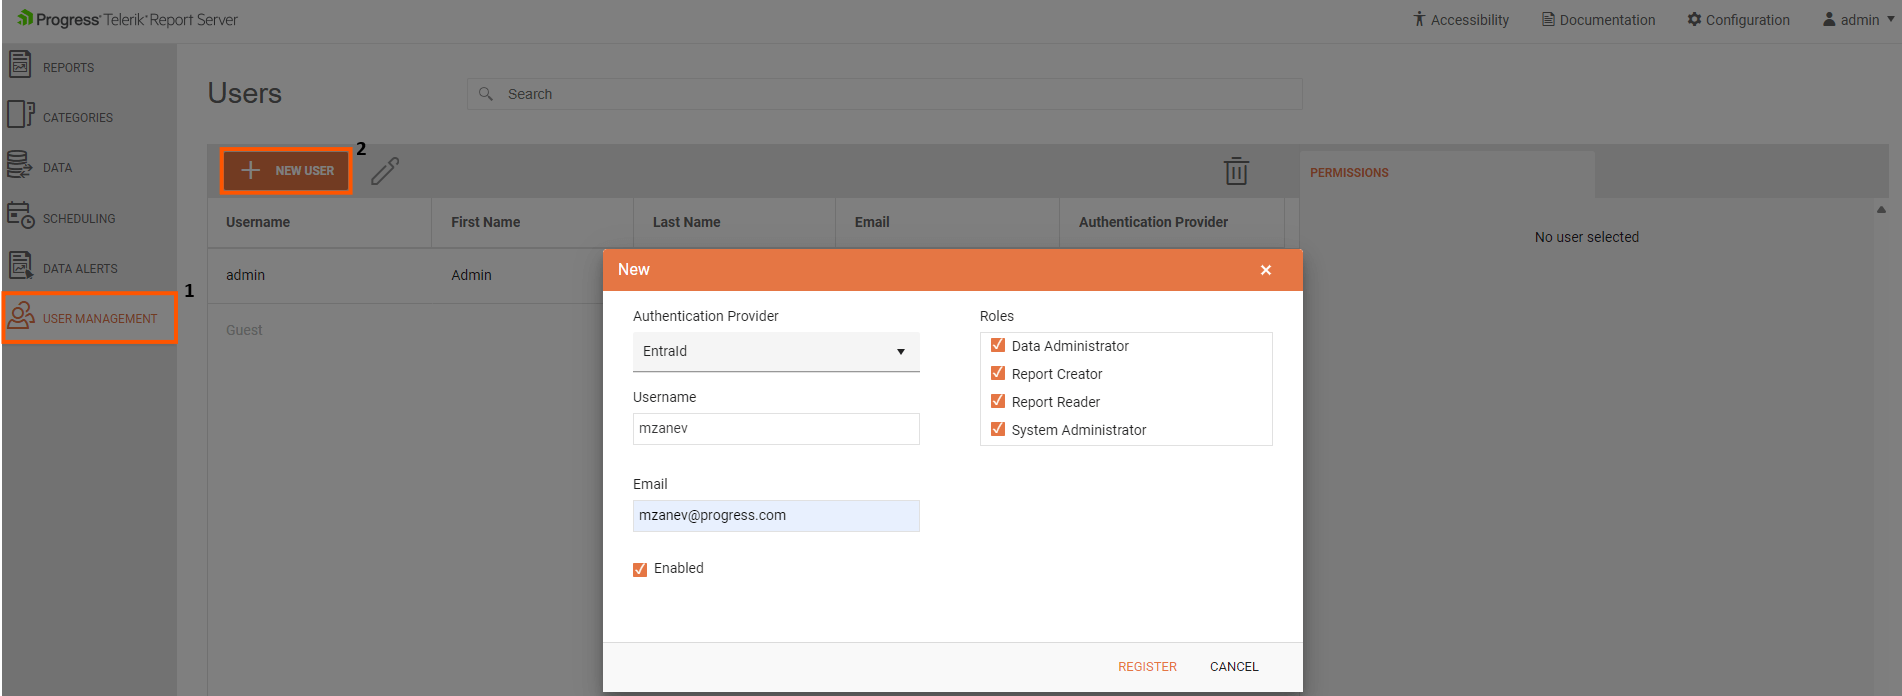
User Management.-
Click the
Add New Userbutton:- Select the
Authentication Providerto beEntraId. - Add a username.
- Add the domain name login email e.g.
username@mycompany.com. - Choose a User Role and save the changes.
- Select the
-
Log out of the Report Server to go to the Login page.
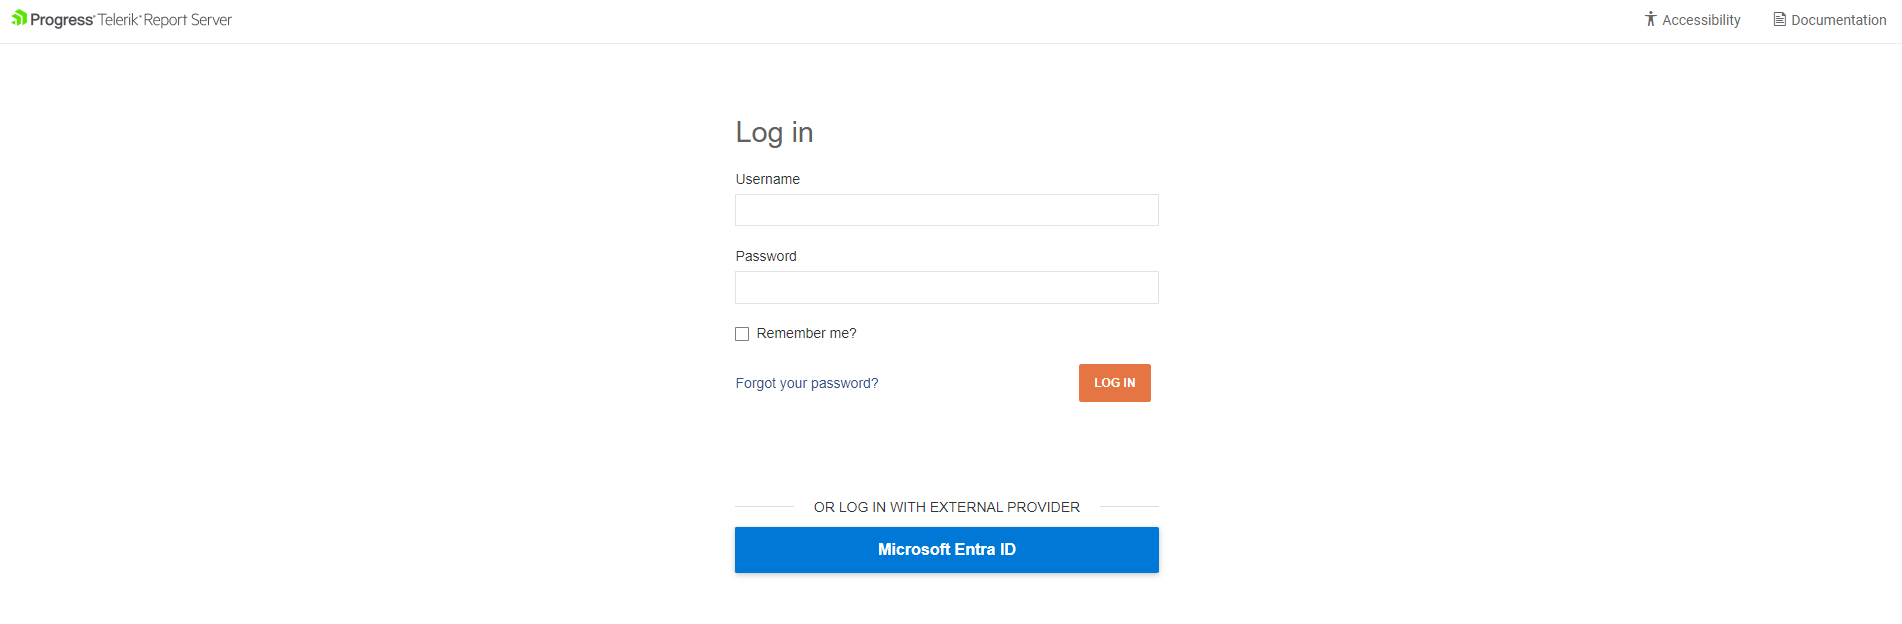
Click the blue
Microsoft Entra IDbutton. You should be automatically logged in with your EntraID.