Text Analysis
This article will guide you through the process of integrating Azure's Text Analytics API with the controls from the UI for WPF suite. More specifically, you will use the RadWatermarkTextBox, RadGauge and RadGlyph to create a simple user control which will determine whether the text which is entered is in English or not as well as analyze its sentiment.
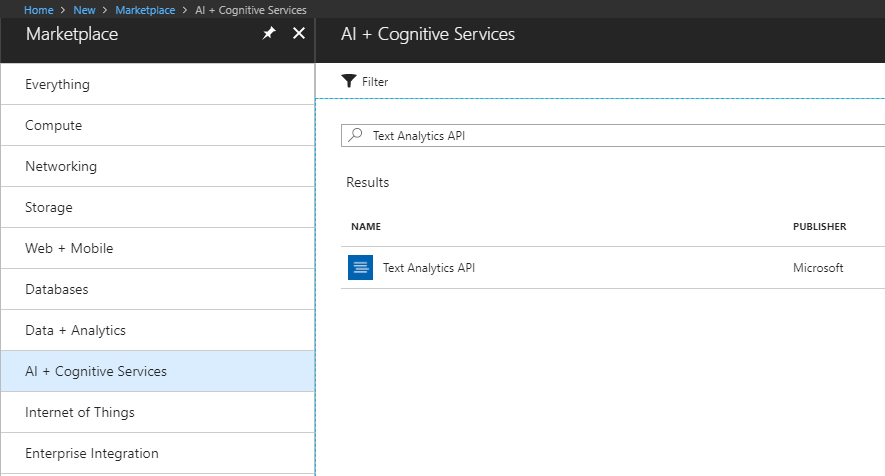
Create a Text Analytics API Account
Before you start, you need to create a new Text Analytics API account through the Azure portal. This has been explained in great detail in this article.
Once you've created the account, you have to obtain the subscription keys that have been generated for you. You will require them later on in order to make API calls from your application.
Create the Application
Start by creating a new WPF application and add the following assemblies which you will need.
- Telerik.Windows.Controls
- Telerik.Windows.Controls.DataVisualization
- Telerik.Windows.Data
You can then set a theme for the application.
Once you've set a theme for your application, add the following dictionary to your list of merged dictionaries which will enable you to use the TelerikWebUI font glyphs for the icons in the project.
Example 1: The User Control's Definition
<Application.Resources>
    <ResourceDictionary>
        <ResourceDictionary.MergedDictionaries>
            <!-- ... -->
            <ResourceDictionary Source="/Telerik.Windows.Controls;component/Themes/FontResources.xaml"/>
        </ResourceDictionary.MergedDictionaries>
    </ResourceDictionary>
</Application.Resources>
Define the User Control's Layout
Now, add a new UserControl to your project. You can give it a descriptive name, such as TextAnalysisControl, for example. Next, define the following XAML:
Example 2: The User Control's Definition
<UserControl x:Class="AzureCognitiveServices.TextAnalysisControl"
xmlns="http://schemas.microsoft.com/winfx/2006/xaml/presentation"
xmlns:x="http://schemas.microsoft.com/winfx/2006/xaml"
xmlns:mc="http://schemas.openxmlformats.org/markup-compatibility/2006"
xmlns:d="http://schemas.microsoft.com/expression/blend/2008"
xmlns:telerik="http://schemas.telerik.com/2008/xaml/presentation"
xmlns:local="clr-namespace:AzureCognitiveServices"
mc:Ignorable="d"
d:DesignHeight="300" d:DesignWidth="300">
<Grid>
<Grid.ColumnDefinitions>
<ColumnDefinition Width="Auto" />
<ColumnDefinition Width="*" />
<ColumnDefinition Width="Auto" />
</Grid.ColumnDefinitions>
<Grid.RowDefinitions>
<RowDefinition Height="Auto" />
<RowDefinition Height="Auto" />
<RowDefinition Height="Auto" />
</Grid.RowDefinitions>
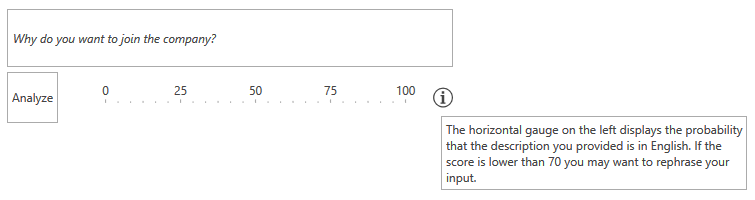
<telerik:RadWatermarkTextBox x:Name="tb" Grid.ColumnSpan="3" MinLines="3" Margin="0, 0, 0, 5" TextWrapping="Wrap" AcceptsReturn="True" WatermarkContent="Why do you want to join the company?" />
<telerik:RadButton Content="Analyze" Click="RadButton_Click" Grid.Row="1" />
<telerik:RadHorizontalLinearGauge Grid.Row="1" Grid.Column="1">
<telerik:HorizontalLinearScale Min="0" Max="100" Margin="10">
<telerik:HorizontalLinearScale.Indicators>
<telerik:BarIndicator Value="{Binding Confidence, Mode=TwoWay, RelativeSource={RelativeSource AncestorType=local:TextAnalysisControl}}"/>
</telerik:HorizontalLinearScale.Indicators>
</telerik:HorizontalLinearScale>
</telerik:RadHorizontalLinearGauge>
<Border Grid.Row="1" Grid.Column="2" Background="Transparent">
<Border.ToolTip>
<TextBlock MaxWidth="300" TextWrapping="Wrap" Text="The horizontal gauge on the left displays the probability that the description you provided is in English and has a positive tone. If the score is lower than 70 you may want to rephrase your input." />
</Border.ToolTip>
<Path Data="{telerik:RadGlyph Glyph={StaticResource GlyphInformation}}" Fill="{telerik:Office2016Resource ResourceKey=IconBrush}" Width="20" Height="20" Stretch="Uniform" />
</Border>
</Grid>
</UserControl>
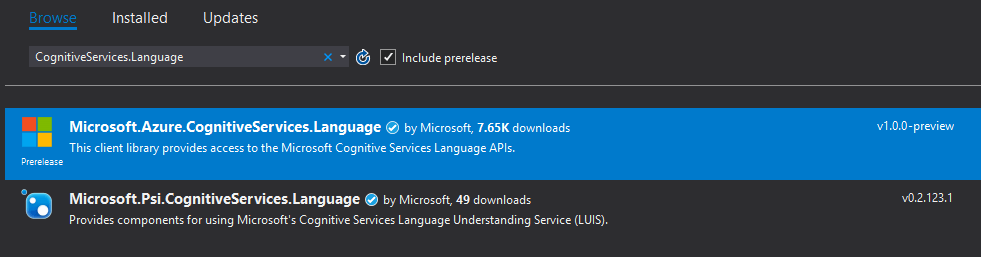
Add the Microsoft.Azure.CognitiveServices.Language NuGet Package
You can now add the Microsoft.Azure.CognitiveServices.Language NuGet package corresponding which provides access to the Microsoft Cognitive Services Language APIs.
The package requires a .NET Framework version equal or higher than 4.5.2. If you're using a lower version, you will need to call the HTTP endpoints directly from C# and serialize and deserialize the requests and responses similarly to the example found in the Image Analysis article.
Use the Text Analytics API
Example 3 demonstrates how to handle the button's Click event and use the Text Analytics API to analyze the text input in the RadWatermarkBox.
Example 3: The User Control's Definition
public partial class TextAnalysisControl : UserControl
{
    const string subscriptionKey = "the subscription key you obtained from Azure";
    private ITextAnalyticsAPI client;

    public TextAnalysisControl()
    {
        InitializeComponent();
        client = new TextAnalyticsAPI();
        client.AzureRegion = AzureRegions.Westeurope;
        client.SubscriptionKey = subscriptionKey;
    }

    public double Confidence
    {
        get { return (double) GetValue(ConfidenceProperty); }
        set { SetValue(ConfidenceProperty, value); }
    }

    public static readonly DependencyProperty ConfidenceProperty =
        DependencyProperty.Register("Confidence", typeof(double), typeof(TextAnalysisControl), new PropertyMetadata(0.0));

    private async Task<double?> MakeAnalysisRequest(string text)
    {
        LanguageBatchResult languageResult = await client.DetectLanguageAsync(
                new BatchInput(
                    new List<Input>()
                    {
                      new Input("1", text)
                    }));

        var detectedLanguage = languageResult.Documents.First().DetectedLanguages.First();
        var englishProbability = detectedLanguage.Name == "English" ? detectedLanguage.Score : 0;

        SentimentBatchResult sentimentResult = await client.SentimentAsync(
        new MultiLanguageBatchInput(new List<MultiLanguageInput>()
        {
            new MultiLanguageInput(detectedLanguage.Iso6391Name, "1", text)
        }));

        double? sentiment = 0;
        if (sentimentResult.Documents.Any())
        {
            sentiment = sentimentResult.Documents.First().Score;
        }

        return (englishProbability + sentiment) / 2;
    }

    private async void RadButton_Click(object sender, RoutedEventArgs e)
    {
        var result = await MakeAnalysisRequest(tb.Text);
        this.Confidence = (double) (result * 100);
    }
}
The click of the Analyze button in turn invokes the MakeAnalysisRequest method which first asynchronously calls the DetectLanguageAsync and SentimentAsync methods which will detect the language and the sentiment of the provided text and return a value between 0 and 1 as the result.
Once both results are retrieved, the code calculates their average and passes it to the Confidence property of our control which in turn updates the value of the RadHorizontalLinearGauge's indicator to inform the users whether they should rephrase their input.
Use the User Control
That's it. You can now use the control however you find necessary to analyze user input.
Example 4: Use the User Control
<local:TextAnalysisControl Height="60" />
Figure 1: The custom text analytics control in the Office2016 theme