Getting Started with WinUI RangeSlider
This tutorial will walk you through the creation of a sample application that contains RadRangeSlider.
Assembly References
In order to use the RadRangeSlider control, you will need to add references to the following assemblies:
Telerik.WinUI.ControlsTelerik.Licensing.Runtime.dll
Adding RadRangeSlider to the Project
You can add a RadRangeSlider manually in XAML as demonstrated in Example 1.
You can access the RadRangeSlider control through an alias pointing to the Telerik.UI.Xaml.Controls.Primitives namespace:
xmlns:telerik="using:Telerik.UI.Xaml.Controls.Input"
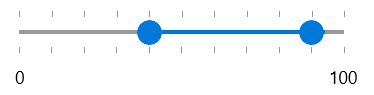
Example 1: Adding a RangeSlider in XAML
<telerik:RadRangeSlider Width="300" TickFrequency="10" SelectionStart="40" SelectionEnd="90"/>
Figure 1: RadRangeSlider Sample