Getting Started with WinForms VirtualGrid
This tutorial will help you to quickly get started using the control.
Adding Telerik Assemblies Using NuGet
To use RadVirtualGrid when working with NuGet packages, install the Telerik.UI.for.WinForms.AllControls package. The package target framework version may vary.
Read more about NuGet installation in the Install using NuGet Packages article.
With the 2025 Q1 release, the Telerik UI for WinForms has a new licensing mechanism. You can learn more about it here.
Adding Assembly References Manually
When dragging and dropping a control from the Visual Studio (VS) Toolbox onto the Form Designer, VS automatically adds the necessary assemblies. However, if you're adding the control programmatically, you'll need to manually reference the following assemblies:
- Telerik.Licensing.Runtime
- Telerik.WinControls
- Telerik.WinControls.UI
- TelerikCommon
The Telerik UI for WinForms assemblies can be install by using one of the available installation approaches.
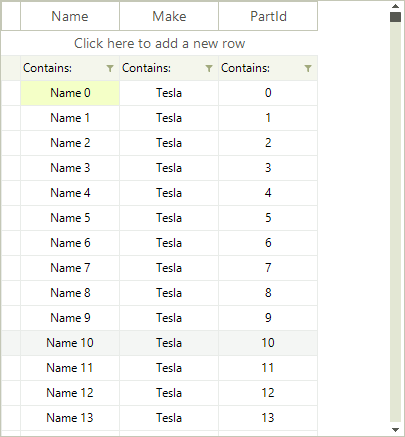
Defining the RadVirtualGrid
The example bellow demonstrates how one can use RadVirtualGrid with a list which contains large amount of data. The example shows how you can use the control events to add or remove rows as well.
In order to use RadVirtualGrid you should add reference to the Telerik.WinControls.GridView assembly.
Setting the form and adding data
1. Add a RadVirtualGrid to a form and set its Dock property to Fill . 2. Add the following sample class to the project.
public class CarPart
{
    public string Name { get; set; }

    public string Make { get; set; }

    public int PartID { get; set; }

    public string this[int i]
    {
        get
        {
            switch (i)
            {
                case 0:
                    return Name;
                case 1:
                    return Make;
                case 2:
                    return PartID.ToString();
                default:
                    return string.Empty;
            }
        }
    }
}
Public Class CarPart
    Public Property Name() As String
    Public Property Make() As String
    Public Property PartID() As Integer
    Default Public ReadOnly Property Item(ByVal i As Integer) As String
        Get
            Select Case i
                Case 0
                    Return Name
                Case 1
                    Return Make
                Case 2
                    Return PartID.ToString()
                Case Else
                    Return String.Empty
            End Select
        End Get
    End Property
End Class
3. Now you can create the list of objects which will be used as data source. In addition you can create an array that contains the column names.
List<CarPart> data = new List<CarPart>();
private string[] columnNames = new string[]
{
    "Name",
    "Make",
    "PartId"
};

public VirtualGridGettingStarted()
{
    InitializeComponent();
    for (int i = 0; i < 1000000; i++)
    {
        data.Add(new CarPart()
        {
            Name = "Name " + i,
            Make = "Tesla",
            PartID = i
        });
    }
}
Private data As New List(Of CarPart)()
Private columnNames() As String = {"Name", "Make", "PartId"}
Public Sub New()
    InitializeComponent()
    For i As Integer = 0 To 999999
        data.Add(New CarPart() With {
            .Name = "Name " & i,
            .Make = "Tesla",
            .PartID = i
        })
    Next i
End Sub
Using the virtual grid
1. To use the grid you should first specify the count of columns and rows. In addition, you should subscribe to the CellValueNeeded and CellValuePushed events which are used for populating the grid with data and updating the data source when values are changed:
radVirtualGrid1.CellValueNeeded += RadVirtualGrid1_CellValueNeeded;
radVirtualGrid1.CellValuePushed += RadVirtualGrid1_CellValuePushed;
radVirtualGrid1.ColumnCount = columnNames.Length;
radVirtualGrid1.RowCount = data.Count;
AddHandler radVirtualGrid1.CellValueNeeded, AddressOf RadVirtualGrid1_CellValueNeeded
AddHandler radVirtualGrid1.CellValuePushed, AddressOf RadVirtualGrid1_CellValuePushed
radVirtualGrid1.ColumnCount = columnNames.Length
radVirtualGrid1.RowCount = data.Count
2. Now you can add the CellValueNeeded event handler. In it we will retrieve the cell value and pass it to the grid according to the current row/column index. The event is fired for the header row so you can set the header cells text as well.
private void RadVirtualGrid1_CellValueNeeded(object sender, VirtualGridCellValueNeededEventArgs e)
{
    if (e.ColumnIndex < 0)
        return;

    if (e.RowIndex == RadVirtualGrid.HeaderRowIndex)
    {
        e.Value = columnNames[e.ColumnIndex];
    }
    if (e.RowIndex >= 0 && e.RowIndex < data.Count)
    {
        e.Value = data[e.RowIndex][e.ColumnIndex];
    }
}
Private Sub RadVirtualGrid1_CellValueNeeded(ByVal sender As Object, ByVal e As VirtualGridCellValueNeededEventArgs)
    If e.ColumnIndex < 0 Then
        Return
    End If
    If e.RowIndex = RadVirtualGrid.HeaderRowIndex Then
        e.Value = columnNames(e.ColumnIndex)
    End If
    If e.RowIndex >= 0 AndAlso e.RowIndex < data.Count Then
        e.Value = data(e.RowIndex)(e.ColumnIndex)
    End If
End Sub
3. When a cell value is changed the CellValuePushed event will fire. This will allow you to update the value in the data source:
private void RadVirtualGrid1_CellValuePushed(object sender, VirtualGridCellValuePushedEventArgs e)
{
    switch (e.ColumnIndex)
    {
        case 0:
            data[e.RowIndex].Name = e.Value.ToString();
            break;
        case 1:
            data[e.RowIndex].Make = e.Value.ToString();
            break;
        case 2:
            data[e.RowIndex].PartID = Convert.ToInt32(e.Value.ToString());
            break;
        default:
            break;
    }
}
Private Sub RadVirtualGrid1_CellValuePushed(ByVal sender As Object, ByVal e As VirtualGridCellValuePushedEventArgs)
    Select Case e.ColumnIndex
        Case 0
            data(e.RowIndex).Name = e.Value.ToString()
        Case 1
            data(e.RowIndex).Make = e.Value.ToString()
        Case 2
            data(e.RowIndex).PartID = Convert.ToInt32(e.Value.ToString())
        Case Else
    End Select
End Sub
Add or remove rows
By default the end user can add or remove rows with the UI. When such operation is performed the UserAddedRow or UserDeletingRow events will fire.
The user can delete multiple rows at once.
The following example shows how you can handle the above events and properly update the data source.
private void RadVirtualGrid1_UserAddedRow(object sender, VirtualGridNewRowEventArgs e)
{
    data.Add(new CarPart()
    {
        Name = e.NewValues[0].ToString(),
        Make = e.NewValues[1].ToString(),
        PartID = Convert.ToInt32(e.NewValues[2].ToString())
    });
}
private void RadVirtualGrid1_UserDeletedRow(object sender, VirtualGridRowsEventArgs e)
{
    var indexesToRemove = e.RowIndices.ToList();

    for (int i = indexesToRemove.Count - 1; i >= 0; i--)
    {
        data.RemoveAt(indexesToRemove[i]);
    }
}
Private Sub RadVirtualGrid1_UserAddedRow(ByVal sender As Object, ByVal e As VirtualGridNewRowEventArgs)
    data.Add(New CarPart() With {
        .Name = e.NewValues(0).ToString(),
        .Make = e.NewValues(1).ToString(),
        .PartID = Convert.ToInt32(e.NewValues(2).ToString())
    })
End Sub
Private Sub RadVirtualGrid1_UserDeletedRow(ByVal sender As Object, ByVal e As VirtualGridRowsEventArgs)
    Dim indexesToRemove = e.RowIndices.ToList()
    For i As Integer = indexesToRemove.Count - 1 To 0 Step -1
        data.RemoveAt(indexesToRemove(i))
    Next i
End Sub
See Also
Telerik UI for WinForms Learning Resources
- Telerik UI for WinForms VirtualGrid Component
- Getting Started with Telerik UI for WinForms Components
- Telerik UI for WinForms Setup
- Telerik UI for WinForms Application Modernization
- Telerik UI for WinForms Visual Studio Templates
- Deploy Telerik UI for WinForms Applications
- Telerik UI for WinForms Virtual Classroom(Training Courses for Registered Users)
- Telerik UI for WinForms License Agreement)