Getting Started with WinForms BulletGraph
This article shows how you can start using RadBulletGraph.
Adding Telerik Assemblies Using NuGet
To use RadBulletGraph when working with NuGet packages, install the Telerik.UI.for.WinForms.AllControls package. The package target framework version may vary.
Read more about NuGet installation in the Install using NuGet Packages article.
With the 2025 Q1 release, the Telerik UI for WinForms has a new licensing mechanism. You can learn more about it here.
Adding Assembly References Manually
When dragging and dropping a control from the Visual Studio (VS) Toolbox onto the Form Designer, VS automatically adds the necessary assemblies. However, if you're adding the control programmatically, you'll need to manually reference the following assemblies:
- Telerik.Licensing.Runtime
- Telerik.WinControls
- Telerik.WinControls.UI
- TelerikCommon
The Telerik UI for WinForms assemblies can be install by using one of the available installation approaches.
Defining the RadBulletGraph
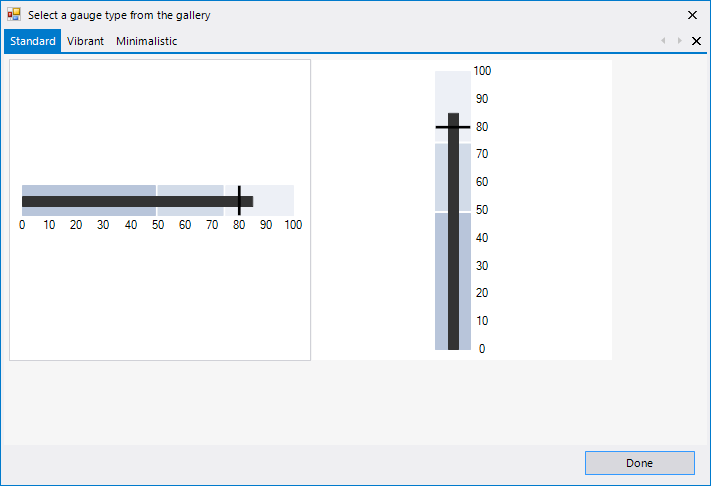
When you drag a RadBulletGraph from the Toolbox and drop it onto the form, the gauge gallery will offer you to pick up the desired type:
Figure 1: Gallery Types

If you do not choose a gauge's style and just close the gallery, an empty RadBulletGraph will be created.
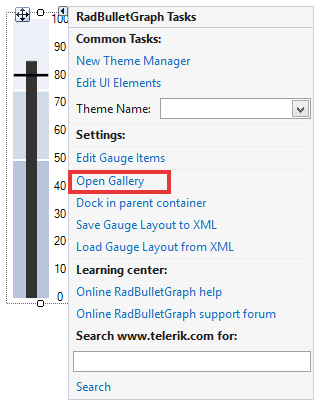
You can change the gauge's style via the Smart tag's option Open Gallery as well.
Figure 2: Smart Tag Gallery Options

Once the control is added to the form you just need to synchronize the FeaturedMeasure and ComparativeMeasure values with your business logic values. For example you can see how the controls work with the following code:
Figure 3: Update Properties

Update Properties
Timer timer;
Random rand;

public BulletGraphCode()
{
    InitializeComponent();
    timer = new Timer();
    rand = new Random();
    timer.Interval = 1000;
    timer.Tick += timer_Tick;
    timer.Start();
}

void timer_Tick(object sender, EventArgs e)
{
    this.radBulletGraph1.FeaturedMeasure = rand.Next(100);
    this.radBulletGraph1.ComparativeMeasure = rand.Next(100);
}
Private timer As Timer
Private rand As Random
Public Sub New()
    InitializeComponent()
    timer = New Timer()
    rand = New Random()
    timer.Interval = 1000
    AddHandler timer.Tick, AddressOf timer_Tick
    timer.Start()
End Sub
Private Sub timer_Tick(ByVal sender As Object, ByVal e As EventArgs)
    radBulletGraph1.FeaturedMeasure = rand.Next(100)
    radBulletGraph1.ComparativeMeasure = rand.Next(100)
End Sub
Please note that when you select the style all elements will be automatically created and you can directly access them. You can create the control in code as well. More information is available in the following article:Getting Started
See Also
Telerik UI for WinForms Learning Resources
- Telerik UI for WinForms BulletGraph Component
- Getting Started with Telerik UI for WinForms Components
- Telerik UI for WinForms Setup
- Telerik UI for WinForms Application Modernization
- Telerik UI for WinForms Visual Studio Templates
- Deploy Telerik UI for WinForms Applications
- Telerik UI for WinForms Virtual Classroom(Training Courses for Registered Users)
- Telerik UI for WinForms License Agreement)