Getting Started with WinForms CalculatorDropDown
This article shows how you can start using RadCalculatorDropDown.
Adding Telerik Assemblies Using NuGet
To use RadCalculatorDropDown when working with NuGet packages, install the Telerik.UI.for.WinForms.AllControls package. The package target framework version may vary.
Read more about NuGet installation in the Install using NuGet Packages article.
With the 2025 Q1 release, the Telerik UI for WinForms has a new licensing mechanism. You can learn more about it here.
Adding Assembly References Manually
When dragging and dropping a control from the Visual Studio (VS) Toolbox onto the Form Designer, VS automatically adds the necessary assemblies. However, if you're adding the control programmatically, you'll need to manually reference the following assemblies:
- Telerik.Licensing.Runtime
- Telerik.WinControls
- Telerik.WinControls.UI
- TelerikCommon
The Telerik UI for WinForms assemblies can be install by using one of the available installation approaches.
Defining the RadCalculatorDropDown
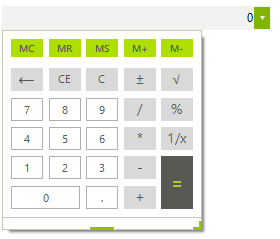
The following example demonstrates how to set up RadCalculatorDropDown with a minmum popup width and height.
Figure 1: Before

1. Drag a RadCalculatorDropDown on a form.
2. In the constructor of your form add the following code:
int desiredWidth = this.radCalculatorDropDown1.Width;
this.radCalculatorDropDown1.CalculatorElement.MinPopupWidth = desiredWidth;
this.radCalculatorDropDown1.CalculatorElement.MinPopupHeight = desiredWidth;
Dim desiredWidth As Integer = Me.RadCalculatorDropDown1.Width
Me.RadCalculatorDropDown1.CalculatorElement.MinPopupWidth = desiredWidth
Me.RadCalculatorDropDown1.CalculatorElement.MinPopupHeight = desiredWidth
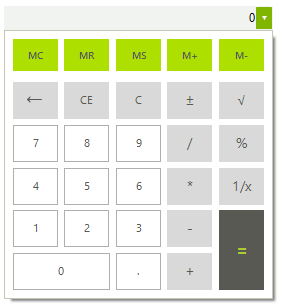
3. Press F5 to run the application. Click the arrow button to open the drop-down. Notice its size equaling that of the editor.
Figure 2: After

See Also
Telerik UI for WinForms Learning Resources
- Telerik UI for WinForms CalculatorDropDown Component
- Getting Started with Telerik UI for WinForms Components
- Telerik UI for WinForms Setup
- Telerik UI for WinForms Application Modernization
- Telerik UI for WinForms Visual Studio Templates
- Deploy Telerik UI for WinForms Applications
- Telerik UI for WinForms Virtual Classroom(Training Courses for Registered Users)
- Telerik UI for WinForms License Agreement)