Getting Started with the .NET MAUI Popup
This guide provides the information you need to start using the Telerik UI for .NET MAUI Popup by adding the control to your project.
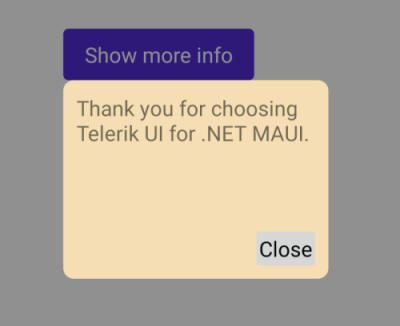
At the end, you will achieve the following result.
Prerequisites
Before adding the Popup, you need to:
Define the Control
1. When your .NET MAUI application is set up, you are ready to add a Popup control to your page.
For demonstration purposes, the current scenario shows how to add a sample Popup attached to a Button control. The purpose of the Popup here is to receive user input—It contains the Entry control for allowing the user to enter a comment and a button for closing the popup.
<telerik:RadTemplatedButton HorizontalOptions="{OnPlatform Default=Center, MacCatalyst=Start, WinUI=Start}"
VerticalOptions="{OnPlatform Default=Center, MacCatalyst=Start, WinUI=Start}"
Content="Show more info"
Clicked="ShowPopup">
<telerik:RadPopup.Popup>
<telerik:RadPopup x:Name="popup"
OutsideBackgroundColor="#66000000"
Placement="{OnPlatform Android=Center, iOS=Center}"
VerticalOffset="8">
<telerik:RadBorder BackgroundColor="#F9F9F9"
CornerRadius="8"
WidthRequest="300">
<VerticalStackLayout>
<Grid BackgroundColor="#E0E0E0"
Padding="12">
<Label Text="Info Popup"
TextColor="#666666"
HorizontalOptions="Center" />
<Label FontFamily="TelerikFontExamples"
FontSize="16"
Text=""
TextColor="#666666"
HorizontalOptions="End"
x:Name="closeButton">
<Label.GestureRecognizers>
<TapGestureRecognizer Tapped="ClosePopup" />
</Label.GestureRecognizers>
</Label>
</Grid>
<Label Padding="12"
TextColor="Black"
Text="Telerik offers a wide range of .NET MAUI controls to enable your cross-platform development of native Windows, macOS, Android and iOS applications."
LineBreakMode="WordWrap" />
</VerticalStackLayout>
</telerik:RadBorder>
</telerik:RadPopup>
</telerik:RadPopup.Popup>
</telerik:RadTemplatedButton>
2. Reference the event handlers for showing/hiding the Popup.
private void ShowPopup(object sender, EventArgs e) => popup.IsOpen = true;

private void ClosePopup(object sender, TappedEventArgs e) => popup.IsOpen = false;
3. Add the namespace.
xmlns:telerik="http://schemas.telerik.com/2022/xaml/maui"
4. Register the Telerik controls through the Telerik.Maui.Controls.Compatibility.UseTelerik extension method called inside the CreateMauiApp method of the MauiProgram.cs file of your project:
using Telerik.Maui.Controls.Compatibility;

public static class MauiProgram
{
    public static MauiApp CreateMauiApp()
    {
        var builder = MauiApp.CreateBuilder();
        builder
            .UseTelerik()
            .UseMauiApp<App>()
            .ConfigureFonts(fonts =>
            {
                fonts.AddFont("OpenSans-Regular.ttf", "OpenSansRegular");
            });

        return builder.Build();
    }
}
Additional Resources
- .NET MAUI Popup Product Page
- .NET MAUI Popup Forum Page
- Telerik .NET MAUI Blogs
- Telerik .NET MAUI Roadmap