Strategies for Reverting Changes in ThemeBuilder
Reverting changes made to your project is an essential feature in any application. The reasons for reverting may vary; you might want to undo the most recent changes or restore the project to a previous version. This feature is particularly helpful when making significant decisions, such as switching from using font icons to using SVG icons.
In this ThemeBuilder tutorial, you will learn about various strategies for reverting changes made to your ThemeBuilder project. The approach you choose will depend on your specific situation and personal preferences. Here are the methods available for achieving this in ThemeBuilder:
Using the Undo Button
The first way to revert changes made in ThemeBuilder is by using the Undo button in the toolbar.

This feature allows you to undo the most recent changes, such as a variable value change or a property adjustment for a component.
The Undo functionality only applies to the current screen. This means that if you refresh the page or enter Advanced Edit mode for a component, you cannot undo changes made on the previous screen.
Using the Reset Button
The Reset button in the Property Grid allows you to revert any changes made to the component's properties back to their default settings.
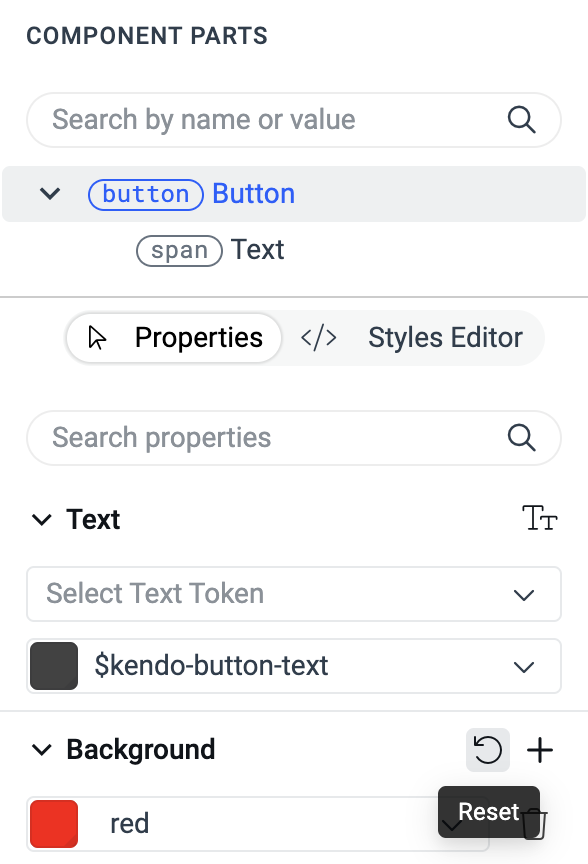
As an opposite to the Undo button from the toolbar, the Reset button isn't limited to the current screen—as long as the styles in your ThemeBuilder project differ from the default ones, you can revert them.
Managing Version History
By managing version history, you can save the current progress of your ThemeBuilder project as a version (snapshot) and later restore it to that specific state. To create such versions, follow these steps:
-
Open the project menu dropdown from the toolbar.
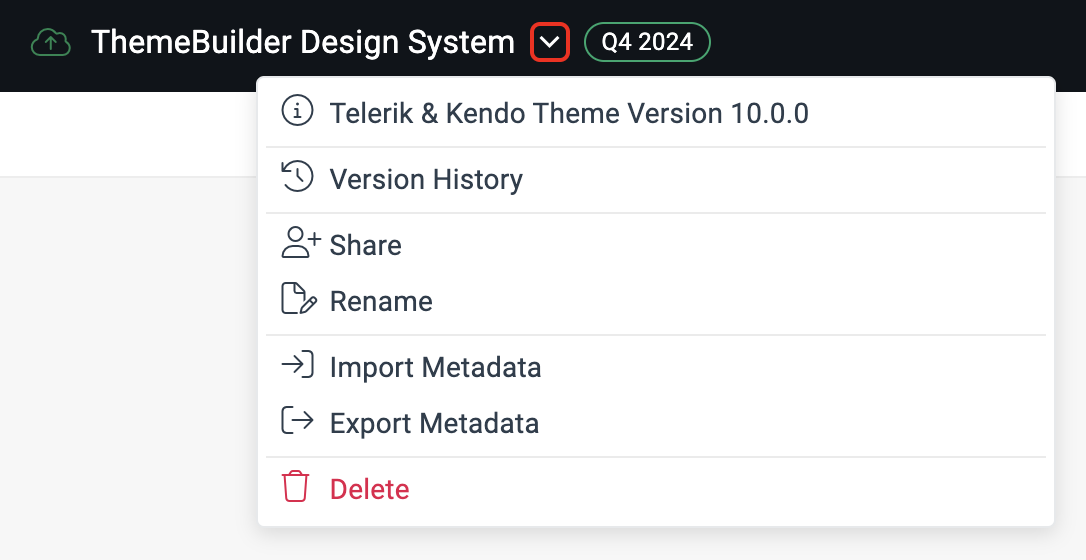
Select Version History from the dropdown menu.
-
Click the + button from the Version History panel.
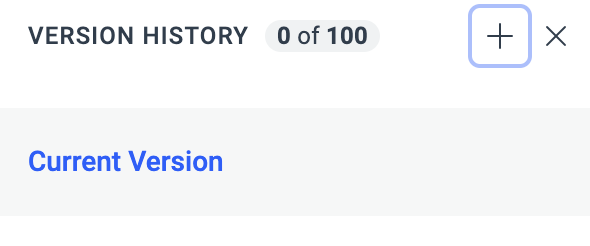
Enter a name and a description in the text boxes from the dialog, then click Save.
After you have created versions, you can make changes to the project, knowing that you can revert to a previous state if needed. To restore the project to a specific version, follow these steps:
-
Open the project menu dropdown from the toolbar.

Select Version History.
-
Locate the version you want to restore to and open the context menu by clicking on the ... button.
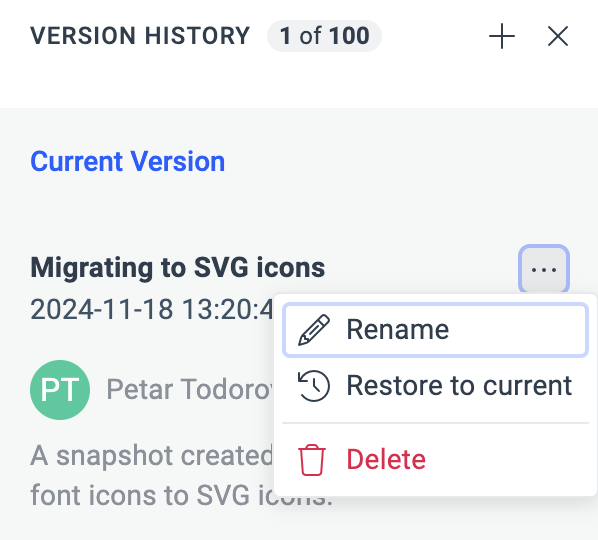
Select Restore to current.
Confirm the action in the dialog that appears.
Duplicating a Project
As an alternative to managing Version History, you can create a duplicate of your project to serve as a snapshot before making significant changes that you may want to revert later. To duplicate your project, follow these steps:
Navigate to the ThemeBuilder dashboard.
-
Locate the project you want to duplicate under My Projects and open the context menu by clicking on the ... button.
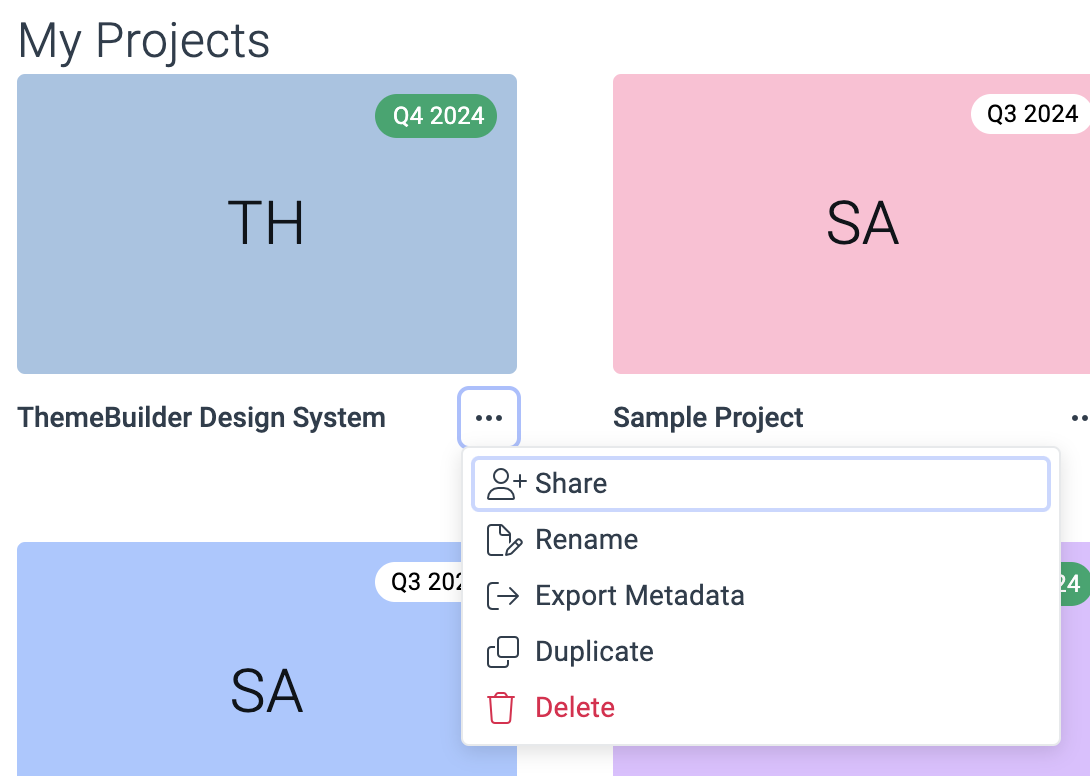
Select Duplicate.
Enter a name for the duplicate project and press
Enter.
The project duplicate contains all the data of the source project. This option is especially useful if you reach the limit for available versions in the Version History.
Exporting and Importing Metadata
Another way to revert changes made in your ThemeBuilder project is by importing previously exported metadata. This option is helpful if you've made unwanted changes and haven’t created any project versions or duplicated the project but do have the exported metadata saved.
To export the metadata from your existing project, follow these steps:
-
Open the project menu dropdown from the toolbar.

Select Export Metadata.
The exported metadata contains information about the changes made to the components and the values of the variables. If you want to restore your project to its state when the metadata was exported, you can either import this metadata back into the same project or create a new project with the same version and import it there. However, creating a new project requires additional steps, such as manually uploading the fonts and the external styles if applicable, since the metadata does not include information about them.
To import the previously exported metadata into your project, follow these steps:
-
Open the project menu dropdown from the toolbar.

Select Import Metadata.