Advanced Verifications
The Advanced Verification Builder allows you to interactively build custom verification rules and validate them against the tested application in live recording session.
Find out more about the available verifications in Test Studio.
Create an Advanced Verification
1. Create a test and start a recording session. Navigate to the tested application - in this example we use a web test and the Telerik Test Studio official page.
2. This sample scenario clicks on the Download Free Trial button and enables highlighting on the next page. Hold the mouse over the title to highlight the element and choose the option to Build Step.... Open the Verifications section under the Elements Steps tab
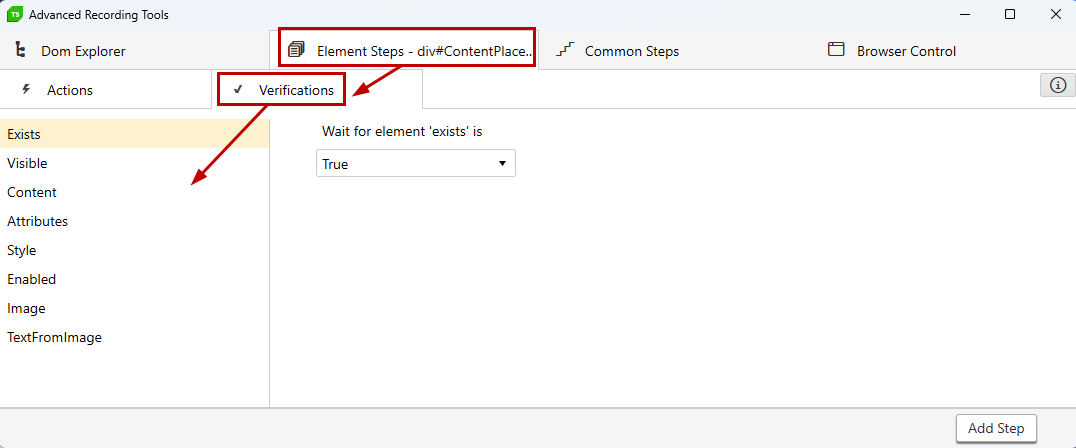
2. You can choose among a list of attributes available for the highlighted element:
- IsVisible
- Content
- Attributes
- Style
- IsEnabled
- Image
- TextFromImage
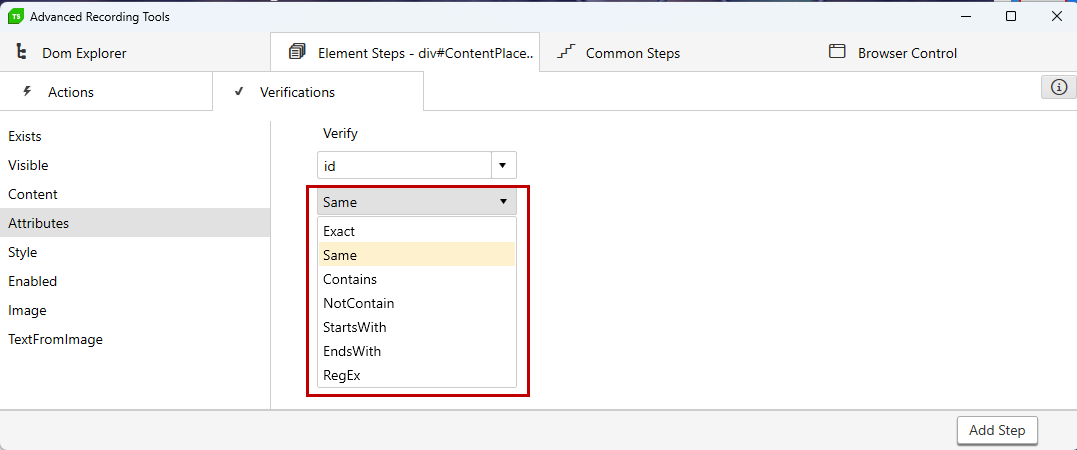
3. When crafting verifications, the suggestions' content of selected option is dynamically built against the live selected element. As selection of element is changed in the DOM, the suggested values are populated according to what values the current element contains.

Building the verification sentence allows you to choose different comparison operators.
3. Once finished building the verification, click the Add Step button to insert it in the test.
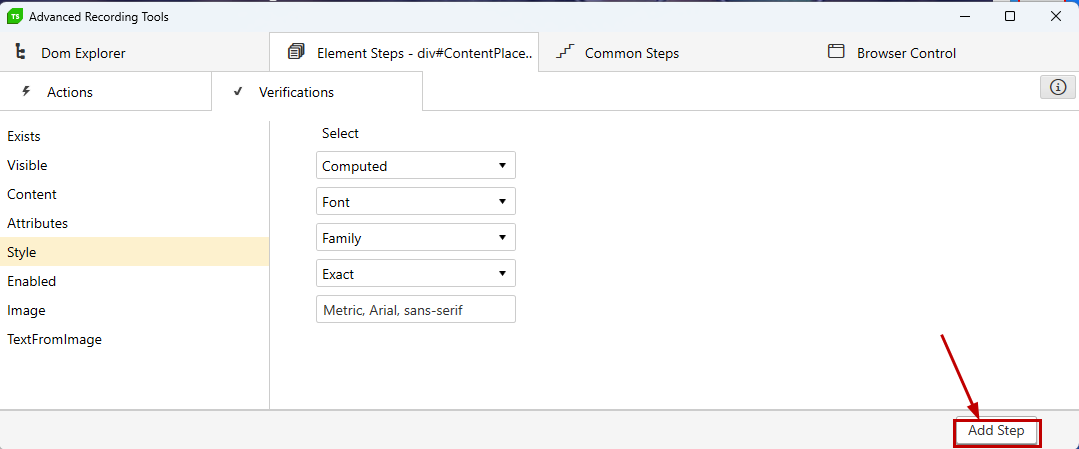
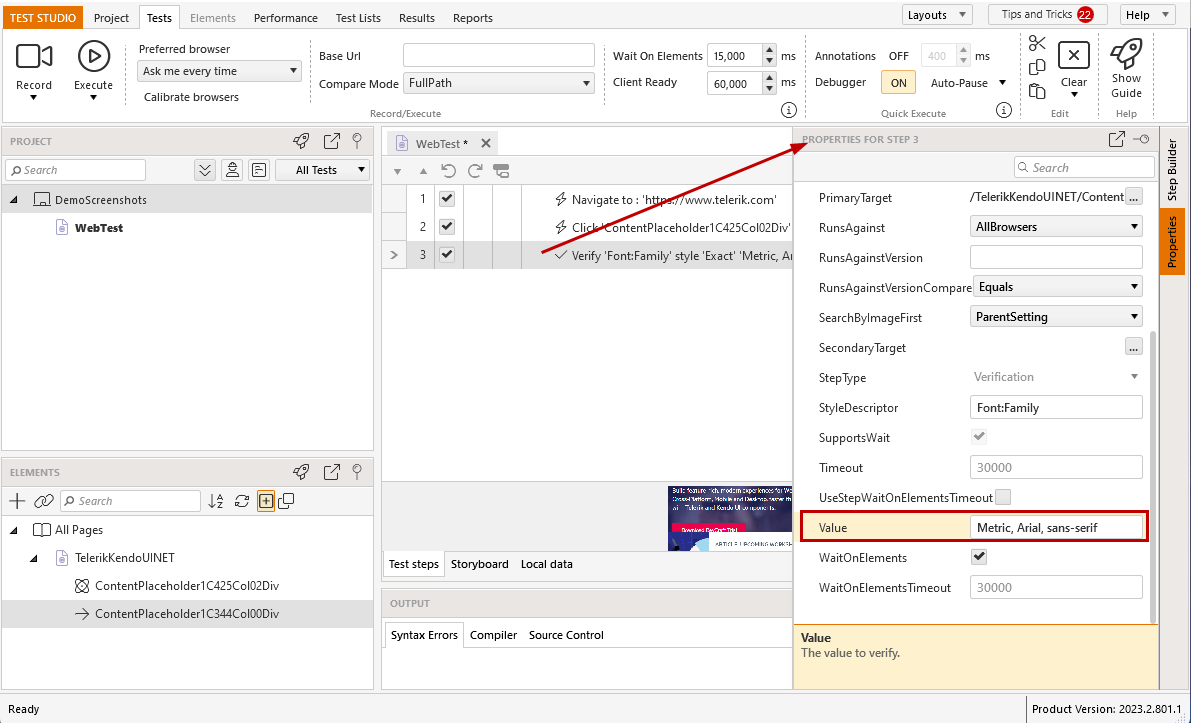
4. Some of the step properties are specific for the verification step and allow you to change the compare type or expected value of attribute.
Tip
You can check out the blog post dedicated on building verifications - Understanding Validation Content Element Types.
Create a Verification Step without Recording Session
The automated test execution is much faster than a real user and often you find out it is suitable to add an additional wait in the already recorded test to ensure its stability when running on different environments. For such cases Test Studio provides the options for partial test execution, which allow you to get to a certain point of the test and record the additional waits.
For the cases when the project and scenarios are quite complex, you can add verification steps for an already recorded element and without starting a recording session. The below list guide you through the steps for this:
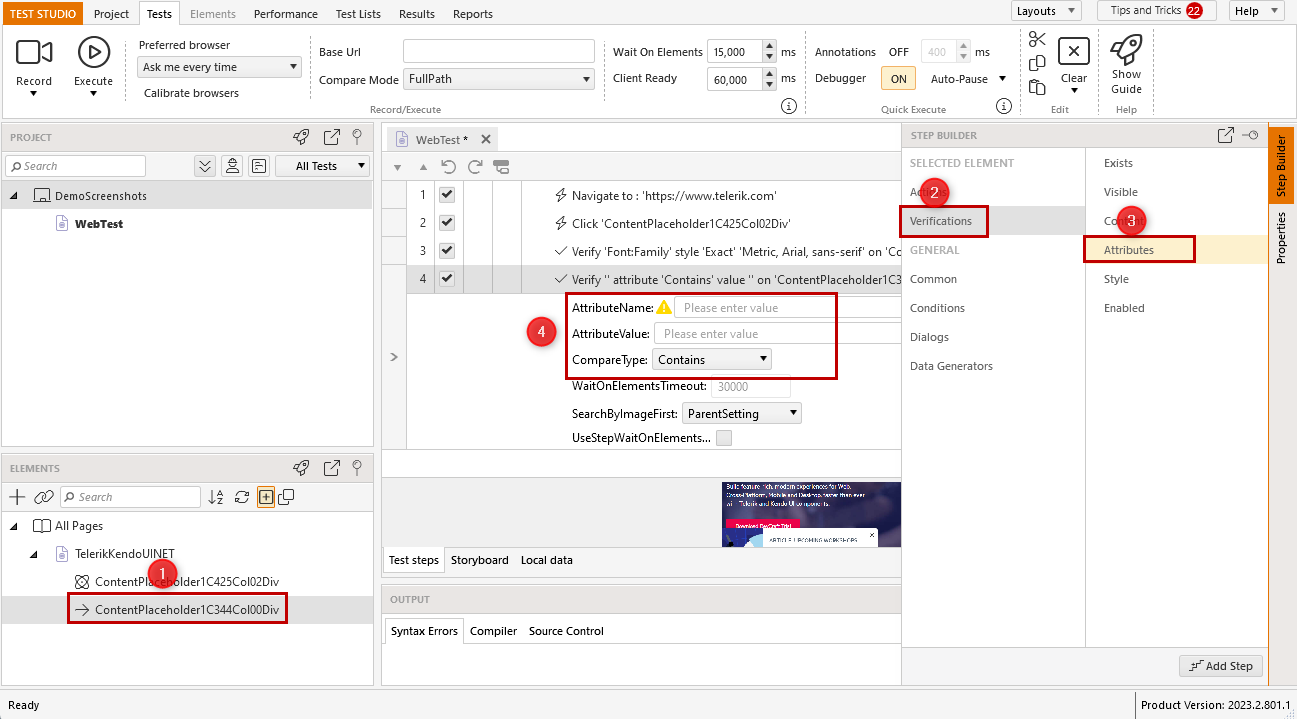
1. Open a test in which you need to add a step. Choose an element from the Elements Explorer.
Note: Usually, the verification step to insert is related to an action step and its element. Thus, if you click on that action step, its target element gets highlighted in the Elements Explorer with a red arrow. Select the element and proceed to the Step Builder.
2. Click the Step Builder pane to activate it. Under the Actions and Verification sections, you can see the options corresponding to the type of selected element.
3. Choose the verification you need and click the Add Step button to insert the step in the test. The verifications related to specific content of the element are not populated out-of-the-box and you need to insert the expected value manually.
Tip
Check this short video demonstrating how to add a step for an existing element in Test Studio.