How to Edit an Item
RadTreeView supports editing the displayed text of the item. The purpose of this tutorial is to show you:
- How to enable/disable the item editing behavior.
- How to start, end and cancel editing declaratively and programmatically.
- What kind of events the treeview API offers you for managing the edit process.
Figure 1: RadTreeView with several items
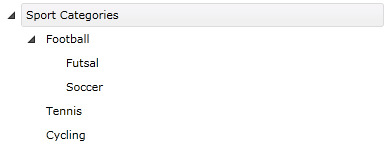
Example 1: RadTreeView populate with several items
<telerik:RadTreeView Margin="8" x:Name="radTreeView">
    <telerik:RadTreeViewItem Header="Sport Categories">
        <telerik:RadTreeViewItem Header="Football">
            <telerik:RadTreeViewItem Header="Futsal"
        x:Name="radTreeViewItemFutsal"/>
            <telerik:RadTreeViewItem Header="Soccer"/>
        </telerik:RadTreeViewItem>
        <telerik:RadTreeViewItem Header="Tennis"/>
        <telerik:RadTreeViewItem Header="Cycling"/>
    </telerik:RadTreeViewItem>
</telerik:RadTreeView>
Enable Editing
By default the treeview is not editable. In order to enable editing you need to set the IsEditable property of RadTreeView to True. The default value is False.
Example 2: Enable editing in XAML
<telerik:RadTreeView Margin="8" x:Name="radTreeView" IsEditable="True">
Example 3: Enable editing in code
radTreeView.IsEditable = true;
radTreeView.IsEditable = True
Toggle Editing by Using Keyboard
Once the edit behavior is enabled, you can start the editing process by selecting an item and pressing the F2 key.
If you want to cancel the current edit operation and to preserve any text changes, you should press the Esc key.
Toggle Editing Programmatically
You can manually enter or exit the edit mode of RadTreeViewItem by setting its IsInEditMode.
Example 4: Start editing via code
radTreeViewItem.IsInEditMode = true;
radTreeViewItem.IsInEditMode = True
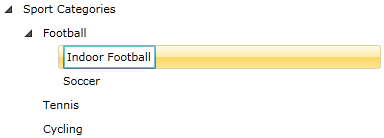
Figure 2: RadTreeViewItem in edit mode
Example 5: Exit editing via code
radTreeViewItem.IsInEditMode = false;
radTreeViewItem.IsInEditMode = False
Setting the IsInEditMode property to False don't save the changes explicitly. To do so call the CommintEdit() method.
Saving the Changes by Using the Keyboard
After entering the new text, in order to save your changes you should press the Enter key.
Saving the Changes Programmatically
If you want to finish the process of editing in code-behind and to save the changes manually, you need to call the CommitEdit() method of the corresponding RadTreeViewItem.
Example 6: Commit changes
radTreeViewItem.CommitEidt();
radTreeViewItem.CommitEidt();
Cancelling the Edit Operation Programmatically
In order to cancel the edit process in the code-behind you need to invoke the CancelEdit() method of the editing treeview item. This method discards modifications to data since the last save.
Example 5: Cancel editing
radTreeViewItemFutsal.CancelEdit();
radTreeViewItemFutsal.CancelEdit()
Events
The Telerik RadTreeView and RadTreeViewItem classes offer you several events for managing the edit process. These events are available both on the RadTreeView and on the RadTreeViewItem classes.
Example 6: Subscribing to edit events
<telerik:RadTreeView Margin="8" x:Name="radTreeView" IsEditable="True"
        PreviewEditStarted="radTreeView_PreviewEditStarted"
        EditStarted="radTreeView_EditStarted"
        PreviewEdited="radTreeView_PreviewEdited"
        EditCanceled="radTreeView_EditCanceled"
        Edited="radTreeView_Edited">
The PreviewEditStarted event occurs when the treeview item is about to be edited. The EditStarted event is fired when the treeview item is already in edit mode. The type of the passed event arguments for both of the events is RadRoutedEventArgs.
Example 7: Accessing the editing RadTreeViewItem in the PreviewEditStarted event handler
private void radTreeView_PreviewEditStarted( object sender, RadRoutedEventArgs e )
{
    RadTreeViewItem targetItem = e.Source as RadTreeViewItem;
}
Private Sub radTreeView_PreviewEditStarted(ByVal sender As Object, ByVal e As RadRoutedEventArgs)
    Dim targetItem As RadTreeViewItem = TryCast(e.Source, RadTreeViewItem)
End Sub
The PreviewEdited event is fired just before the new Header text of the item is applied. If the treeview is data bound you can update the data source with the new value. The Edited event is fired once the new Header text for the item is applied. You can get access to the new text of the Header property, as well as to the old one, via the RadTreeViewItemEditedEventArgs of the PreviewEdited and Edited events.
Figure 3: Getting the header text
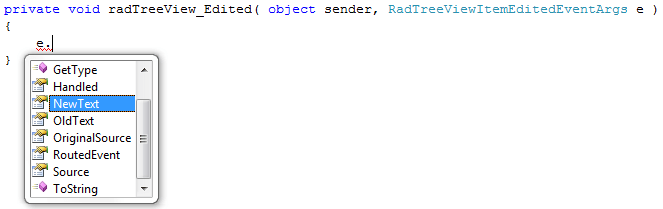
If the the ItemEditTemplate property is set and it does not contain a TextBox, then the NewText and OldText properties will not be used.
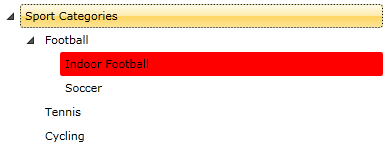
In the event handler you can place some code that has to be executed when the item is edited. For example, change the background color of the edited item:
Example 8: Setting the background of the edited RadTreeViewItem
private void radTreeView_Edited( object sender, RadTreeViewItemEditedEventArgs e )
{
    ( e.Source as RadTreeViewItem ).Background = new SolidColorBrush( Colors.Red );
}
Private Sub radTreeView_Edited(ByVal sender As Object, ByVal e As RadTreeViewItemEditedEventArgs)
    TryCast(e.Source, RadTreeViewItem).Background = New SolidColorBrush(Colors.Red)
End Sub
Figure 4: RadTreeViewItem with its background changed on edit
ItemEditTemplate and ItemEditTemplateSelector
Telerik RadTreeView also supports ItemEditTemplate and ItemEditTemplateSelector. To learn more on how to do that, visit the Item Edit Template and Item Edit Template Selector topics.