Customizing Items Layout
RadTabControl allows you to customize the items placement and lines ordering.
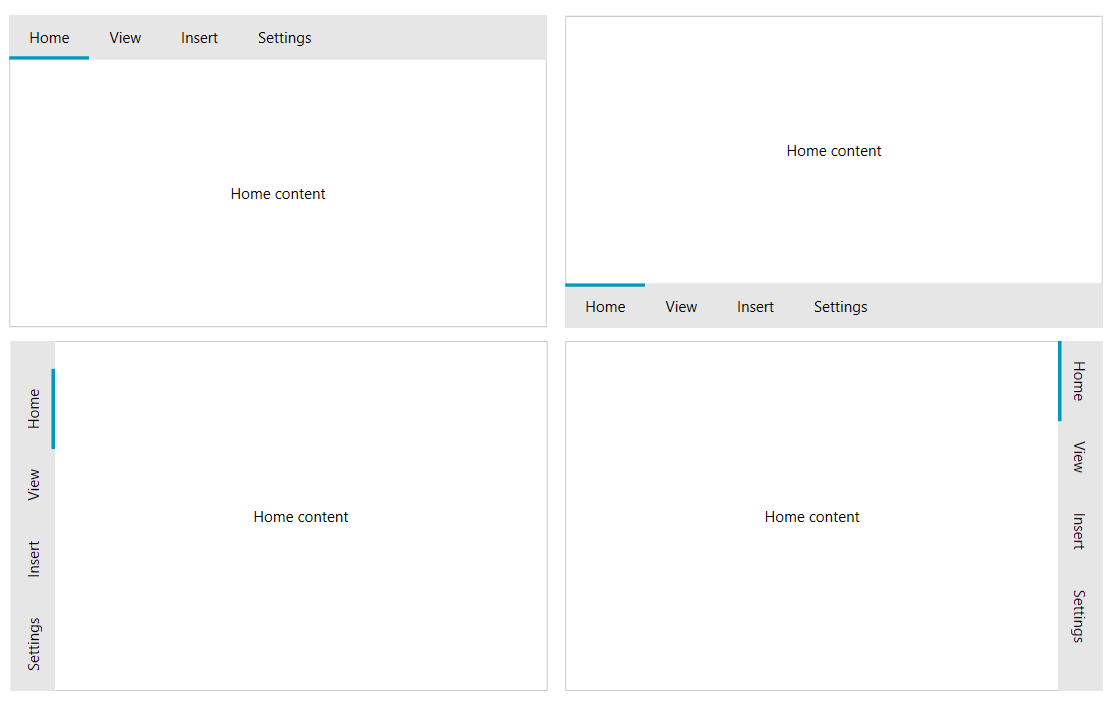
To change the placement of the tabstrip area where the items are placed, set the TabStripPlacement property of RadTabControl. The placement can be Top (default), Bottom, Left or Right.
Example 1: Setting TabStripPlacement
<telerik:RadTabControl TabStripPlacement="Bottom">
    <telerik:RadTabItem Header="Home" />
    <telerik:RadTabItem Header="View" />
    <telerik:RadTabItem Header="Insert" />
    <telerik:RadTabItem Header="Settings" />
</telerik:RadTabControl>
Figure 1: All tabstrip placements

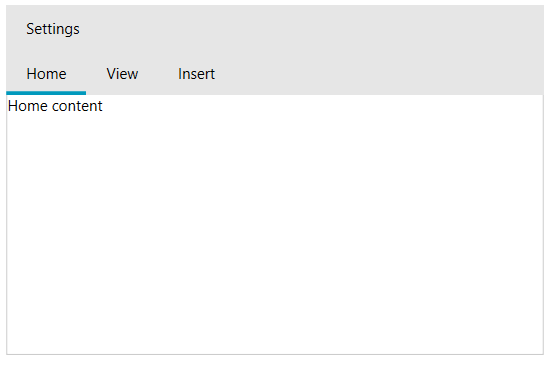
The tab items can be separated in two different lines (rows). To create a new line, set the IsBreak property of the RadTabItem which should start the line. Read more about this feature in the Create Multi-Line Tabs article.
Example 2: Setting IsBreak
<telerik:RadTabControl>
    <telerik:RadTabItem Header="Home" />
    <telerik:RadTabItem Header="View" />
    <telerik:RadTabItem Header="Insert" IsBreak="True" />
    <telerik:RadTabItem Header="Settings" />
</telerik:RadTabControl>
Figure 2: Tab items on multiple rows

The line with the selected tab will be moved on the bottom row.
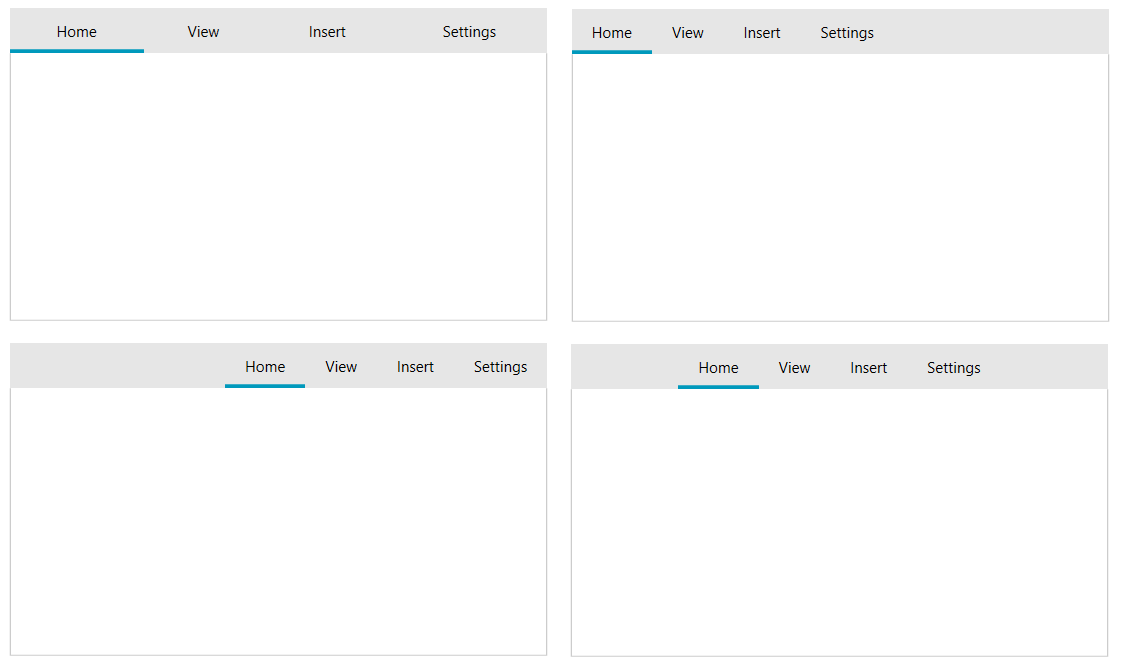
To align the tabs in the tabstrip area, set the Align property of RadTabControl. The available alignments are Left (default), Right, Center, Justify.
Example 3: Setting alignments
<telerik:RadTabControl Align="Justify">
    <telerik:RadTabItem Header="Home" />
    <telerik:RadTabItem Header="View" />
    <telerik:RadTabItem Header="Insert" />
    <telerik:RadTabItem Header="Settings" />
</telerik:RadTabControl>
Figure 3: All tabstrip alignments
