Add Custom Element in the ToolBox
This article demonstrates how to add a custom UIElement in the NewItems section of the LayoutControlToolBoxView which is located under the Items tab.
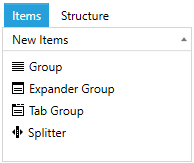
Figure 1: The default toolbox items

To add a new element in the toolbox you can use the NewItems collection of LayoutControlToolBoxView and insert a new LayoutControlHierarchicalNodeProxy object. The proxy has several properties that describe the toolbox item - header, element type and element instance - which will be used when the item is dropped in the layout control. Example 1 and 2 show how to set up the proxy and add it in the NewItems collection.
Example 1: Example LayoutControlToolBoxView definition
<telerik:LayoutControlToolBoxView x:Name="toolBoxView" LayoutControl="{Binding ElementName=layoutControl}">
Example 2: Creat item proxies and add them in the NewItems collection
LayoutControlHierarchicalNodeProxy buttonToolBoxProxy = new LayoutControlHierarchicalNodeProxy();
buttonToolBoxProxy.Header = "Button";
buttonToolBoxProxy.OriginalItemType = typeof(Button);
buttonToolBoxProxy.OriginalItem = new Button() { Content = "Button" };

LayoutControlHierarchicalNodeProxy textBoxToolBoxProxy = new LayoutControlHierarchicalNodeProxy();
textBoxToolBoxProxy.Header = "TextBox";
textBoxToolBoxProxy.OriginalItemType = typeof(TextBox);
textBoxToolBoxProxy.OriginalItem = new TextBox() { Text = "Your input.." };

this.toolBoxView.NewItems.Add(buttonToolBoxProxy);
this.toolBoxView.NewItems.Add(textBoxToolBoxProxy);
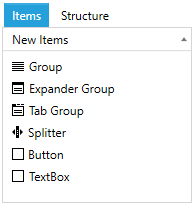
In Example 2 we add two additional proxies in the collection and they represent a TextBox and a Button which can be dragged and dropped from the toolbox to the layout control.
Figure 2: The toolbox with two additional items

The custom items will be drawn using the default toolbox item icon. You can find a runnable project showing how to alter this and also the approach described in the article in our GitHub SDK repository.