Dynamo DB
This article will show you how to create a WPF application and access data stored in a DynamoDB table by connecting to the AWS DynamoDB service.
Please note that you can use the local version of DynamoDB to setup and test your application. This article shows a real example where an actual DynamoDB web service is used.
Step 1: Create the Application
Create a new WPF application and add the following assemblies which you will need.
- Telerik.Windows.Controls
- Telerik.Windows.Controls.GridView
- Telerik.Windows.Controls.Input
- Telerik.Windows.Data
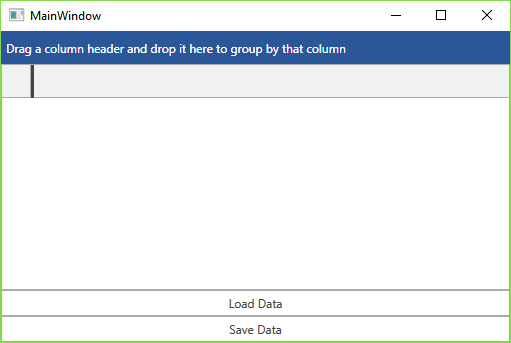
Now define the following XAML layout which consists of a RadGridView control to display the data and two RadButtons to load and save the data from and to the database.
Example 1: XAML layout
<Grid>
    <Grid.RowDefinitions>
        <RowDefinition Height="*" />
        <RowDefinition Height="Auto" />
        <RowDefinition Height="Auto" />
    </Grid.RowDefinitions>
    <telerik:RadGridView x:Name="grid" ItemsSource="{Binding Customers}" />
    <telerik:RadButton Grid.Row="1" Content="Load Data" Command="{Binding LoadCustomersCommand}" />
    <telerik:RadButton Grid.Row="2" Content="Save Data" Command="{Binding SaveChangesCommand}" />
</Grid>
Figure 1: Blank RadGridView and two RadButtons
Step 2: Install the NuGet package
In Visual Studio open the NuGet Package Manager and install the DynamoDB module.
Figure 2: Install DynamoDB package
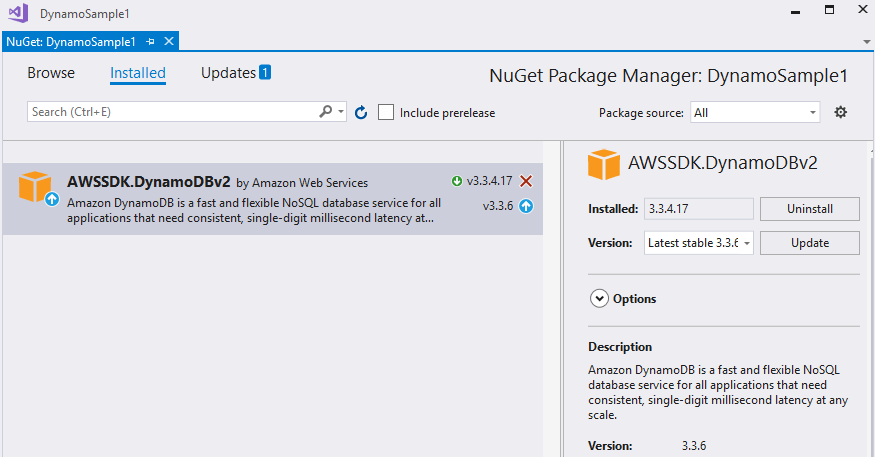
Another option is to to type the following command in the NuGet Package Manager Console: PM> Install-Package AWSSDK.DynamoDBv2
In addition you need to configure your AWS credentials. One way to do this is to specify the credentials in the App.config file of your application as demonstrated in Example 1.
Example 2: Add AWS Credentials
<?xml version="1.0" encoding="utf-8" ?>
<configuration>
    <appSettings>
        <add key="AWSProfileName" value="Telerik"/>
        <add key="AWSRegion" value="eu-west-3" />
    </appSettings>
</configuration>
If you do not have a AWS account in Visual Studio please check the Getting Started article.
Step 3: Create the ViewModel
As our database contains a list of customers, define a Customer class that will hold the data for a single record.
Example 3: The Customer class
public class Customer
{
    public int Id { get; set; }

    public string Name { get; set; }

    public int Employees { get; set; }

    public string State { get; set; }
}
Now add a class called MainWindowViewModel to the example. It will handle all functionality for managing the DynamoDB database.
First of all, create the Customers collection which will hold the entries from the database and the method that creates the Customers table.
Example 4: Create the Customers table
public class MainWindowViewModel : ViewModelBase
{
    private AmazonDynamoDBClient client;
    private ObservableCollection<Customer> customers;

    public MainWindowViewModel()
    {
        try
        {
            this.client = new AmazonDynamoDBClient();
            this.Customers = new ObservableCollection<Customer>();
            this.CreateCustomersTable();
        }
        catch (Exception ex)
        {
            Console.Error.WriteLine("Error: failed to create a DynamoDB client; " + ex.Message);
        }
    }

    public ObservableCollection<Customer> Customers
    {
        get { return this.customers; }
        set
        {
            if (this.customers != value)
            {
                this.customers = value;
                this.OnPropertyChanged("Customers");
            }
        }
    }

    private void CreateCustomersTable()
    {
        List<string> currentTables = client.ListTables().TableNames;

        if (!currentTables.Contains("Customers"))
        {
            CreateTableRequest createRequest = new CreateTableRequest
            {
                TableName = "Customers",
                AttributeDefinitions = new List<AttributeDefinition>()
                {
                    new AttributeDefinition
                    {
                        AttributeName = "Id",
                        AttributeType = "N"
                    },
                    new AttributeDefinition
                    {
                        AttributeName = "Name",
                        AttributeType = "S"
                    }
                },
                KeySchema = new List<KeySchemaElement>()
                {
                    new KeySchemaElement
                    {
                        AttributeName = "Id",
                        KeyType = "HASH"
                    },
                    new KeySchemaElement
                    {
                        AttributeName = "Name",
                        KeyType = "RANGE"
                    }
                },
            };

            createRequest.ProvisionedThroughput = new ProvisionedThroughput(1, 1);

            CreateTableResponse createResponse;
            try
            {
                createResponse = client.CreateTable(createRequest);
            }
            catch (Exception ex)
            {
                Console.Error.WriteLine("Error: failed to create the new table; " + ex.Message);

                return;
            }
        }
    }
}
Now when the table is ready you can add some data by adding the following method to the viewmodel.
Example 5: Add items to the table
private void AddCustomers()
{
    var table = Amazon.DynamoDBv2.DocumentModel.Table.LoadTable(client, "Customers");
    var search = table.Scan(new Amazon.DynamoDBv2.DocumentModel.Expression());
    if (search.Count == 0)
    {
        Document dataObj1 = new Document();
        dataObj1["Name"] = "Telerik";
        dataObj1["Id"] = 2;
        dataObj1["Employees"] = 46;
        dataObj1["State"] = "NY";
        table.PutItem(dataObj1);

        Document dataObj2 = new Document();
        dataObj2["Name"] = "Progress";
        dataObj2["Id"] = 13;
        dataObj2["Employees"] = 54;
        dataObj2["State"] = "IL";
        table.PutItem(dataObj2);
    }
}
You can then invoke the AddCustomers method in the constructor of the viewmodel.
Example 6: Invoke the AddCustomers method in the viewmodel's constructor
public MainWindowViewModel()
{
    try
    {
        this.client = new AmazonDynamoDBClient();
        this.Customers = new ObservableCollection<Customer>();
        this.CreateCustomersTable();
        this.AddCustomers();
    }
    catch (Exception ex)
    {
        Console.Error.WriteLine("Error: failed to create a DynamoDB client; " + ex.Message);
    }
}
Now set the DataContext of the Grid to the MainWindowViewModel so that the table is created and the entries are added.
Example 7: Initialize the MainWindowViewModel
<Grid.DataContext>
    <local:MainWindowViewModel />
</Grid.DataContext>
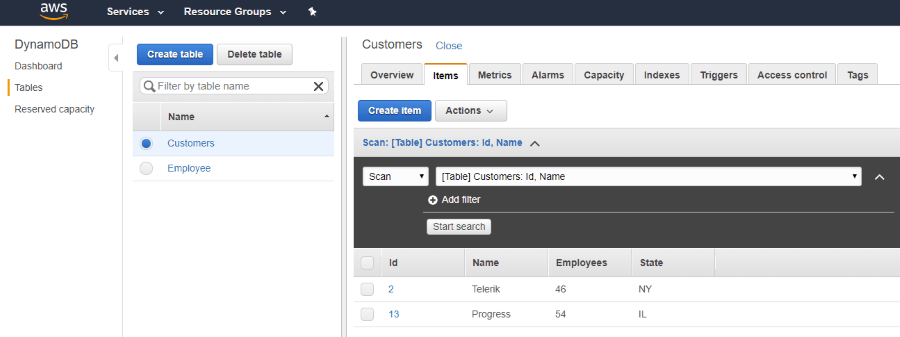
If you run the code at this point you will be able to see the data in your AWS console.
Step 4: Get the Data from DynamoDb
Now you are ready to populate the RadGridView control with the data by iterating over the records in the database and adding items to the Customers collection.
Example 8: Load data from the database
// MainWindowViewModel.cs
private void LoadData(object obj)
{
    var table = Amazon.DynamoDBv2.DocumentModel.Table.LoadTable(client, "Customers");
    var search = table.Scan(new Amazon.DynamoDBv2.DocumentModel.Expression());

    var documentList = new List<Document>();
    do
    {
        documentList.AddRange(search.GetNextSet());

    } while (!search.IsDone);

    var customers = new ObservableCollection<Customer>();
    foreach (var doc in documentList)
    {
        var customer = new Customer();
        foreach (var attribute in doc.GetAttributeNames())
        {
            var value = doc[attribute];
            if (attribute == "Id")
            {
                customer.Id = Convert.ToInt32(value.AsPrimitive().Value);
            }
            else if (attribute == "Name")
            {
                customer.Name = value.AsPrimitive().Value.ToString();
            }
            else if (attribute == "Employees")
            {
                customer.Employees = Convert.ToInt32(value.AsPrimitive().Value);
            }
            else if (attribute == "State")
            {
                customer.State = value.AsPrimitive().Value.ToString();
            }
        }

        customers.Add(customer);
    }

    this.Customers = customers;
}
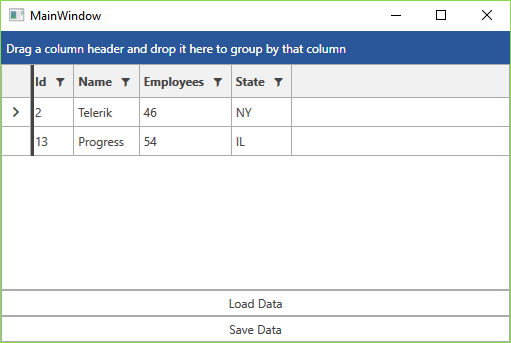
If you now call the LoadData method in the constructor of the viewmodel, the grid will be populated with the entries from the AddCustomers method.
Example 9: Load data from the database
this.client = new AmazonDynamoDBClient();
this.Customers = new ObservableCollection<Customer>();
this.CreateCustomersTable();
this.AddCustomers();
this.LoadData(null);
Figure 3: The populated RadGridView
Step 5: Save/Load Changes
All that's left is to handle the click of the two RadButtons. For the purpose, add two commands to your viewmodel.
Example 10: Define the save and load commands
public ICommand LoadCustomersCommand { get; set; }
public ICommand SaveChangesCommand { get; set; }

public MainWindowViewModel()
{
    // ...
        this.LoadCustomersCommand = new DelegateCommand(LoadData);
        this.SaveChangesCommand = new DelegateCommand(SaveChanges);
    // ...
}
This example uses the DelegateCommand class provided by the UI for WPF suite, but you can replace this with an implementation of the ICommand interface.
As you can see in Example 10, the LoadCustomersCommand in turn calls the logic of the LoadData method which we already defined and used to initially load the data.
All that's left is to bind the command of the "Save Data" button. The SaveChanges method it is pointing to iterates over all rows and updates the respective items in the database.
Example 11: Save changes to the database
private void SaveChanges(object obj)
{
    foreach (var item in this.Customers)
    {
        this.UpdateCustomer(item as Customer);
    }
}

private void UpdateCustomer(Customer customer)
{
    var table = Amazon.DynamoDBv2.DocumentModel.Table.LoadTable(client, "Customers");
    var entry = new Document();
    entry["Id"] = customer.Id;
    entry["Name"] = customer.Name;
    entry["Employees"] = customer.Employees;
    entry["State"] = customer.State;
    table.UpdateItem(entry);
}
The changes made in the RadGridView control will now be reflected in the database when you click the "Save Data" button.