Design Time
To start using RadValidationProvider just drag it from the toolbox and drop it onto the form.
Smart Tag
Select RadValidationProvider and click the small arrow at the top right position in order to open the Smart Tag. Open the FilterDescriptor Collection Editor by clicking the Edit Validation Rules option in the Smart tag.
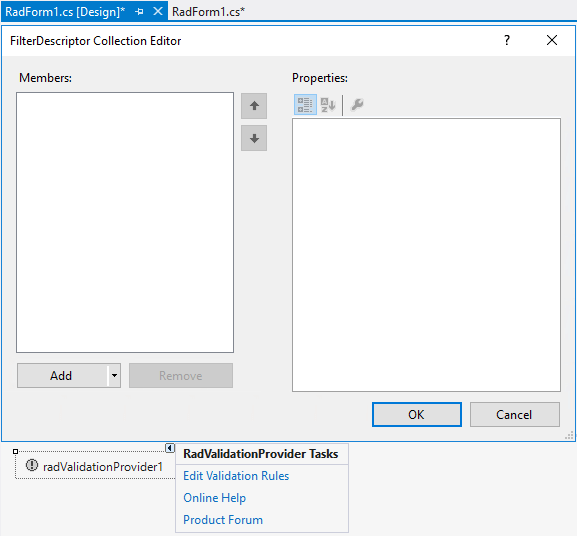
The different Validation Rules that RadValidationProvider offers can be added at design time without the necessity of writing any code once the FilterDescriptor Collection Editor is opened.
RadValidationRule
RadValidationRule allows you to define validation logic for a single control considering a validation operator and a fixed value.
We will add a rule that validates the value in a RadSpinEditor and ensures that it is less than 100:
-
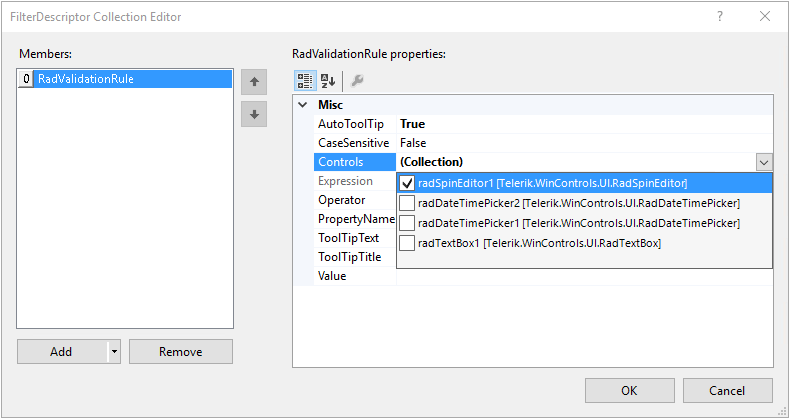
Add a RadValidationRule and select the RadSpinEditor control that you want to validate from the Controls collection:
-
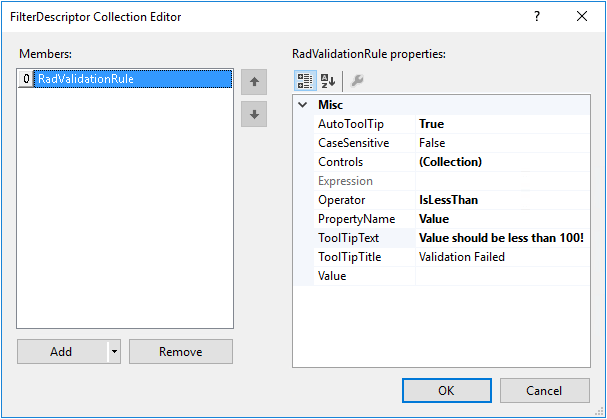
Set the Operator to IsLessThan, PropertyName to Value, ToolTipText to "Value should be less than 100!":
-
Set the Value to 100 and then select int from the types drop down:
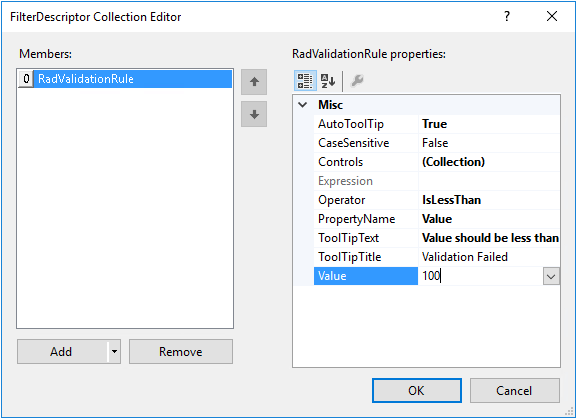
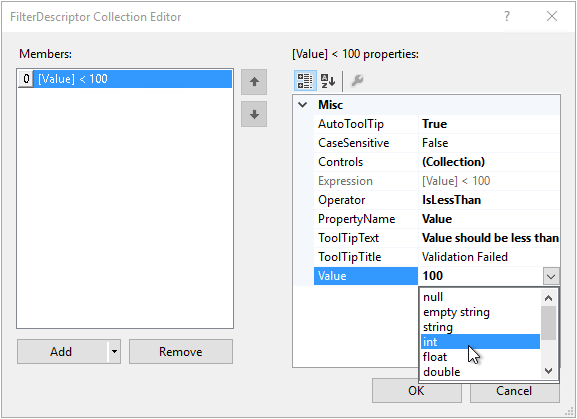
The data type of the Value can be specified after entering a value first and then selecting the type from the drop down. Thus, the correct expression will be serialized.
When you enter a value and try to exit RadSpinEditor, the validation rule will be evaluated and an error indication will be shown if the validation fails:

RadValidationRuleWithTargetControl
RadValidationRuleWithTargetControl allows you to define validation logic of a control against a second control, e.g. if you have two RadSpinEditor controls for selecting minimum/maximum price and you need to ensure that minimum price is less than maximum price.
-
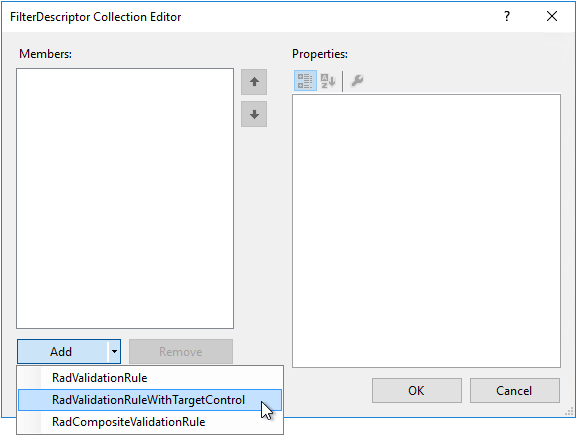
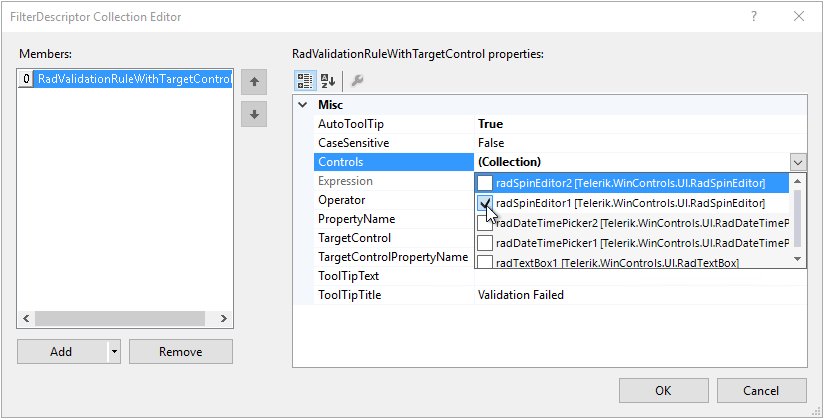
Add a RadValidationRuleWithTargetControl and select the "minimum price" RadSpinEditor from the Controls collection:
-
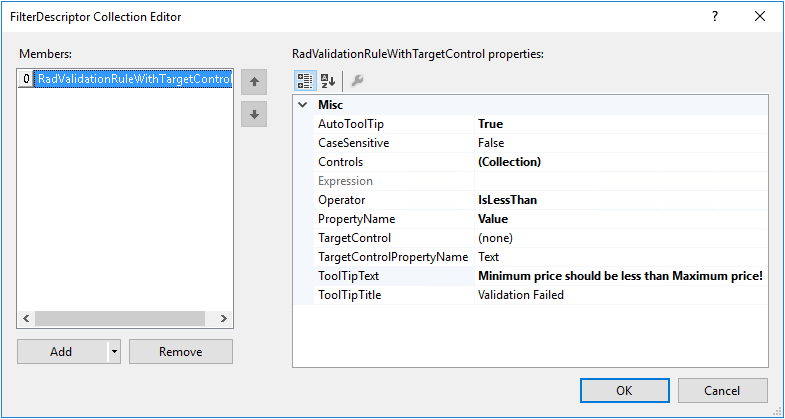
Set the Operator to IsLessThan, PropertyName to Value, ToolTipText to "Minimum price should be less than Maximum price!":
-
Select the "maximum price" RadSpinEditor as TargetControl and set the TargetControlPropertyName to Value:
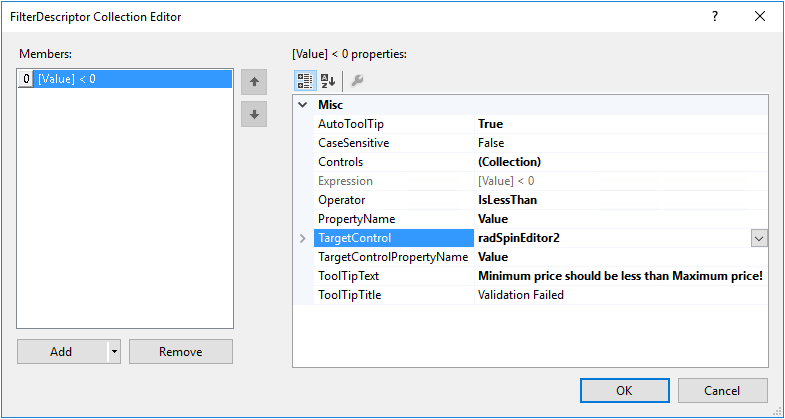
Please ensure that the initial values in both RadSpinEditor controls meet the validation. Otherwise, you may remain blocked when you focus the "minimum price" RadSpinEditor for the first time, e.g. if both controls have initial value = 0. No matter what value you enter in the "minimum price" RadSpinEditor, you want to be able to validate it and exit the control.

In a similar way you can add a rule to validate that the "maximum price" RadSpinEditor's value is greater than the value of the first one. Thus, when you focus the second RadSpinEditor and try to exit it, it will ensure that a valid value (greater than minimum) is added.
RadCompositeValidationRule
RadCompositeValidationRule allows defining more complex validation logic by adding multiple simpler validation rules.
Considering the previous example with minimum and maximum price, we want to validate "price" RadSpinEditor (radSpinEditor3) which value should be within the [minimum,maximum] range.
-
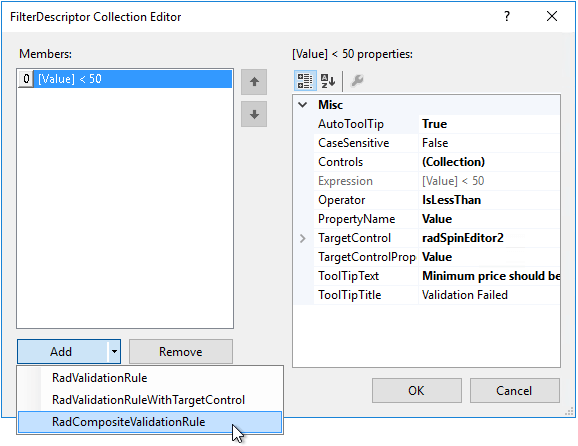
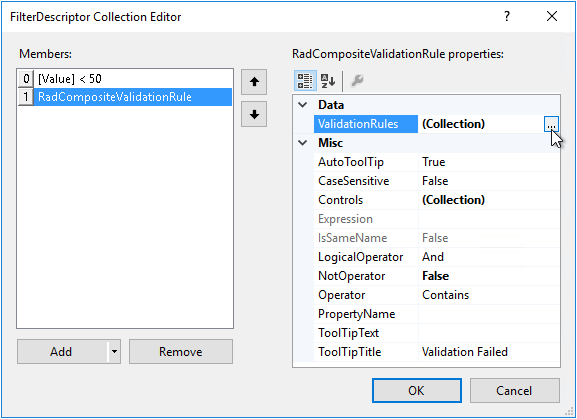
For this purpose, it is necessary to add a RadCompositeValidationRule which contains two RadValidationRuleWithTargetControls:
-
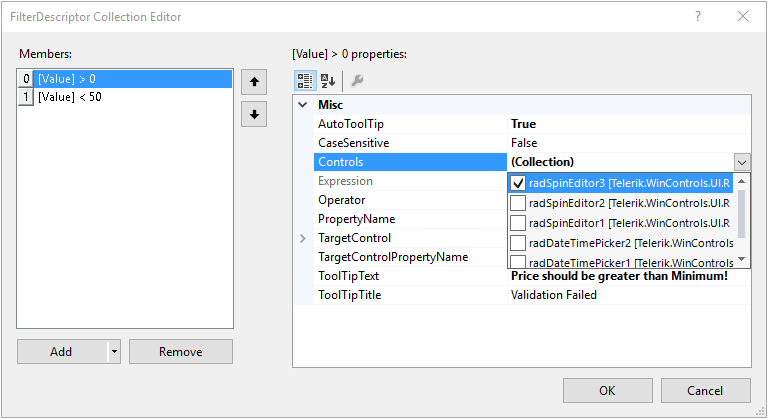
The first RadValidationRuleWithTargetControl should validate that "price" RadSpinEditor is greater than "minimum price" RadSpinEditor:
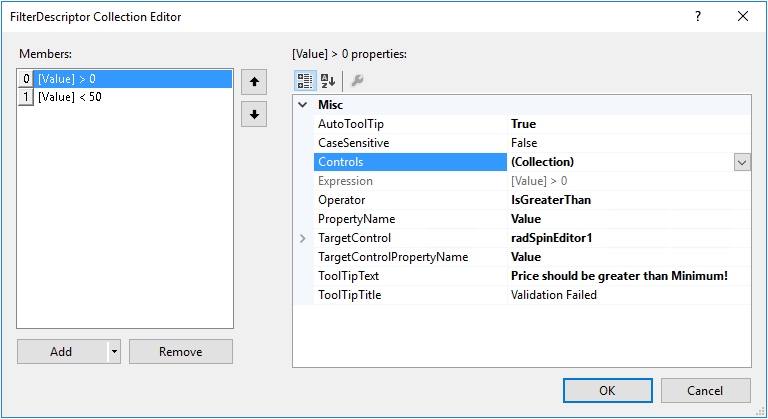
-
The second RadValidationRuleWithTargetControl should validate that "price" RadSpinEditor is less than "maximum price" RadSpinEditor:
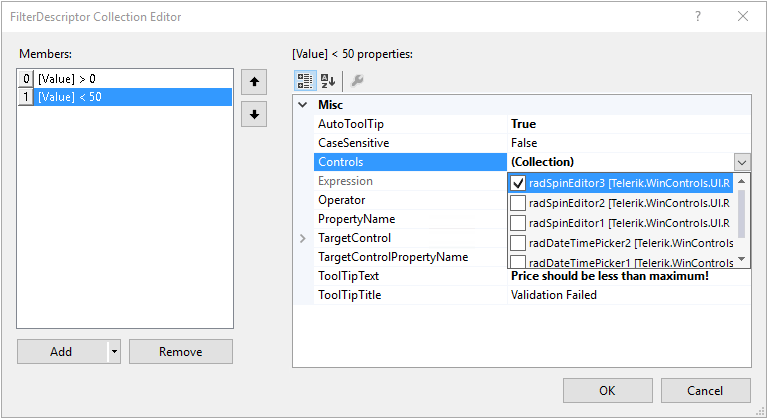
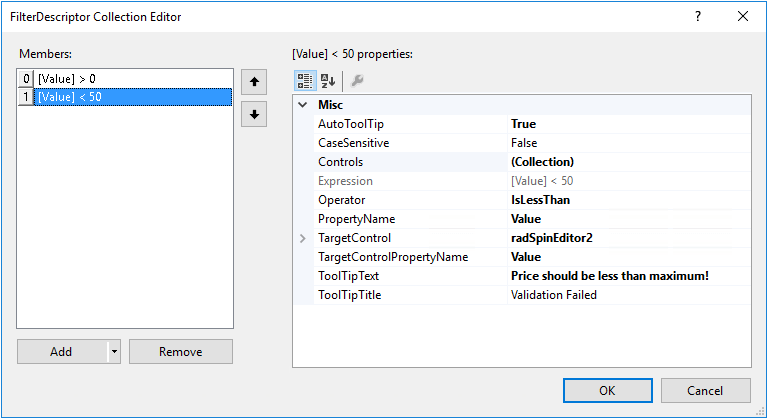
None of the associated controls (e.g. radSpinEditor3) of a composite rule should be added as a target in any of the nested rules! Please be careful when defining composite rules in order to get the proper validation logic. Usually, it is even possible to simplify the validation logic and define separate RadValidationRuleWithTargetControls outside a composite rule.
-
Once you have added the nested rules, return back to the RadCompositeValidationRule and specify the LogicalOperator and ToolTipText:
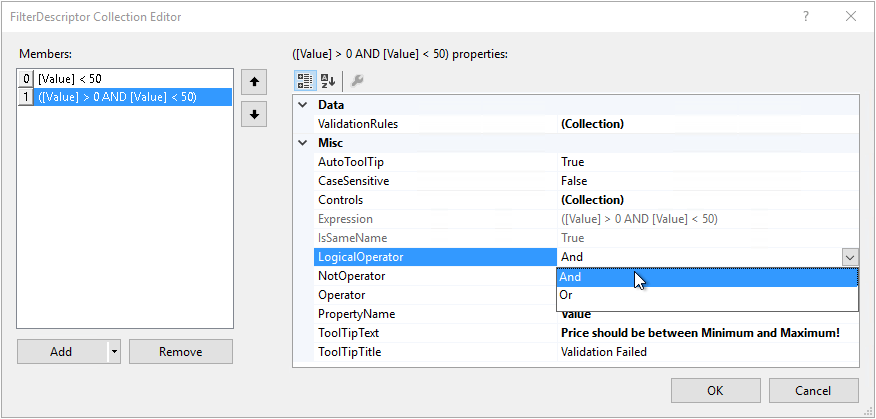
When you start the application and enter a price that doesn't meet the validations rules, the specified error message for the composite rule will be shown:
