Getting Started with WinForms ProgressBar
This tutorial will help you to quickly get started using the control.
Adding Telerik Assemblies Using NuGet
To use RadProgressBar when working with NuGet packages, install the Telerik.UI.for.WinForms.AllControls package. The package target framework version may vary.
Read more about NuGet installation in the Install using NuGet Packages article.
With the 2025 Q1 release, the Telerik UI for WinForms has a new licensing mechanism. You can learn more about it here.
Adding Assembly References Manually
When dragging and dropping a control from the Visual Studio (VS) Toolbox onto the Form Designer, VS automatically adds the necessary assemblies. However, if you're adding the control programmatically, you'll need to manually reference the following assemblies:
- Telerik.Licensing.Runtime
- Telerik.WinControls
- Telerik.WinControls.UI
- TelerikCommon
The Telerik UI for WinForms assemblies can be install by using one of the available installation approaches.
Defining the RadProgressBar
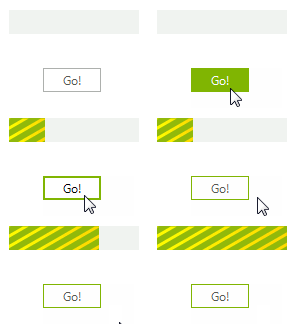
In this tutorial, you will use a RadProgressBar to show the progress of a long-running operation. The long-running operation is simulated with a Timer control.
1. Place a RadProgressBar control, a RadButton control, and a standard Timer control on a form.
2. Set the Timer control Interval property to 50.
3. In the Properties window, click the events button.
4. Double-click the Tick event.
5. Replace the automatically-generated event handler with this code:
Handling the Timer Tick event
int ticks = 0;
private void timer1_Tick(object sender, EventArgs e)
{
    ticks++;
    radProgressBar1.Value1 = ticks;
    if (ticks == 100)
    {
        timer1.Enabled = false;
        ticks = 0;
    }
}
Private ticks As Integer = 0
Private Sub timer1_Tick(ByVal sender As Object, ByVal e As EventArgs)
    ticks += 1
    RadProgressBar1.Value1 = ticks
    If ticks = 100 Then
        Timer1.Enabled = False
        ticks = 0
    End If
End Sub
6. In the design view of the form, select the RadButton control.
7. In the Properties window set the Text property to "Go!".
8. In the Properties window, click the events button.
9. Double-click the Click event.
10. Replace the automatically-generated event handler with this code:
void radButton1_Click(object sender, EventArgs e)
{
    timer1.Enabled = true;
}
Private Sub radButton1_Click(ByVal sender As Object, ByVal e As EventArgs)
    Timer1.Enabled = True
End Sub
11. In the design view of the form select the RadProgressBar control.
12. Set Dash to true.
13. Set Text to an empty string.
14. Set SeparatorColor1 to Yellow.
15. Set SeparatorColor2 to Gold.
16. Set SeparatorWidth to 6.
17. Set StepWidth to 12.
18. Set SweepAngle to 210.
19. Press F5 to run the project.
20. Click the Go Button to see the Telerik RadProgressBar animation.

Telerik UI for WinForms Learning Resources
- Telerik UI for WinForms ProgressBar Component
- Getting Started with Telerik UI for WinForms Components
- Telerik UI for WinForms Setup
- Telerik UI for WinForms Application Modernization
- Telerik UI for WinForms Visual Studio Templates
- Deploy Telerik UI for WinForms Applications
- Telerik UI for WinForms Virtual Classroom(Training Courses for Registered Users)
- Telerik UI for WinForms License Agreement)